New Conceptions Baby Essentials (NCBE) Sew Along
- At January 09, 2013
- By Kelly
- In Tutorials and Sew Alongs
 5
5

Today we have a sew along for the shirt worn by this cute model.

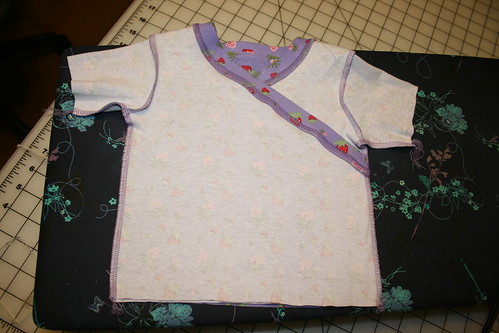
The New Conceptions Baby Essentials pattern pack is one of my go-to staples for baby things. This sew-along will walk you through construction of the cross-front top.
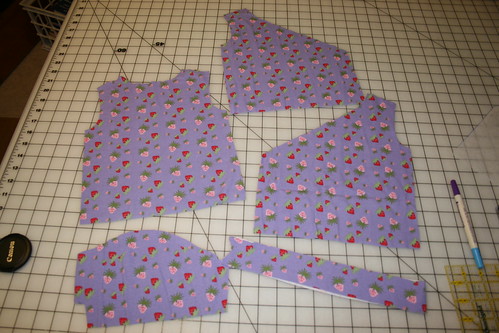
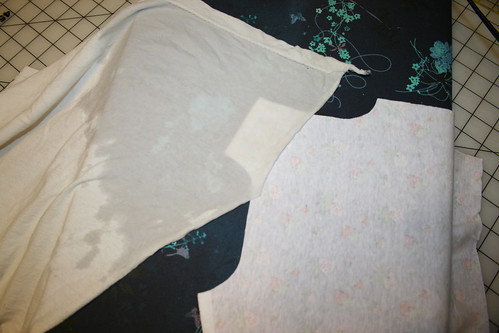
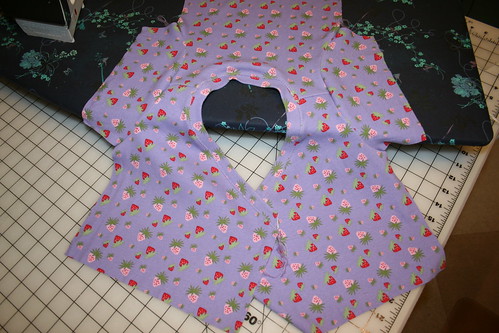
First, cut out all your pieces. If you are using a directional print, make sure you pay attention to which way the design is running. Try not to notice that one of our front pieces should have been cut the other way. This piece is now designated as the back front piece – which means we’re going to hide most if it behind the crossover in the front!
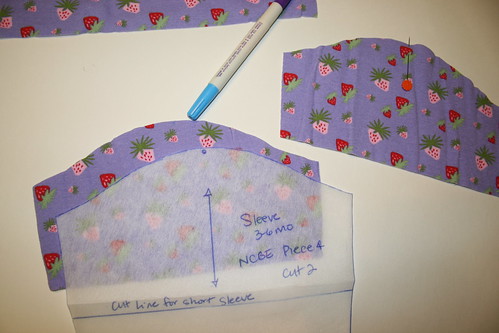
Mark your center sleeve seam and the little dots on the shirt front pieces, using either a marking pen or a pin.
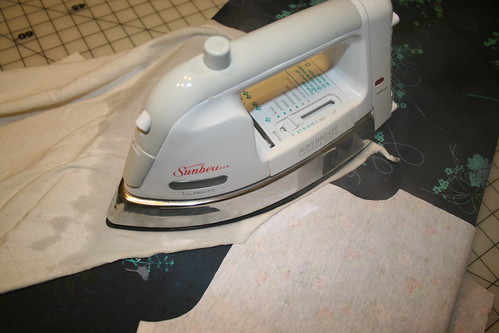
Before sewing, take a minute to stabilize the shoulders.
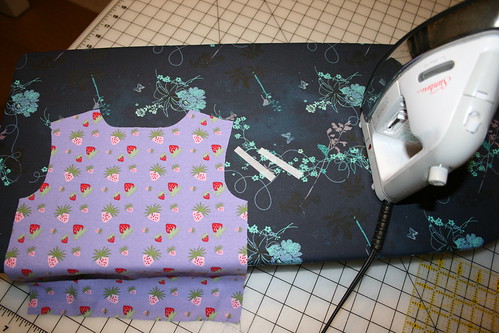
Shoulder stabilizer – those little dots on the fusible interfacing are what attaches it to the fabric – think of them as a sticky mess waiting to happen on your iron if you don’t put them face down on the fabric.
Place the stabilizer on the wrong side of the back shoulder piece. Cover with a damp press cloth and press with iron as instructed by the interfacing directions. (If you don’t have yours, mine says: “With iron at wool/steam setting, press FIRMLY for full 15 seconds. ALWAYS USE A DAMP PRESS CLOTH AND PRESS DOWN FIRMLY FOR 15 SECONDS. Repeat, lifting and slightly overlapping iron until all interfacing is fused. Steam press on right side. Let fabric cool, then check bond.”) I’m not sure about that whole 15 seconds thing, but the people at Pellon seem pretty convinced of its importance. I usually hold the iron there until the press cloth is dry. I’m kind of impatient, though, so I don’t know that it’s really 15 seconds. Here’s a link to the Pellon instructions so you can do yours properly.
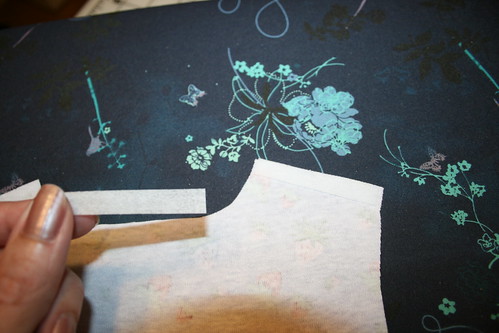
Don’t you like my press cloth? It’s one of my husband’s old t-shirts.
Attach the front pieces to the back piece at the shoulders. I’m using a ball point needle, size 80/12 for this. Remember, you have a ¼” seam allowance on this pattern.

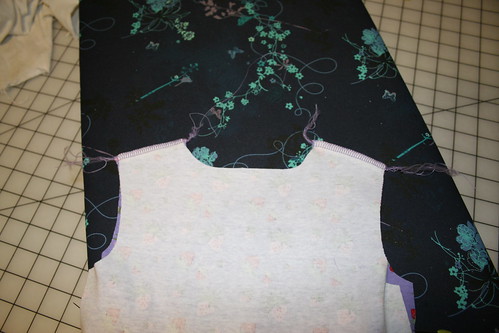
After you have the fronts and back together, I like to press the seam allowance to the back. If you sewed your seam on the sewing machine, you can press it open, which will make it a little more flat than if you did it on the serger.
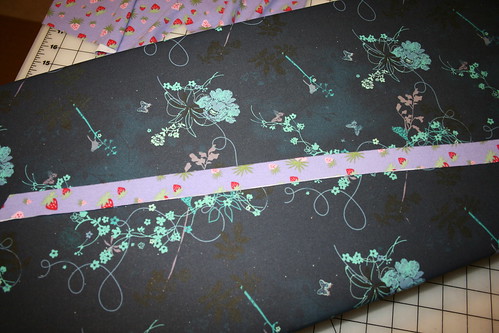
Next, take the long neck binding piece and fold it in half the long way. Press it so it’s nice and flat.
Pin the binding to the neckline of your shirt, right sides together. I like to find the center of the back of the shirt and pin the center of the binding to it, then pin each of the ends. Then I pin between these three points so any stretching of the binding piece is relatively evenly distributed.
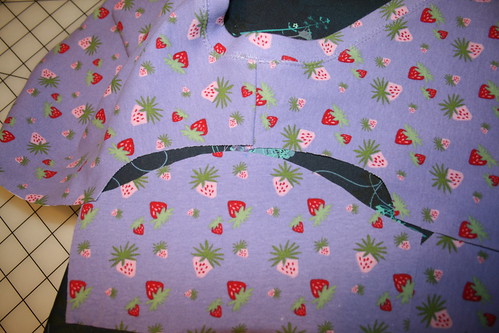
Attach binding to neckline.
Once you’ve attached the binding, press.

I like to topstitch next. It’s easy to do while the shirt is still flat.
Line up center of sleeve with shoulder seam.
Place right sides together and pin.
Sew sleeve to body of shirt and repeat for other sleeve.
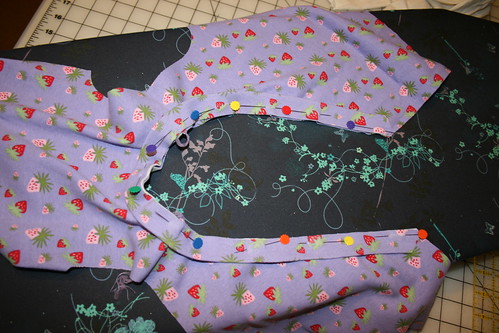
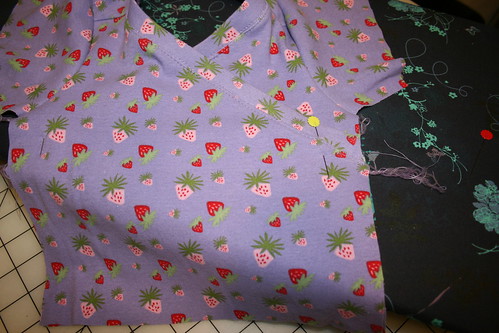
Match sides of front body of shirt and pin, well away from where you will be stitching the side seams. See that I pinned on the underside for the crossover that is lower underneath? That’s because it’s easier to line up that side when you have it flipped to the back. Since you are pinning far from where you’ll be sewing the seam, it doesn’t matter that it’s on the back.
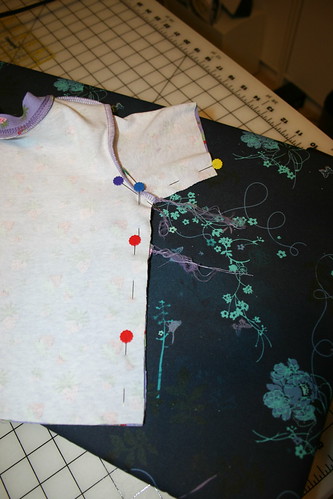
Now pin the front and back side seams as well as the sleeve edges right sides together. Make sure to match up your sleeve seam. I pinned that one first and then pinned the sides.
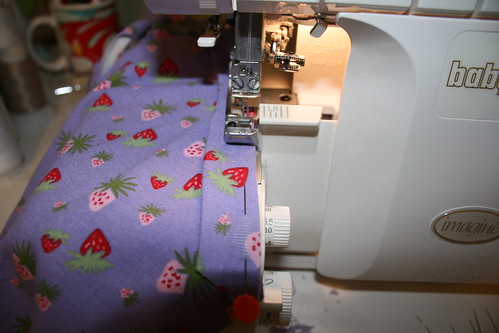
Sew this side seam and repeat on the other side.
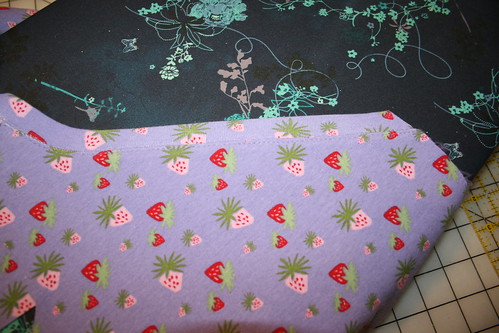
Looking good!
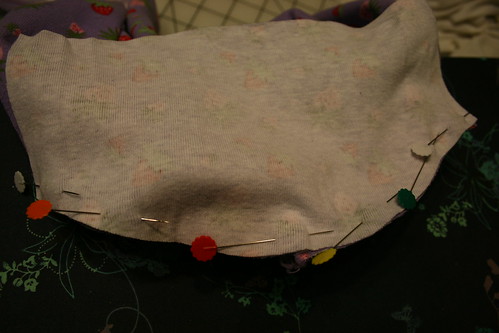
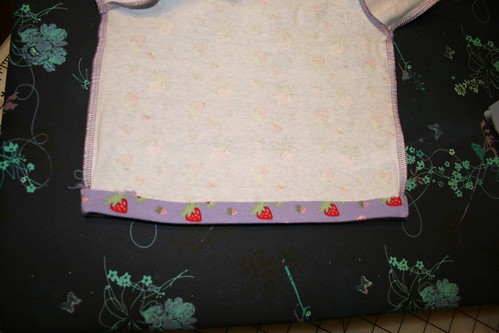
Press the hem before topstitching.
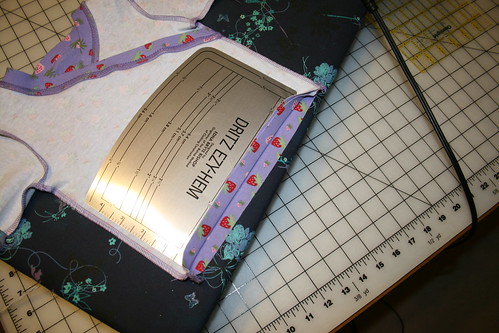
Nice and even using the Ezy-Hem!
Press the sleeve hems. These are too small for the Ezy-Hem, so you’ll have to measure carefully with a small ruler or just eyeball it, depending on your need for perfection here.
Now stitch those hems. This was done using a coverstitcher, but with some practice you should be able to get good results from a twin needle using a stretch stitch.
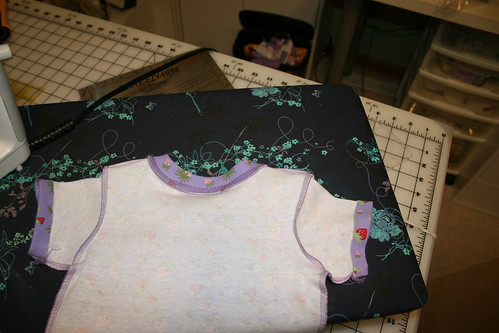
All done!

Thanks to my sister for sharing her daughter for this project.


