Luggage Handle Cover Tutorial
- At January 07, 2013
- By Kelly
- In Tutorials and Sew Alongs
 7
7
The colder it gets here, the more I dream of a sunny vacation. Here’s a tutorial to make your luggage easier to spot if you’re one of the lucky travelers this winter and your bag is one of the many black bags coming down the carousel at baggage claim.

You’ll need:
1 outer fabric 12″x7″
1 piece of iron-on interfacing 11.5″x6.25″
Hook & Loop Aplix, Touchtape or Velcro, I’m using 1″ wide, but 1.5″ would probably be okay.
1. Center interfacing on wrong side of outer fabric and iron on.

2. Finish the top edge, either by serging or zig-zagging. (This will be inside later, don’t worry if it’s not pretty. You can skip this if you really want to. You just have to promise not to be confused later when your top edge doesn’t look like mine in the pictures.)
3. Fold right sides together, matching short ends. Stitch along bottom and side edges, leaving top open.
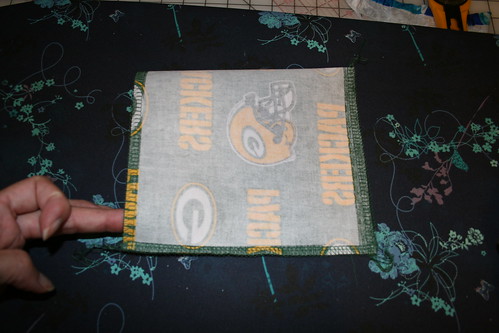
Now you have an inside out pouch like this:

4. Start at one end of the top edge and sew about 2″ in.

Then leave a gap for turning and sew to the fold, like this:

5. Clip the corners. This will make them nicer when you turn it right side out.

6. Turn right side out. Poke the corners to make them nicer. I used my bamboo pointer/turner, but a chopstick also works well, as does an unsharpened pencil.
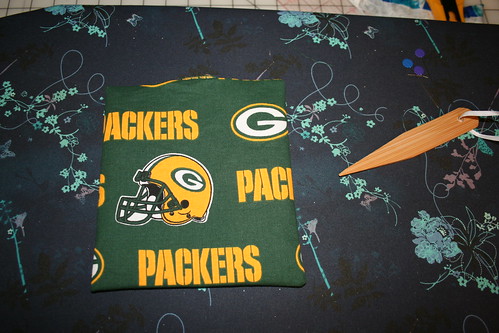
7. Press, folding under the seam allowance at the hole you left for turning and then topstitch all the way around, a little less than 0.25″ from the edge. This will close up the hole you left for turning.

8. Fold the bottom under about 1.75″ and press. (Notice this is not an exact science.) Repeat for top side.

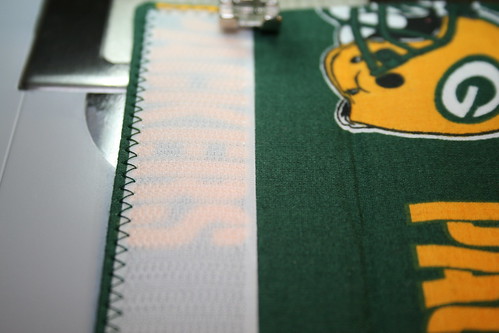
9. Attach hook fastener to the back of the bottom side. I use a zigzag stitch. It’s going to be about 5″, but it’s easiest to just line it up between the topstitching on either side and cut whatever size piece that is and cut a piece of loop fastener the same length.
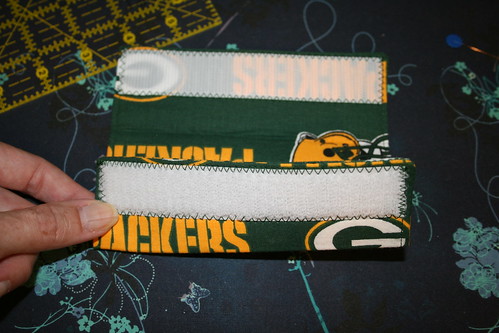
Notice that the top and bottom/front and back haven’t really mattered until now. The side that you put the hook fastener on will be the side that is on the inside of the cover, so if you like the way the fabric design is better on one side, put the hook fastener on the other side!
10. Attach loop fastener to the top of the front side.

All done! Now it’ll look like this:
Put it on your luggage handle.

Flip it around if you want the closures underneath.
Variations:
Use denim or equivalent weight twill and skip the interfacing.
Embroider a name or initials on the fabric, top/bottom centered on one half so it appears when the cover is on the handle.
This particular cover is on its way to Vegas this morning as my husband travels for work. He’s gotten lots of comments on it from Packers fans across the world!
I’d like a happy floral print on luggage headed somewhere sunny with me, but I don’t see that in my future. Where would you like to go?
Happy Travels!
Kelly
 Image: Hilton Kauai Beach Resort by Mr.Thomas


