User Tag List

Page 1 of 4 1234 LastLast
Results 1 to 20 of 63

Thread: Satin Stitch Applique Tutorial in downloads

  1. #1
    Join Date
    Nov 2006
    Location
    Northern CA
    Posts
    3,710
    Downloads
    56
    Uploads
    10

    Satin Stitch Applique Tutorial in downloads

    Here is how I do the satin stitch applique.


    What you will need:
    -Fabrics of your choice
    -Heat N Bond lite
    -pencil
    -scissors
    -stabilizer
    -iron
    -and sewing machine, of course

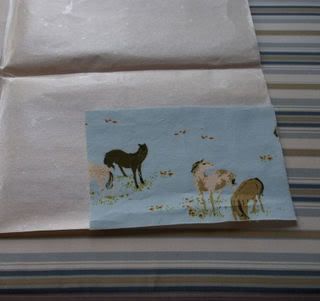
    First take the piece of fabric you'd like to make the applique out of and iron the Heat n Bond Lite onto the back. I usually lay my piece out and cut around it, then turn it over and iron it on.


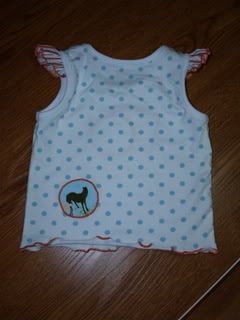
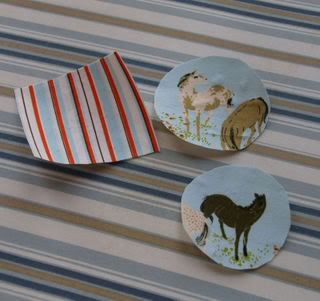
    Cut out the shapes you want to applique. In this case I am doing 3 pieces (2 for the front of a shirt and one for the back) Here the pencil comes in handy to draw an exact shape on the paper backing, and you can also trace something on the paper part before ironing it to the fabric too...just remember the shape will be reversed when you put it on your item.

    Tip: don't cut out the exact shapes until after you iron on the Heat N Bond Lite, it makes it so much easier to cut it out afterwards and not have to line up exact shapes.

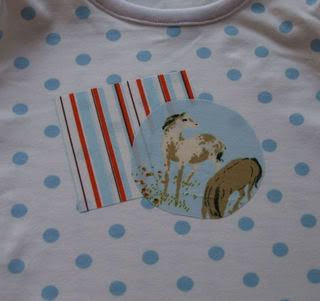
    Peel off the paper backing and position it to where you like it. Then iron them on.

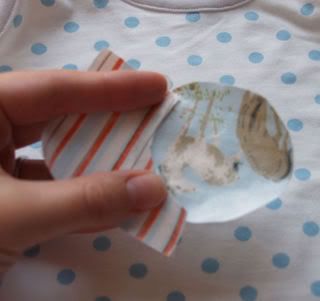
    Tip: When you have one overlapping the other, sometimes it's good to cut away the excess so that only the edge overlaps. This is great for when you use lighter fabrics and can see through them and also keeps it so it's not so bulky.


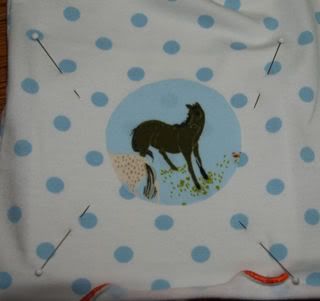
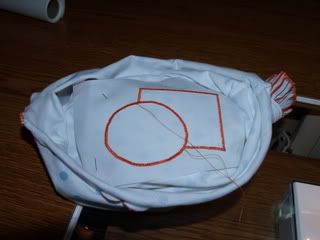
    Next I cut a piece of stabilizer and place it under all of the fabrics (I use a tearaway kind) Pin around the edges to hold it in place.


    Now it's time to sew!
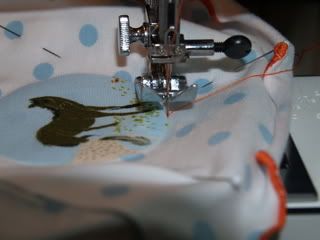
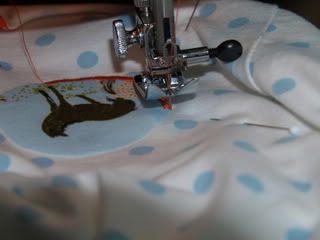
    The satin stitch is just the zigzag stitch. You can make it as wide and as long a stitch as you like. (for these I used a stitch width of 2.5 and length of almost 0, I like mine tight together) I know all machines are not the same so play on a scrap and see what you like. I start on the outside edge and put my needle right next to the edge of the applique.


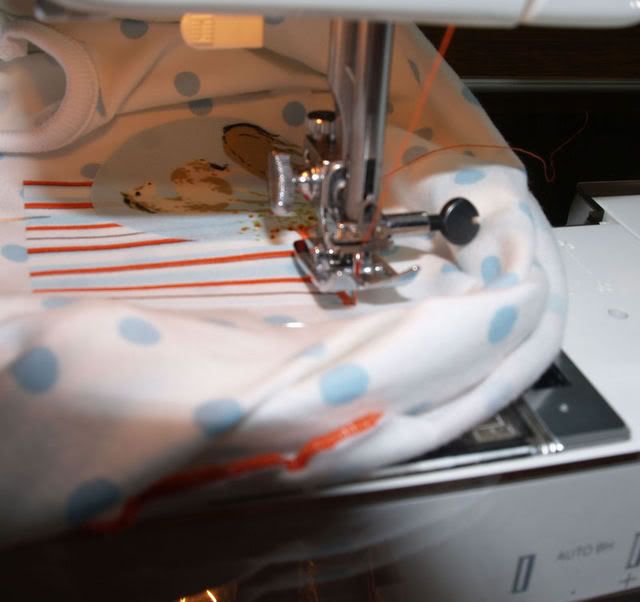
    When I stitch on a curve, I go a couple of stitches and, with my needle in the fabric, I lift my presser foot and slightly turn the fabric, then repeat. Tip:for an outside cuve (like I'm doing) stop your needle on the outside when turning...for an inside curve, stop your needle on the inside.

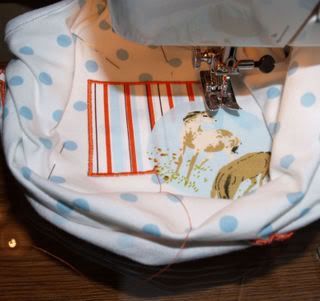
    Tip: for straight square type stitches-when you get to a corner you want to go a couple of stitches past the edge and then turn. (sorry the pic is kinda hard to see)

    Tip:when working with more than one piece, I always start stitching the one that is underneath if possible. That makes it so the edges get covered by the last one you stitch.


    And last I take the pins out and tear away the paper stabilizer.


    All done!
    Krista~ Mommy to Kyra 7-31-05 & Logan 12-30-08


    To view links or images in signatures your post count must be 0 or greater. You currently have 0 posts.

  2. #2
    Join Date
    Nov 2006
    Location
    Northern CA
    Posts
    3,710
    Downloads
    56
    Uploads
    10
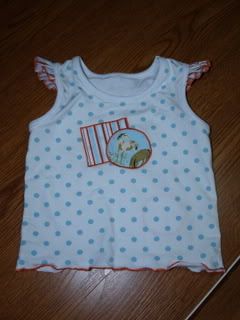
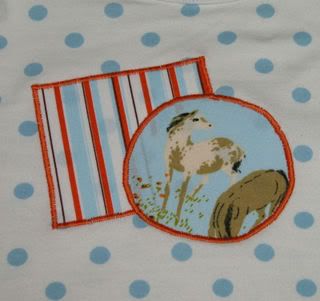
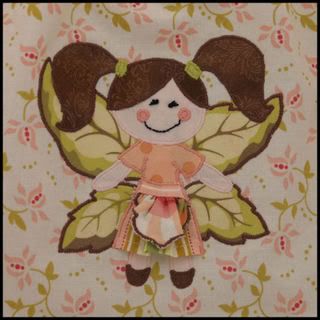
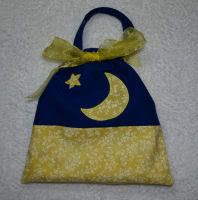
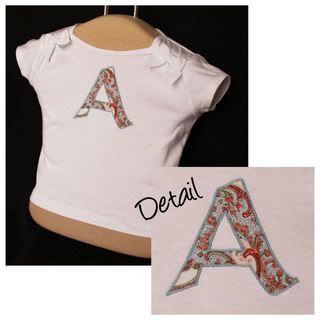
    Here are some things I've done using this technique...
    All the "ladybug" dots are appliqued on


    Krista~ Mommy to Kyra 7-31-05 & Logan 12-30-08


    To view links or images in signatures your post count must be 0 or greater. You currently have 0 posts.

  3. #3
    Join Date
    Mar 2007
    Location
    Idaho
    Posts
    1,136
    Downloads
    42
    Uploads
    0
    Very timely! I was just asking about appliques in a thread yesterday. I will have my laptop with your tutorial right by my sewing machine while I attempt my first one tomorrow. Thanks so much for taking the time to share this! Very clear photos and instructions.
    Heather
    Mama to:

    To view links or images in signatures your post count must be 0 or greater. You currently have 0 posts.
    Chase(7)Regan(5)Maso n(3)Eli(1)
    Married to my dh
    To view links or images in signatures your post count must be 0 or greater. You currently have 0 posts.
    (who can fix ANYTHING!) for 9 years

  4. #4
    Join Date
    Apr 2007
    Location
    Eugene Oregon
    Posts
    2,150
    Downloads
    49
    Uploads
    0
    Wonderful tutorial mama. I love to see these and you did a FABULOUS job!!!!!!!!!!
    Now I feel the need to applique, lol.
    Amy SAHM mom to 5 .Wife to one computer genius who thinks I have no brain.
    To view links or images in signatures your post count must be 0 or greater. You currently have 0 posts.


    To view links or images in signatures your post count must be 0 or greater. You currently have 0 posts.

  5. #5
    Join Date
    Feb 2006
    Location
    Dubai, United Arab Emirates
    Posts
    1,105
    Downloads
    68
    Uploads
    0
    Thank you.
    I am a detail oreinted.
    And you are very specific.
    Thank you again!
    Shyma

    "Maya" as DS calls me to him, Mohammed 12/26/05, and to my girl Alia 7/27/07,and baby boy Ahmad 6/14/09

    ISO:
    Olive+S Bubble Dress size 2T & up
    Minkee dot: Yellow or Baby Blue
    Velour (75-80% cotton):In chocolate, raspberry, black, orange, red
    at good price to help on the international shipping please ^_^

  6. #6
    Join Date
    Jul 2005
    Location
    SC
    Posts
    4,123
    Downloads
    24
    Uploads
    0
    Very cool Tut Krista
    Thank you for doing it

    and Mamas I have the fairy set and let me tell you the applique is PERFECT!!
    [SIGPIC][/SIGPIC]

  7. #7
    Join Date
    Jun 2007
    Location
    Illinois
    Posts
    5,915
    Downloads
    128
    Uploads
    11
    Great Tut! Your PM's are full, but I PM'd you to let you know i was going to put this in PDF format for you!

  8. #8
    Join Date
    Aug 2006
    Location
    Austin TX
    Posts
    4,690
    Downloads
    178
    Uploads
    0
    Awesome tutorial. Thanks so much for sharing!
    Mama to Noah (Aug 03), Owen (Jun 06), and Rosa (Feb 11)

    To view links or images in signatures your post count must be 0 or greater. You currently have 0 posts.

    To view links or images in signatures your post count must be 0 or greater. You currently have 0 posts.

    To view links or images in signatures your post count must be 0 or greater. You currently have 0 posts.

    To view links or images in signatures your post count must be 0 or greater. You currently have 0 posts.

    To view links or images in signatures your post count must be 0 or greater. You currently have 0 posts.

    Come visit my blog!
    To view links or images in signatures your post count must be 0 or greater. You currently have 0 posts.

  9. #9
    Join Date
    Jul 2005
    Location
    Mass.
    Posts
    3,833
    Downloads
    48
    Uploads
    0
    Thanks Krista--that tutorial is awesome!
    ~*~Lauren & Kathryn First Day of School 2008~*~


    To view links or images in signatures your post count must be 0 or greater. You currently have 0 posts.

  10. #10
    Join Date
    May 2007
    Location
    Idaho
    Posts
    4,842
    Downloads
    141
    Uploads
    0
    Thank you so much for posting this! I attempted several appliques this past week and they look "okay", but now I see I did several things wrong.

    I love that letter A -- so pretty.

    Also, I thought that the Heat and Bond says to NOT use w/a sewing machine? Can you use a machine? I was afraid to try.

    Tanya

  11. #11
    Join Date
    Jul 2005
    Location
    Texas
    Posts
    1,963
    Downloads
    20
    Uploads
    0
    Thank you for the tutorial.

    These are great instructions. Very easy to understand!

    To view links or images in signatures your post count must be 0 or greater. You currently have 0 posts.
    Lisa
    wife to Simon and mom to 7 wonderful kids!
    McKrae 13, Westley 11, Grant 9, Leah 7, Elise 5, & Ella 3 and Leeanne born 2/09

  12. #12
    Join Date
    Jul 2005
    Location
    Going Crazy!
    Posts
    7,097
    Downloads
    67
    Uploads
    0
    Thanks for sharing the tutorial! It helps alot!!!
    *~Kim~*

    To view links or images in signatures your post count must be 0 or greater. You currently have 0 posts.

  13. #13
    Join Date
    Aug 2005
    Location
    South Florida
    Posts
    559
    Downloads
    25
    Uploads
    0
    Thank you.

  14. #14
    Join Date
    Aug 2005
    Location
    Buried under a pile of clean but unfolded laundry
    Posts
    3,400
    Downloads
    21
    Uploads
    0
    2 thumbs way up for an awesome tutorial.
    Sabrina
    Mom to 3 little men and a little lady
    To view links or images in signatures your post count must be 0 or greater. You currently have 0 posts.


    I blog!
    To view links or images in signatures your post count must be 0 or greater. You currently have 0 posts.


    To view links or images in signatures your post count must be 0 or greater. You currently have 0 posts.


    ISO of Ottobre 2/01

  15. #15
    Join Date
    Nov 2006
    Location
    Northern CA
    Posts
    3,710
    Downloads
    56
    Uploads
    10
    Quote Originally Posted by tavsmummy View Post
    Thank you so much for posting this! I attempted several appliques this past week and they look "okay", but now I see I did several things wrong.

    I love that letter A -- so pretty.

    Also, I thought that the Heat and Bond says to NOT use w/a sewing machine? Can you use a machine? I was afraid to try.

    Tanya
    You need the Heat N Bond Lite (or any other type that says ok for machine applique). The regular won't work. It gums up your needle (trust me, I know! )
    Krista~ Mommy to Kyra 7-31-05 & Logan 12-30-08


    To view links or images in signatures your post count must be 0 or greater. You currently have 0 posts.

  16. #16
    Join Date
    May 2007
    Location
    home
    Posts
    1,417
    Downloads
    76
    Uploads
    0
    this is how I do it minus the paper stabalizer, great tut

    To view links or images in signatures your post count must be 0 or greater. You currently have 0 posts.

    ~ Kristen ~ Wife to Jay, mama to Lily, Avry and Jackson


    To view links or images in signatures your post count must be 0 or greater. You currently have 0 posts.

  17. #17
    Join Date
    Jan 2006
    Location
    Georgia
    Posts
    892
    Downloads
    7
    Uploads
    0
    Krista..
    the only thing that would improve this tut is if you told me how to make one of those adorable fairy appliques!!
    Sheri: college student
    To view links or images in signatures your post count must be 0 or greater. You currently have 0 posts.
    sewing noob
    To view links or images in signatures your post count must be 0 or greater. You currently have 0 posts.
    and single mama
    To view links or images in signatures your post count must be 0 or greater. You currently have 0 posts.
    to 2 yr old LillyGoose
    To view links or images in signatures your post count must be 0 or greater. You currently have 0 posts.


    To view links or images in signatures your post count must be 0 or greater. You currently have 0 posts.


    To view links or images in signatures your post count must be 0 or greater. You currently have 0 posts.


    To view links or images in signatures your post count must be 0 or greater. You currently have 0 posts.

  18. #18
    Join Date
    Jul 2005
    Location
    Kansas City area
    Posts
    2,754
    Downloads
    29
    Uploads
    5
    Great info, thanks!

    Question--so when you wash it, do the stitches ripple or anything? Because I've done this a couple times and after laundering, it gets a little... less pretty (I mean appliques on knits primarily, with wovens I don't have this problem). The first time I think I didn't use stabilizer, and it was pretty bad. And I've done it with tearaway stabilizer and still had rippling after laundering the item. I guess I'm wondering if this is common or if there's something I'm missing.

    I do want to try appliqueing with a stabilizer that is left on and see if that helps....
    Vicki

    blog:
    To view links or images in signatures your post count must be 0 or greater. You currently have 0 posts.

    etsy:
    To view links or images in signatures your post count must be 0 or greater. You currently have 0 posts.


    To view links or images in signatures your post count must be 0 or greater. You currently have 0 posts.

  19. #19
    Join Date
    Nov 2006
    Location
    Northern CA
    Posts
    3,710
    Downloads
    56
    Uploads
    10
    Quote Originally Posted by victoria View Post
    Great info, thanks!

    Question--so when you wash it, do the stitches ripple or anything? Because I've done this a couple times and after laundering, it gets a little... less pretty (I mean appliques on knits primarily, with wovens I don't have this problem). The first time I think I didn't use stabilizer, and it was pretty bad. And I've done it with tearaway stabilizer and still had rippling after laundering the item. I guess I'm wondering if this is common or if there's something I'm missing.

    I do want to try appliqueing with a stabilizer that is left on and see if that helps....
    I used to get rippling when I first started and I wasn't using the stabilizer. And after washing I iron it if it's like that.
    Although I just started using the mesh fusible stuff (don't know it's exact name) after I'm all done. I got it a Joann's and it looks like the same stuff you see on the back of applique's on RTW clothing.

  20. #20
    Join Date
    Feb 2006
    Location
    Dubai, United Arab Emirates
    Posts
    1,105
    Downloads
    68
    Uploads
    0
    Unfortunatly I cannot get HeatnBond Lite.
    But I got a question,

    So the main purpose in applique,
    is to interface the applique and fuse it temporary to the garment (until washed)
    or fuse everthing permenantly, interfaced applique permenantly fused to garment?

    TIA!

Page 1 of 4 1234 LastLast

Posting Permissions

  • You may not post new threads
  • You may not post replies
  • You may not post attachments
  • You may not edit your posts
  •