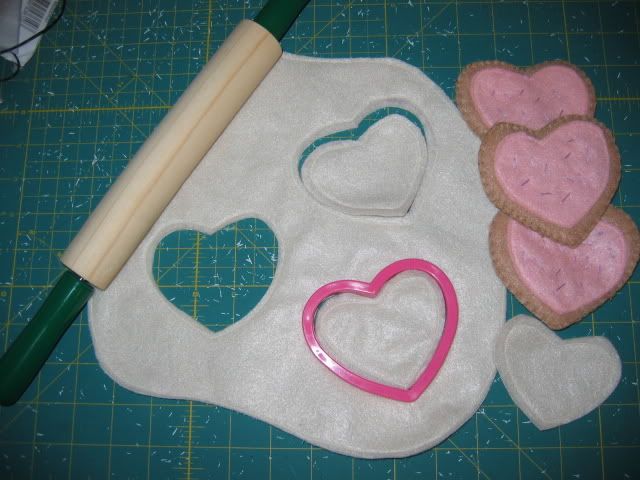
-
Felt food- cookie dough
Please see the free patterns section for the complete pattern. 
Materials:
light colored felt (cream or slightly darker)
fabric marker
scissors
rotary cutter (optional)
cookie cutter of your choice
darker felt for baked cookies (optional)
colored felt for icing (optional)
Step 1:
Cut a free form shape of dough from 2 pieces of felt. I cut on the fold with my rotary cutter. My piece is roughly 10.5 by 11 inches.

Step 2:
Using your sewing machine, stitch close to the edge making sure to catch both pieces. Don't worry about being super careful on this step because we will clean it up in the next step.

Step 3:
Using your rotary cutter or scissors, even up the edges. Cut close to the edge without cutting your stitches.

Step 4:
Using your cookie cutter and fabric marker, draw around the outside of your cookie cutter. I try to draw really close to the edge.

Step 5:
Sew just off the outside edge of your marker line. See top cookie.

Step 6:
Using your rotary cutter, start your cutting line. Be careful to just cut on the other side of your marker line. You could even cut a little into the line, but make it even.

Step 7:
Use scissors to finish cutting out dough cookie.

Step 8:
Stitch along edge of cookie just like you did for the dough. Be careful with this piece because you will want it for the dough cookie.

You are finished. Remove the fabric marker, and you are ready to play.

To make "baked" cookies, I turn the cookie cutter upside down, and I trace the top rim of the cutter onto slightly darker felt. *This only works if you have a cutter like mine* I also add a few layers of quilt batting to make the cookies looked baked. I used my machine to sew on the icing, but I did the edges of the baked cookies by hand.

You could omit the sewing machine entirely, and do the whole set by hand.
Last edited by sewingmel; 04-15-2009 at 08:06 AM.
 Posting Permissions
- You may not post new threads
- You may not post replies
- You may not post attachments
- You may not edit your posts
-
Forum Rules


 Reply With Quote
Bookmarks