-
Four Patch Doll Quilt Sew-Along Part Two
Ok, we've got our 4 patches sewn. We'll start working on the background.
Cut 6 -4" squares of the background fabric
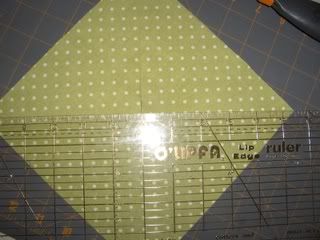
Then we will cut the triangles for the sides:
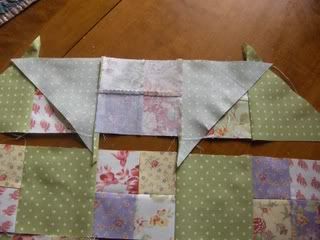
Cut 3 -7 3/4" squares
Cut the squares into quarters diagonally
Lay these triangles around the edges of the quilt.
Here's a little extra info .gif "a (11)") You can make this quilt in any size and to figure out what size to cut your side triangles, you need this formula:
You can make this quilt in any size and to figure out what size to cut your side triangles, you need this formula:
Count how many side triangles you need. Then divide that number by 4 rounding UP to the nearest whole number. Then take your block and measure it across the diagonal. Add 2" to that measurement. That is the size you want to cut your squares.
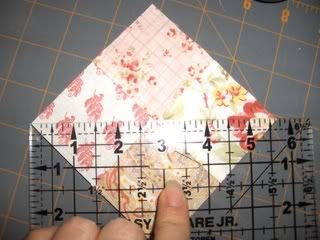
Next we will cut the triangles for the corners.
Cut 2- 5 1/2" squares of background fabric.
Cut into half diagonally.
Yep, there's a formula for this, too. Take the measurement of your blocks (not diagonal this time) and add 1 1/2".
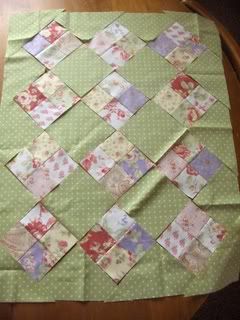
Now we get our first glance of how it will all look together. Lay out the blocks and triangles on your work area. The triangles will overlap, don't worry.
Now, it's time to sew them in diagonal rows. Don't worry about the corner triangles yet. Take the top right diagonal row and sew the 4 patch and two triangles together. Make sure that you match up the bottom of the triangle to the 4 patch. I like to keep the quilt laid out, rather than picking up all the rows at once. It helps me keep things in the right order.
Continue sewing all the diagonal rows together.
Next, sew the rows to one another, making sure that you match up the seams rather than the edges. You can see in the picture below that the points of the triangles stick out a bit.
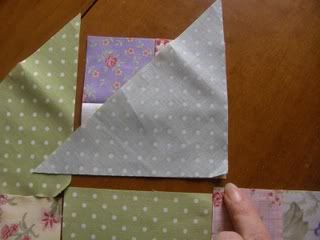
Time to add the corners. Center each corner triangle, right sides together, using the center seam of the 4 patch to place it. Sew together. Trim off all of those little points sticking out.

The top is pieced!! Next post will be quilting and binding
 Posting Permissions
- You may not post new threads
- You may not post replies
- You may not post attachments
- You may not edit your posts
-
Forum Rules


 Reply With Quote
Bookmarks