The "Who Needs Coach??" Tutorial
Here is the tutorial for the knockoff Coach bags I made over the weekend. This is my first long tutorial so if I need to revise anything let me know, k?
You can use woven or twill for these bags easily. I think upholstery weights would be too thick and bulky. I use medium to heavy weight interfacing with these. I buy it by the bolt from Bourne Mills a home décor fabric company. My mom is an interior designer so she orders it through her work. Nice perk, not to mention the samples. 
I've put pics in the tut but if you want a full pictorial walkthrough you can see all the pics I took in order in my photobucket album here: http://i115.photobucket.com/albums/n...utorial%20Pics
Fabric A: Main bag fabric
Fabric B: Inside and accent fabric
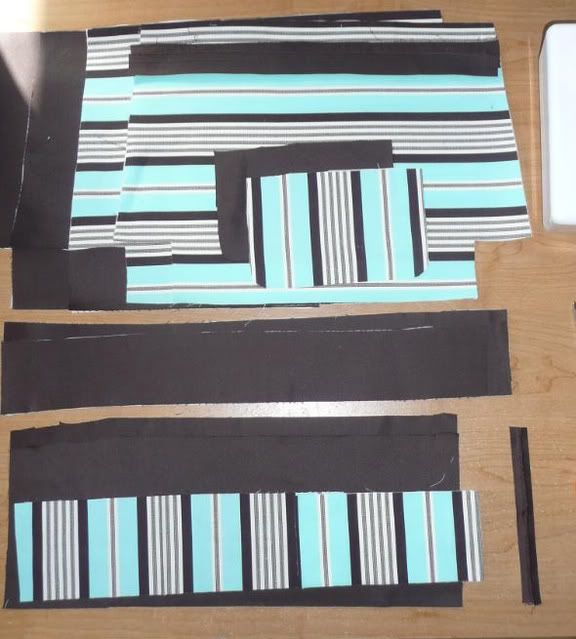
Straps: (3”x21”) 2 of B, 2 of interfacing
Front Pocket: (5”x8”) 1 of A, 1 of B, 1 of interfacing. Bond interfacing to A
Inside Pockets: (6”x18”) 2 of B
Contrast Stripe: (4”x18”) 1 of A
Top Binding: (1.25”x17”) : 2 of B
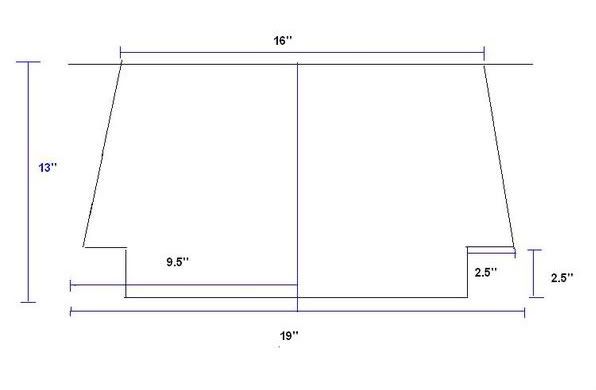
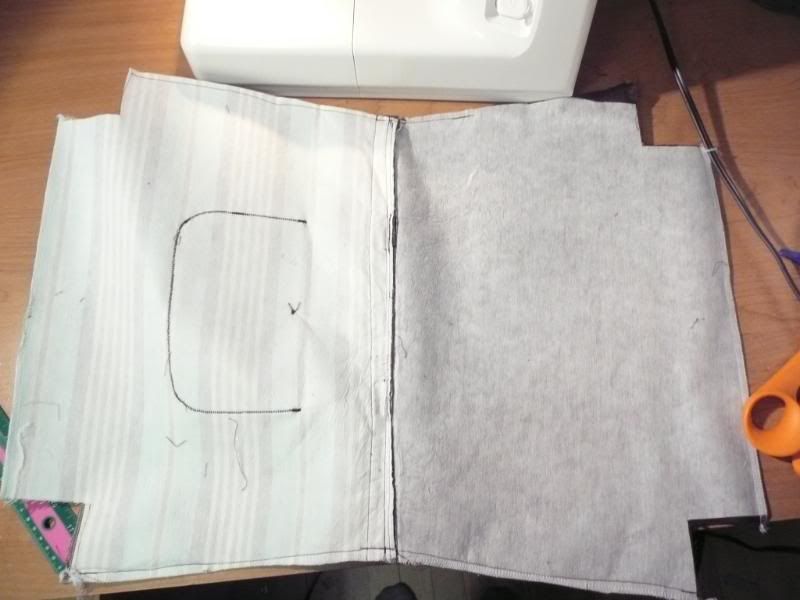
Main Body: (See diagram) 2 of A, 2 of B, 4 of interfacing
1 - 16” zipper (You could probably get away with a 14” but I find the longer zipper easier to work with)
1- Button or snap for front pocket
4 bedazzler studs if you want them. I .gif "A (02)") my bedazzler.
my bedazzler.
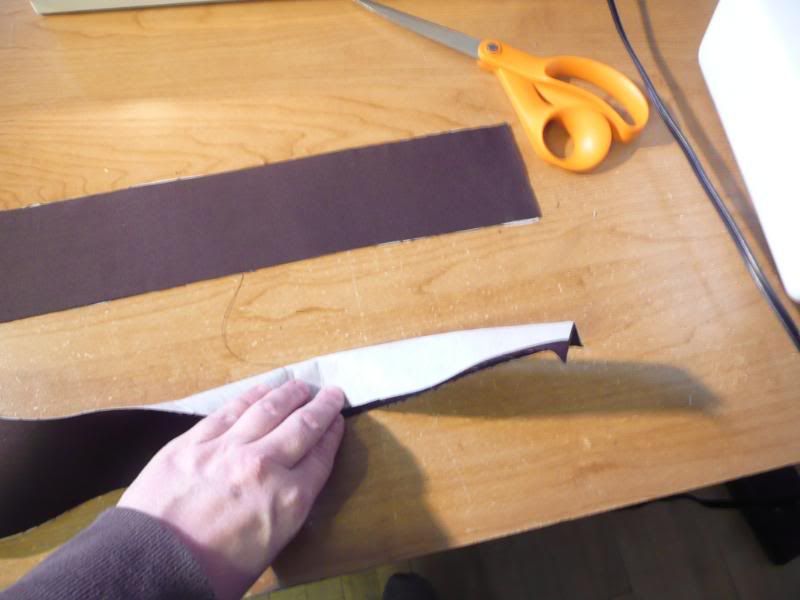
STRAPS: Bond interfacing to wrong side of fabric. Sew up straps with long edge right sides together. Flip the tubes inside out. Press with seam on one side. Top stitch each long end of strap. Now set them aside.
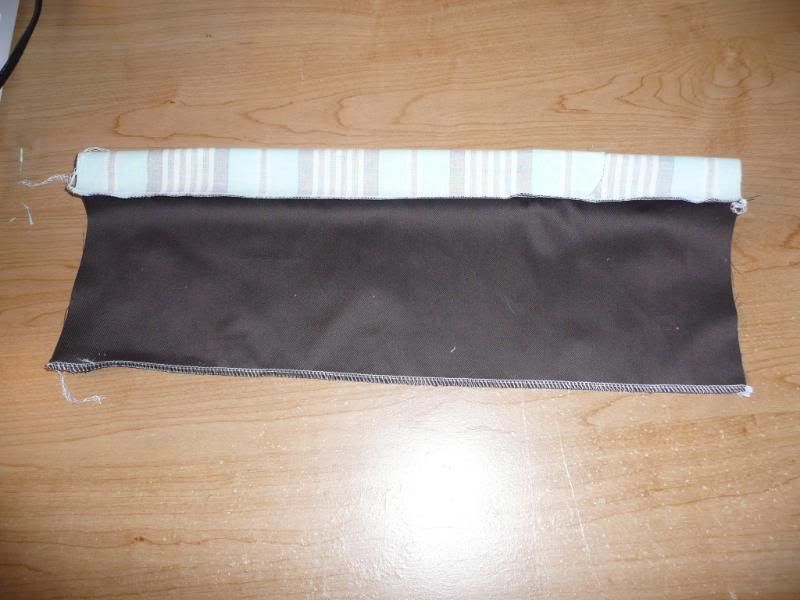
INSIDE BAG POCKETS: Sew one long edge of A to one long edge of B. Repeat with the other B and the opposite side of A. You should have a piece that looks like BAB. Now sew the two remaining long edges of the B’s together with the right sides in. Flip the pocket right side out through one of the ends. Press tube flat with the BB seam at the bottom and A folded in half at the top. Topstitch 1/4” above the A stripe.
ASSEMBLING THE INSIDE: Position the finished pocket on one of the Main Bag B pieces 1” above the TOP of the cut out squares. Pin in place with a couple of pins. Now you’re going to sew three seams. Two go straight up from the corners of the cutout squares and the third goes straight up the middle. Backstitch several times at the top part of the seams. Then sew straight across the bottom of the pockets. Set both B Main Body pieces aside.
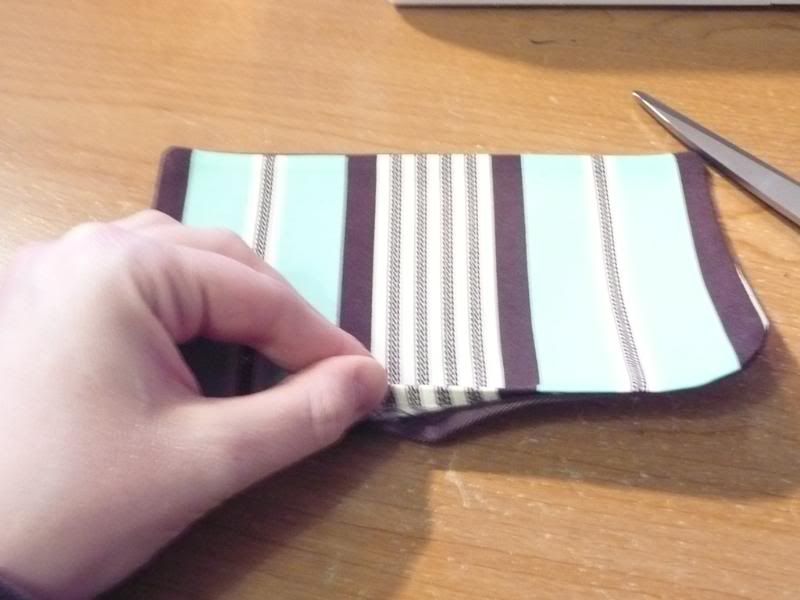
OUTSIDE POCKET: Bond interfacing to wrong side of A. Sew A and B together with the right sides facing leaving a small opening to flip it. Flip right side out and press flat tucking in the open part and pressing flat. Top stitch the upper pocket edge if you want. Make a button hole if using a button.
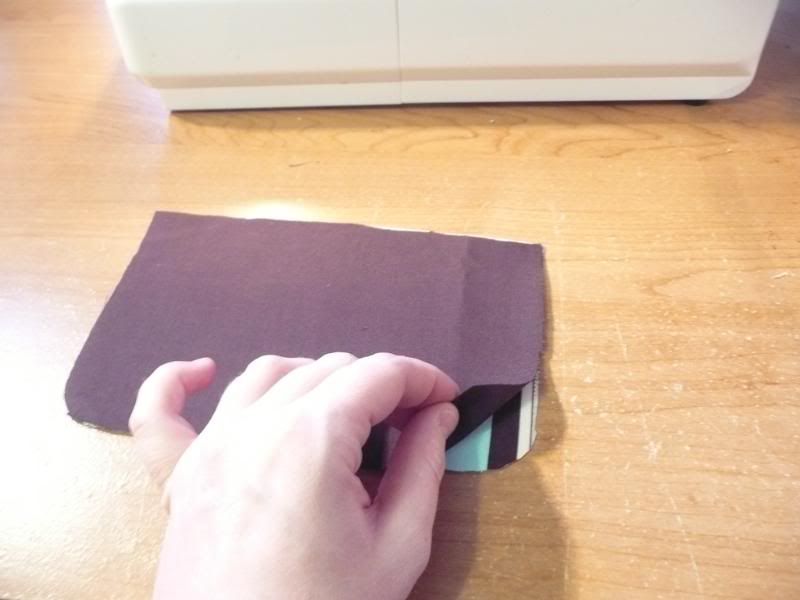
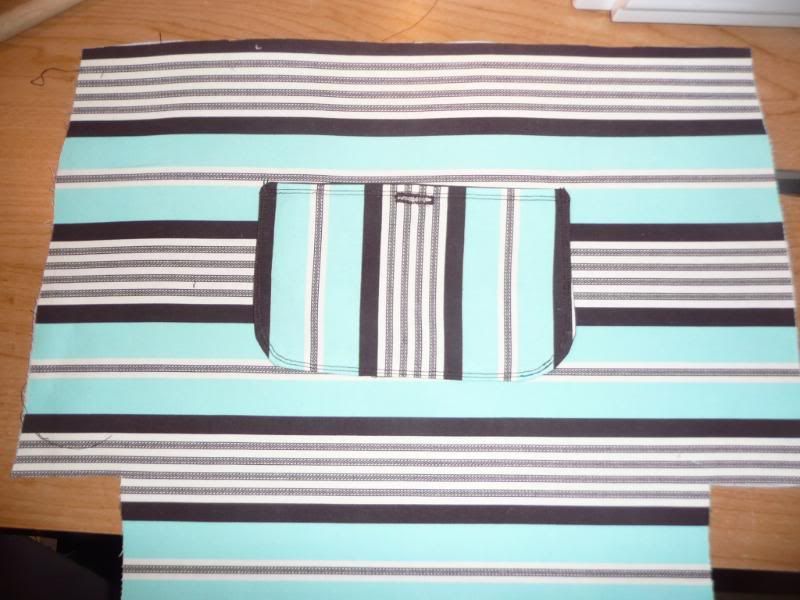
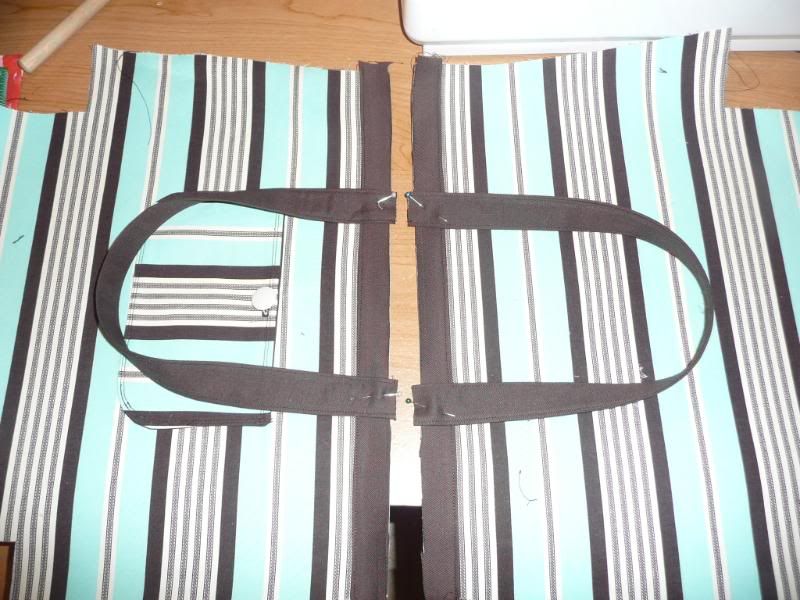
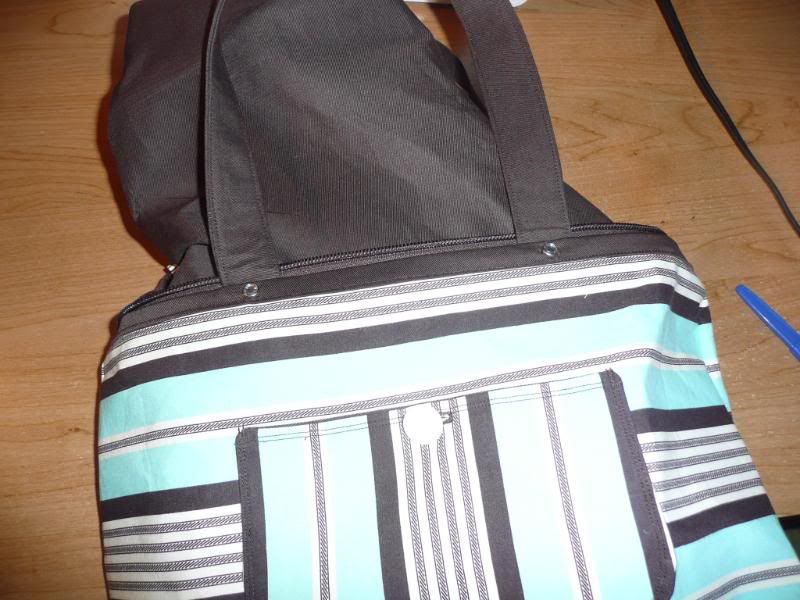
OUTSIDE ASSEMBLY: Take one of the A Main Bag pieces and position pocket in the center. I just place it where I want it and then measure to each edge to make sure it’s centered. Pin down and stitch the pocket on. I do a double seam since front pockets get a lot of use. Plus it looks pretty. Sew the button on or attach a snap now.
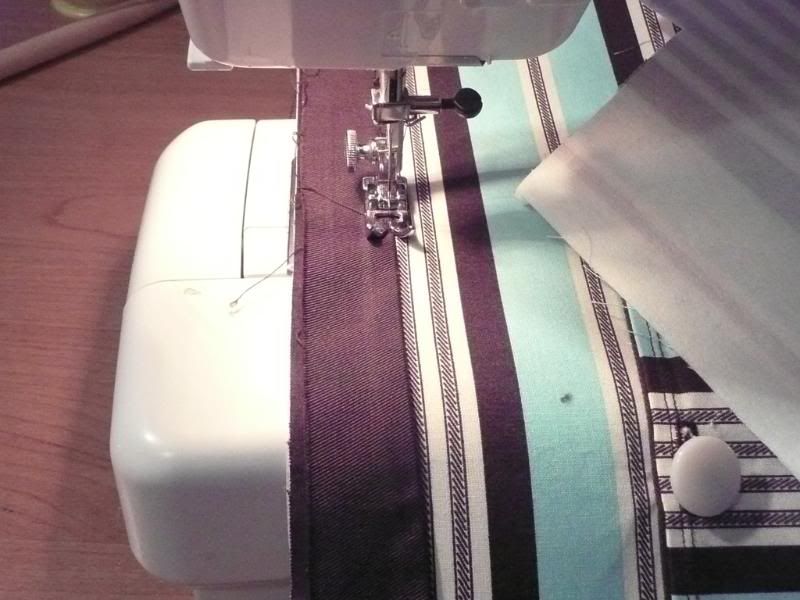
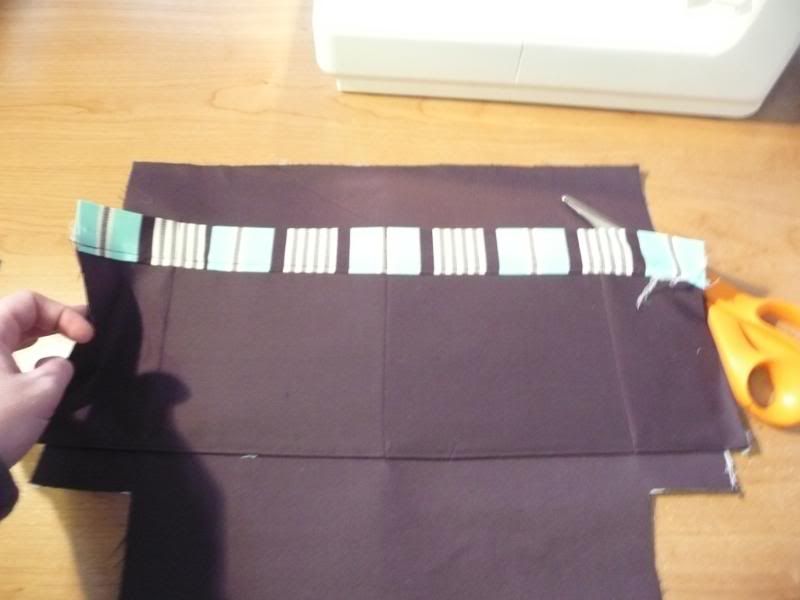
Take a piece of the Top Binding and press up 0.25” all along one long end. I actually make ½” bias tape with my bias tape maker and then press one of the two edges flat again. Line up the binding right side up at the top of the A Main Bag piece with the fold down and the raw edge lined up with the top bag edge. Sew along the folded edge. Press front. Repeat binding for the other A Main Bag piece.
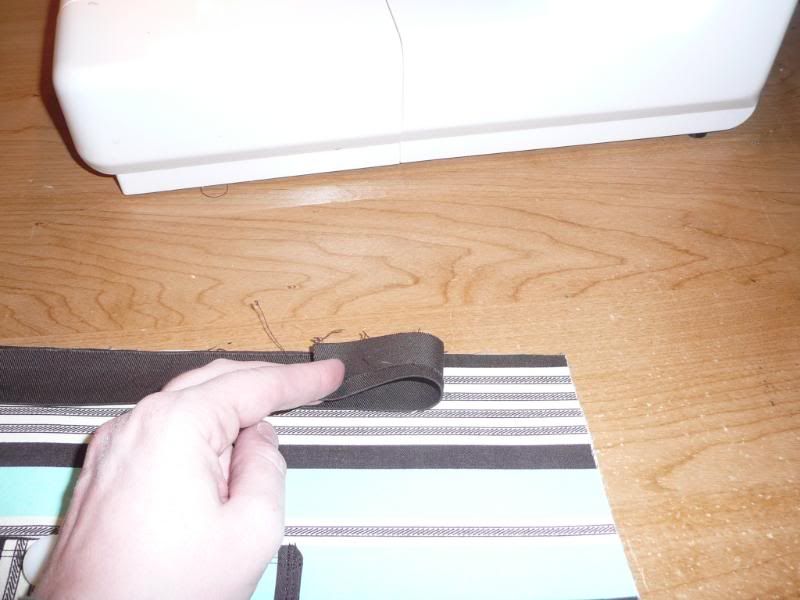
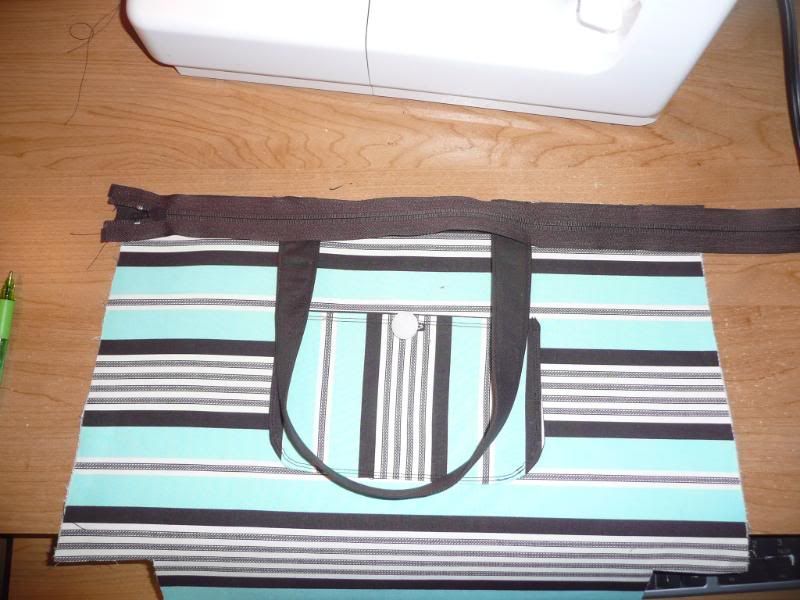
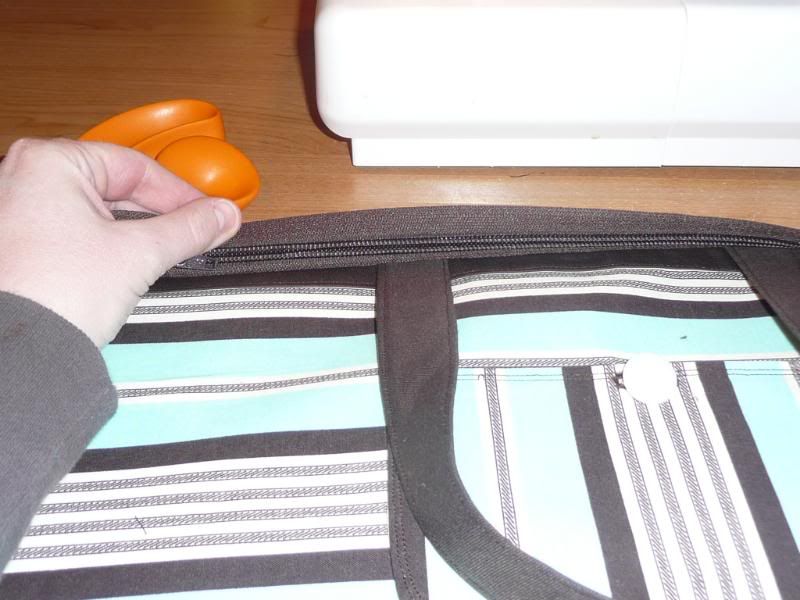
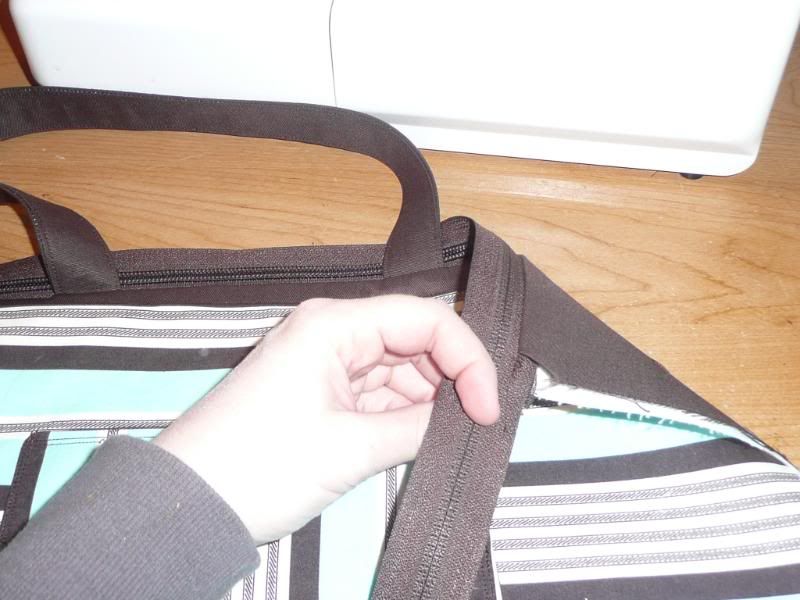
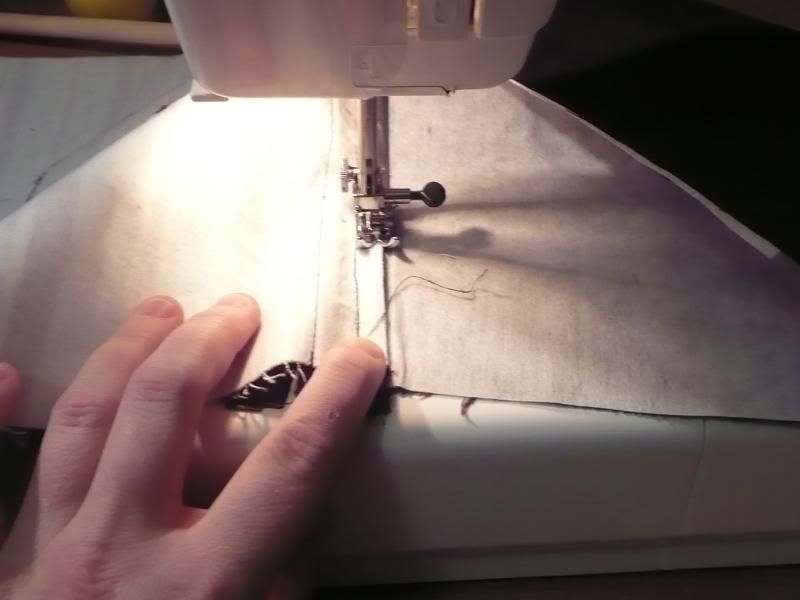
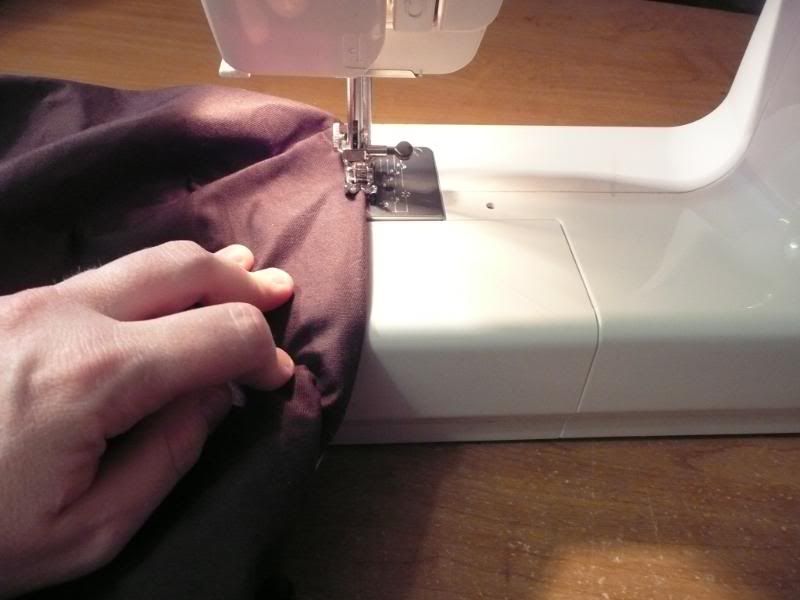
ZIPPER: This isn’t hard, I promise. Start with the A Main Bag front and lay it down in front of you. Pin the handles down with their outside edge even with the pockets outside edge. Stitch over the straps very close to the edge several times to fasten them in place. Take the zipper and place it zip down on the front, with the top edge of the front and the top edge of the zipper lined up. The zip end should have almost no overhang and the other edge should be too long. This is ok.
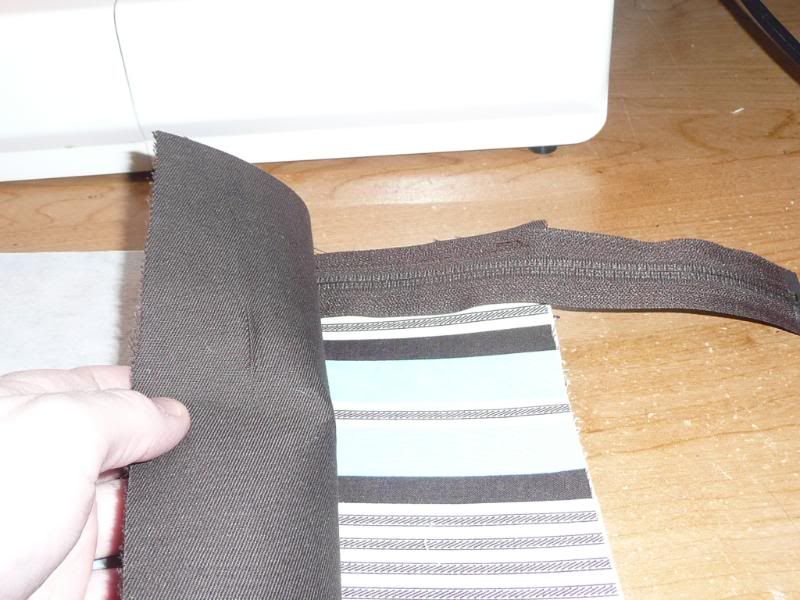
Now stitch with a zipper foot between the top edge and the zip. Place it in front of you again and take the B main bag piece without the pockets and place it right sides together with A sandwiching the zipper in the middle. Now flip it over and stitch over the same stitching line this time sewing B along with A and the zipper. Open it up and fold it wrong sides together so that the other side of the zipper is sticking up. Press the seam where the fabrics meet the zipper. Flip up A and stitch seam allowance to B.
Now to repeat the process for the other side but this time with half a bag attached. Lay outside back A down and pin strap in place. Stitch down. Line up zipper with the top edge of A, zip facing down. Stitch between the zipper and the top edge. Place Inside Back B (the piece with pockets) right sides together with A, sandwiching the zipper in between the two. Flip over and follow the same stitch line. Flip over with wrong sides together and press seam. Open up and sew seam allowance to B.
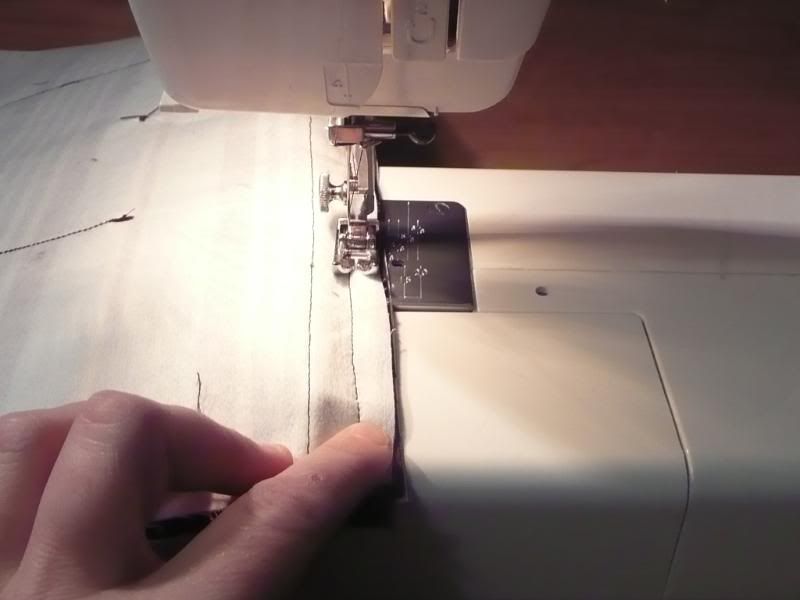
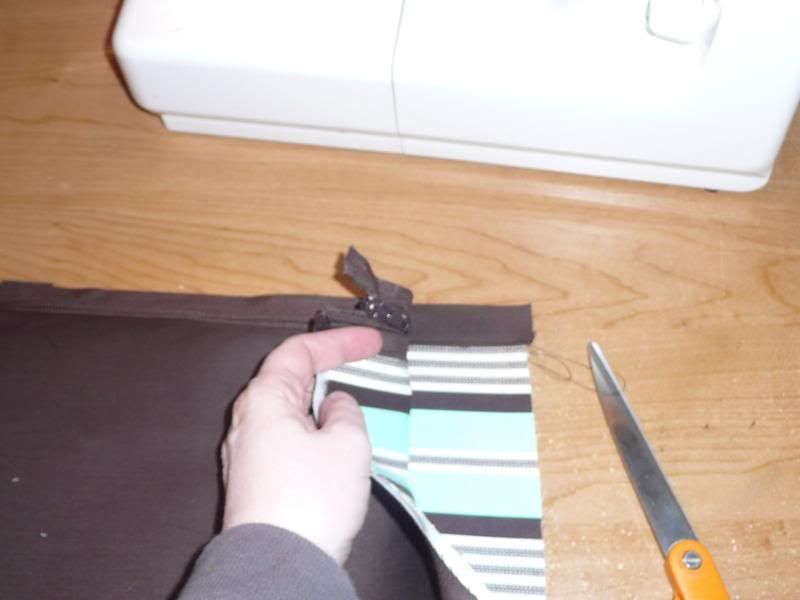
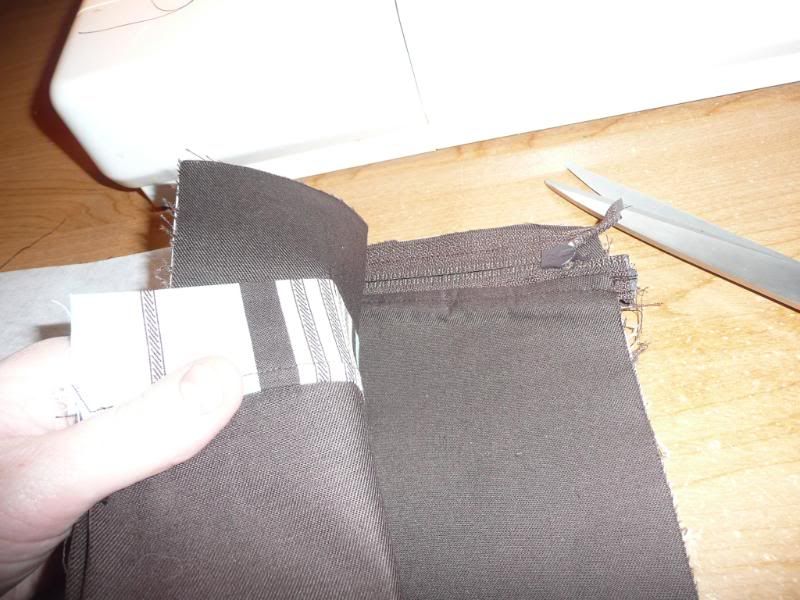
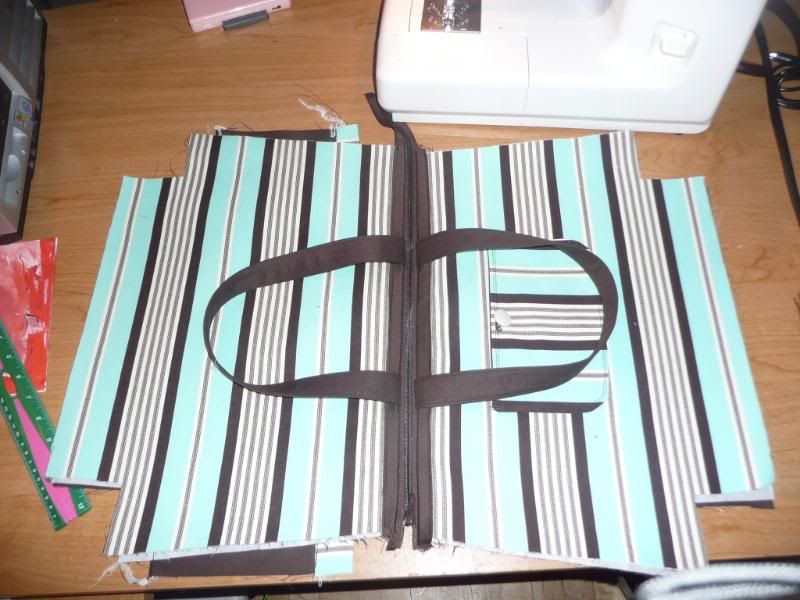
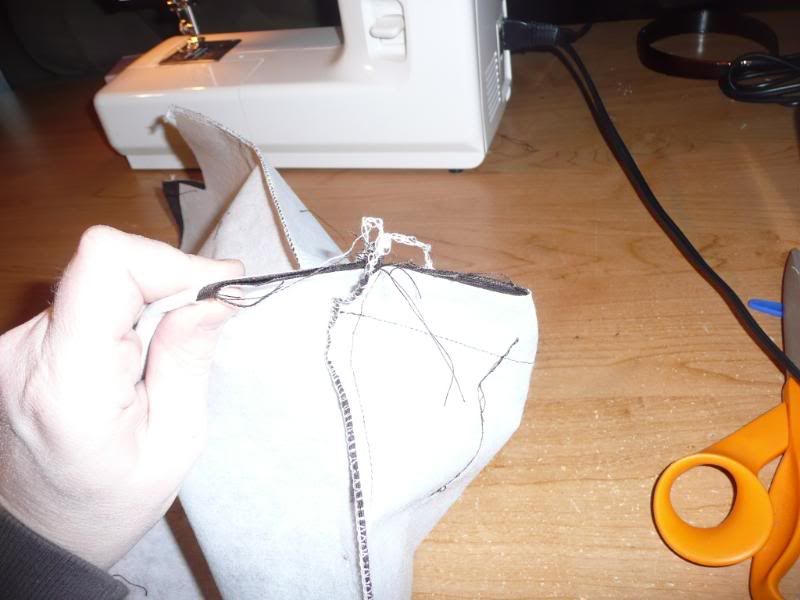
MAKE IT A BAG: Put the pieces right sides together so that AA and BB are together. Line up the binding on each side and pin in place. Fold the zipper edges towards the inside of the bag on each side. Sew up each side starting at on end sewing over the zipper and down to the other end. Leave a gap of about 5” on the inside edge of one of the seams so you can flip the bag later. Go slow at the bottom end of the zipper over the plastic teeth or you’ll break your needle. Before doing anything else unzip the zipper. Then sew across the bottom of each side.
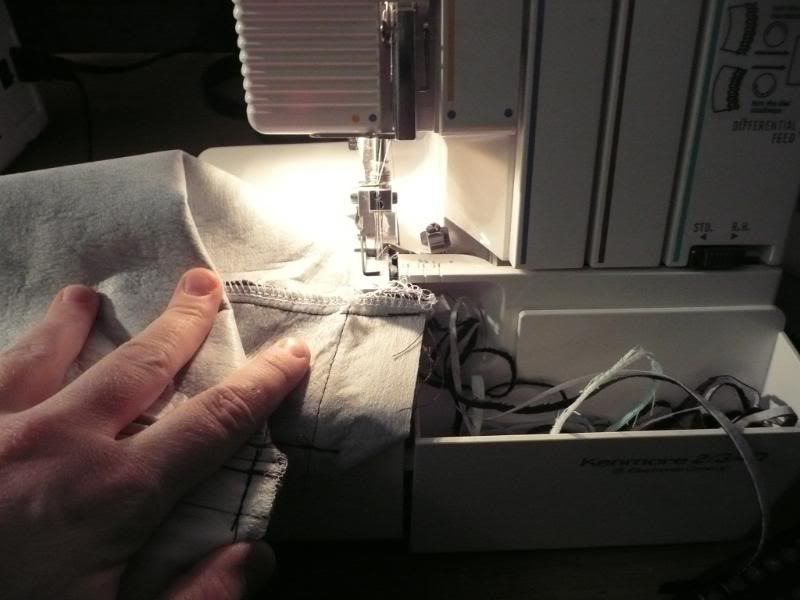
The cutout squares should not be sewn. Trim seams. Take one cutout square and fold it so that the side and bottom seams meet in the middle. Sew straight across about ½” from the edge. Repeat for the other three corners. Flip the bag right side out. Apply the bedazzle studs now. Make sure you poke the ends of the zipper up with something as far as they will go. Fold the raw edges of the hole in and press flat. Hand or machines sew closed.
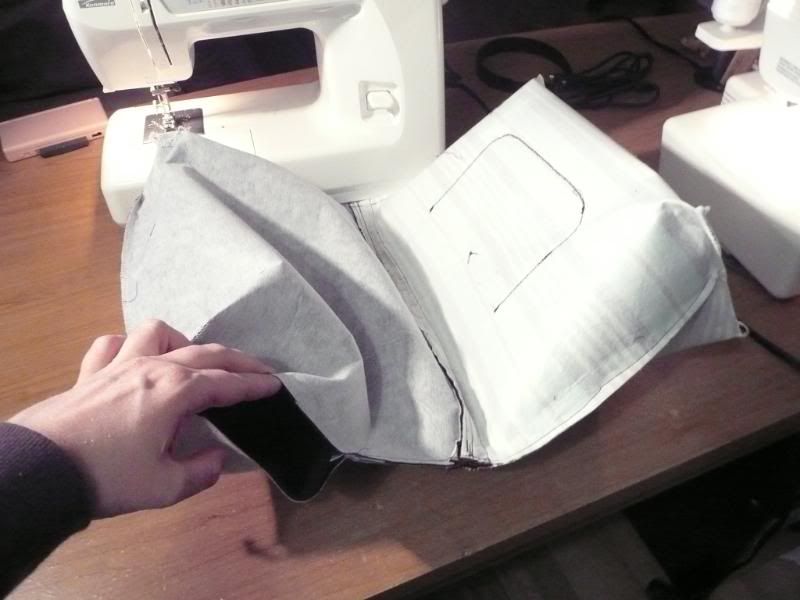
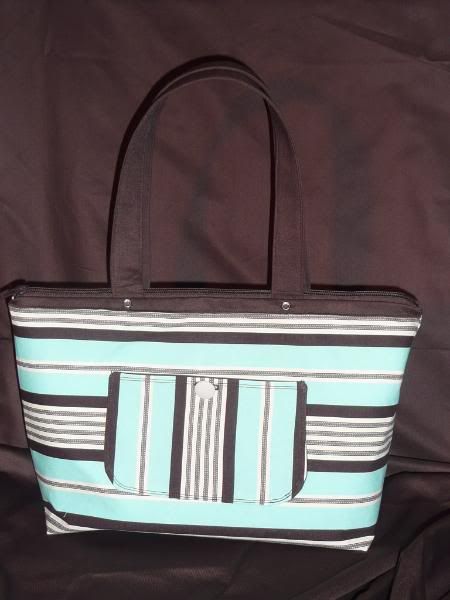
Push the inside…well…..inside and give the whole thing a really good pressing. Zip up the zipper and voila! Your very own Coach knockoff.
Allie - mama to Olivia (9) and Chelsea (4)
To view links or images in signatures your post count must be 0 or greater. You currently have 0 posts.
To view links or images in signatures your post count must be 0 or greater. You currently have 0 posts.


 Reply With Quote
Bookmarks