-
Penguin Felt Along
Okay, so I am a beginner needle felter, so this may not be too helpful, but I will try, LOL! Also, this penguin (with the hat) is not actually finished, but I just did a quick once thru to show the steps. I will go back and felt him some more, and add the details suck as beak, eyes, feet, and a little sculpturing.
First up, you need wool roving, needle felting needles, and a piece of foam to support your project. (my foam used to be larger, but my kids needed it for another project, and this was all that was left when they were done  )
)
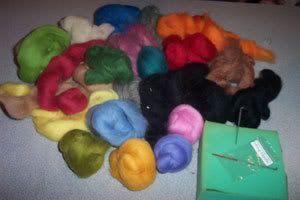
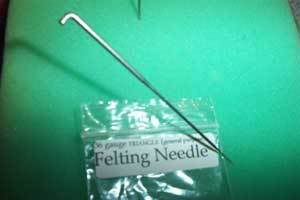
I got most of my supplies on Ebay, the foam I bought at joanns for cheap. Check around for prices on needles and roving, it can be pretty reasonable, to fairly expensive. Needles come in different sizes, I am using a 36 triangle (general purpose), and I also use 38 star (fine). This is what I have, so this is what I use.
CAUTION, these needles are sharp, and have little barbs on them, so major ouch if you are not careful!! This is where the foam pad comes in handy, the needle will poke into the foam, and not into your lap, hand etc.
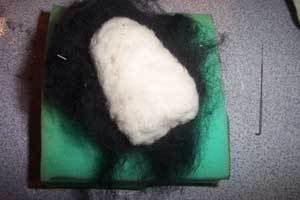
So, now you decide what you are going to make. I am making a penguin here, so I am using natural roving as my base. I pull a hunk off, I do not cut with scissors.
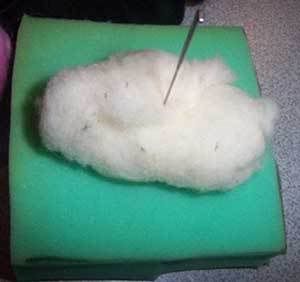
Now, start poking your needle up and down all over your piece of roving. It doesn't have to go all the way thru. The bits of wool will bind up against one another as the needle is pushed in and out, causing the wool to felt up. Keep your needle straight up and down as you are using it. This is what it looked like after lightly poking with the needle all the way around.
Now I am going to add black. I pulled of a piece of roving, and layed it around my natural, and started felting it on the first piece. I usually go around the edges first, to kind of get them stable and in place, and then continue with the rest, making sure I do this fairly evenly.
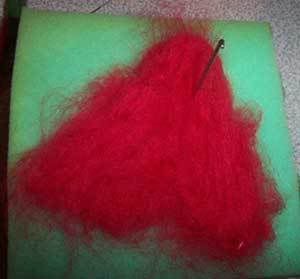
I am going to add a hat, so I tore off some red and layed it out in the shape that I want it in, and then just start poking that needle all over the red. Remember that you are poking into the foam, not just on the wool roving itself.
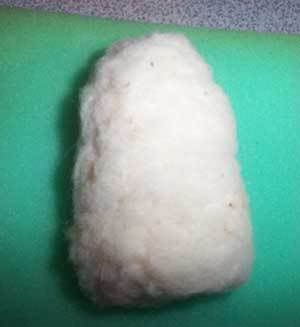
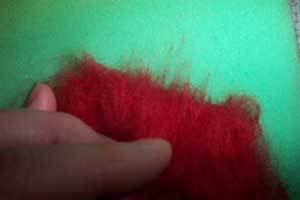
Now I am pulling it off the foam, it will act like it's stuck, just pull gently, turn it over and continue felting, until it's as firm as you want it so be.
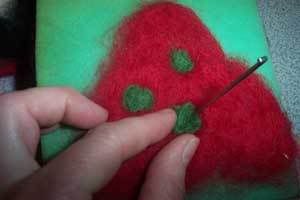
I wanted green dots on my hat, so I pulled of little bits and felted them onto the red.
I wanted to twist 2 colors together for the brim of the hat, so I pulled of 2 strands of roving, similar in size.
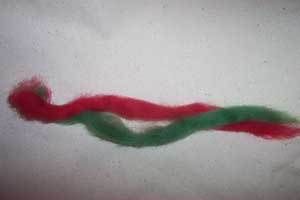
I used a needle and stuck it in one end, and started twisting the strands together.
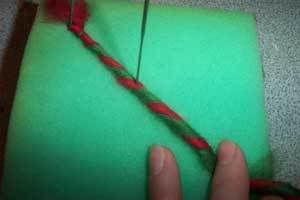
I am now felting the twisted strands together.
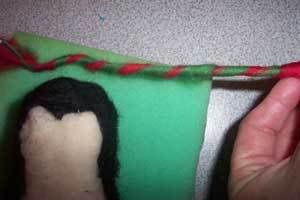
Here, I have wrapped the hat around the penguin's head and start to felt into place, poking the needle around the outer edge, so it's becoming attatched to the head.
I have added the twisted wool roving to the edge of the hat and am felting that into place
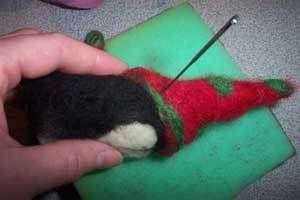
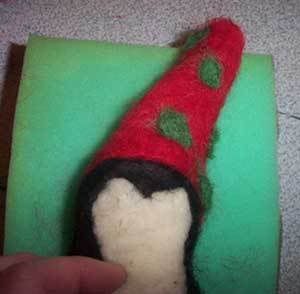
I want my hat to look flopped over, so I am poking my needle in thru my hat and into the head, creating the crease in the hat. This will keep it in place. If you want definition somewhere, you just continually poke, until you get the sculpting and definition that you want.
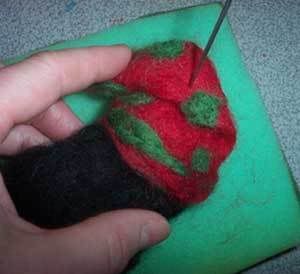
This is what the penguin looks like with the hat felting in place.
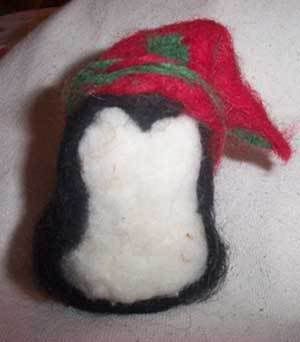
He is not finished, but I will come back and add the photo when he is done. This is the basic technique that I use to felt. The more you poke the needle in, the firmer your felted piece will get. If you want it someone squishy, just don't felt it as much. If you want it really firm, then keep using that needle.
Here is a picture of a penguin that I did for my 14yr old dd who collects all things penguin .gif "A (01)")
She wanted eyes, I put them on, she didn't like them, so we just added more roving over the top and covered them up. This is a very forgiving medium to work with!!
This penguin is 3" tall, and 2" wide at the base.

Thanks for reading, I hope this was somewhat helpful to someone 
Dina
 Posting Permissions
- You may not post new threads
- You may not post replies
- You may not post attachments
- You may not edit your posts
-
Forum Rules


 Reply With Quote
Bookmarks