Colorblock tutorial - in downloads
Materials:
-your favorite t-shirt pattern (check Burda, Kwik Sew, or Ottobre Design for great t-shirt patterns)
-knit fabric
-acrylic or wooden ruler
-scissors or rotary cutter
-tracing paper
Step one:
Using your favorite t-shirt pattern, draw straight lines up and down, across, or sideways on the traced pattern.
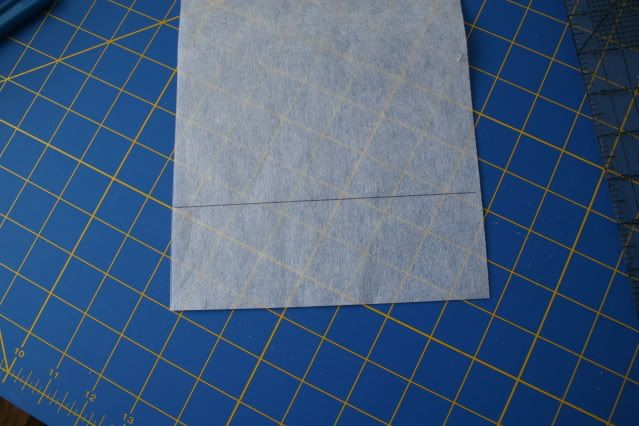
Step two: Your drawn, straight line is now your seam line. You have two options to finish your pattern. If you can only cut the correct lines, you can draw your cut lines onto your pattern. Add seam allowance above and below your drawn line as needed. Make sure that your grain line stays the same as your original pattern.
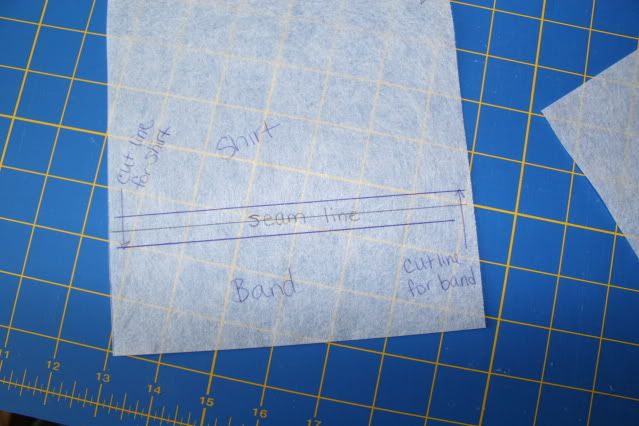
If this confuses you, trace a new pattern piece, and add seam allowances above and below your drawn lines as needed.
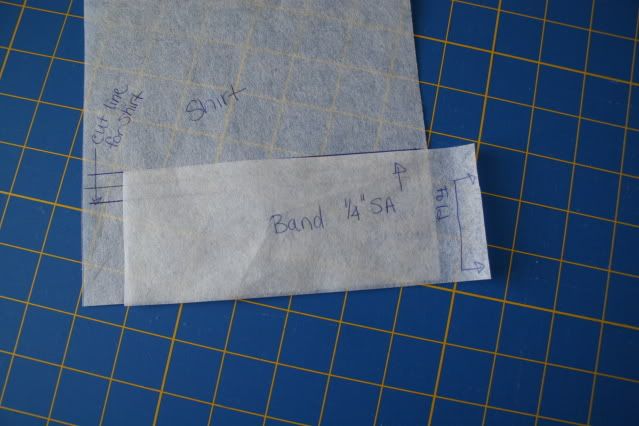
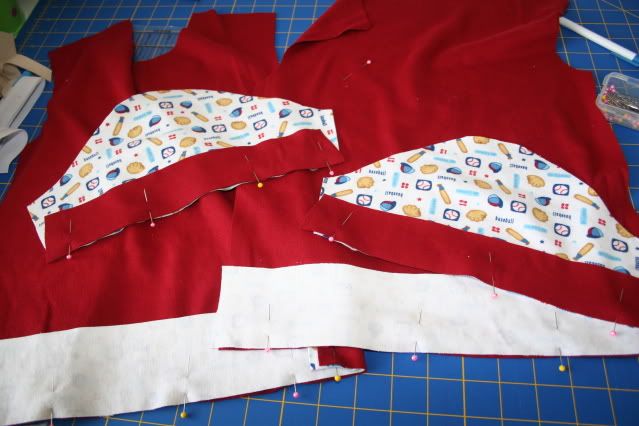
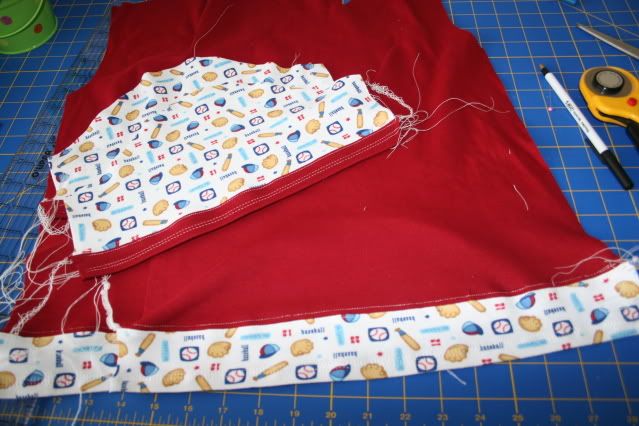
Step 3: Cut out all pattern pieces using your altered/new pattern. I used the colorblock technique for the bottom band of the shirt and for a bottom band on the sleeves.
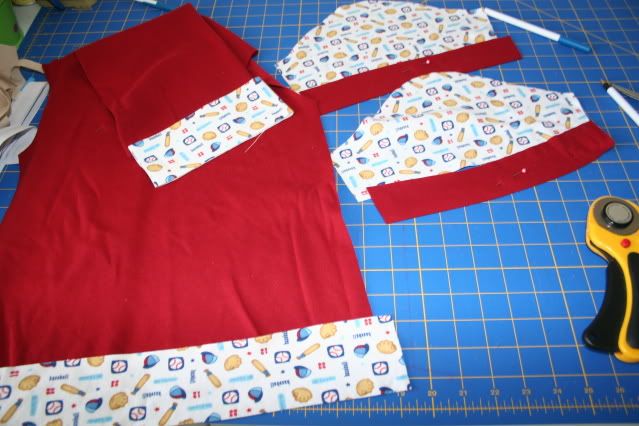
Step 4: Pin partial shirt and sleeve pieces together right sides together. You are only trying to reassemble the pieces you cut apart. You will assemble the t-shirt later.
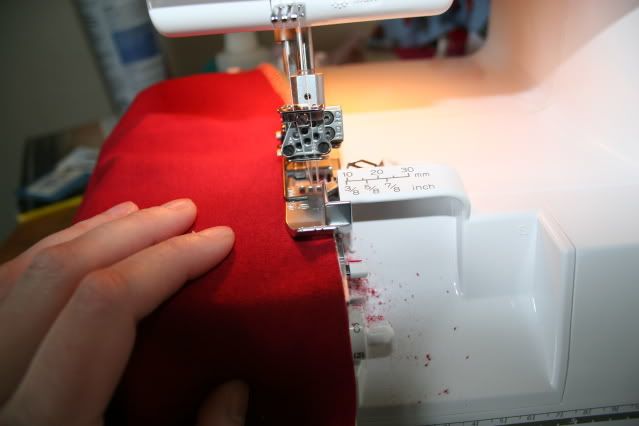
Step 5: Serge or sew (using a zig-zag) partial pieces together.
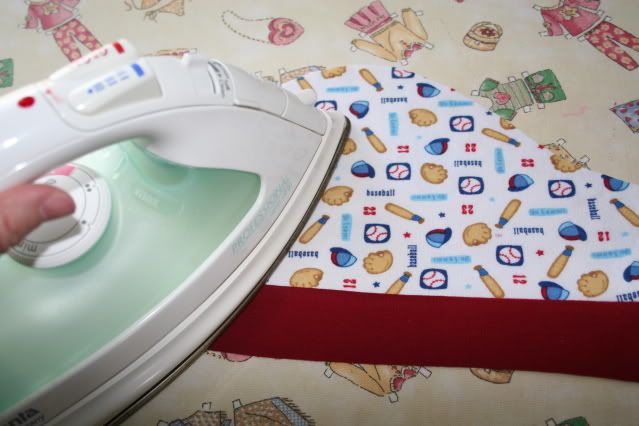
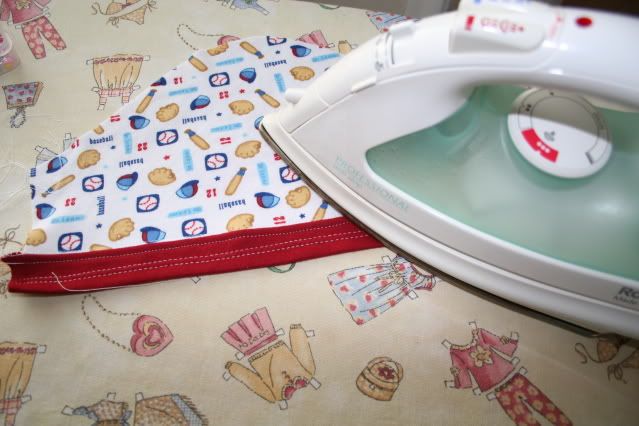
Step 6: Iron.
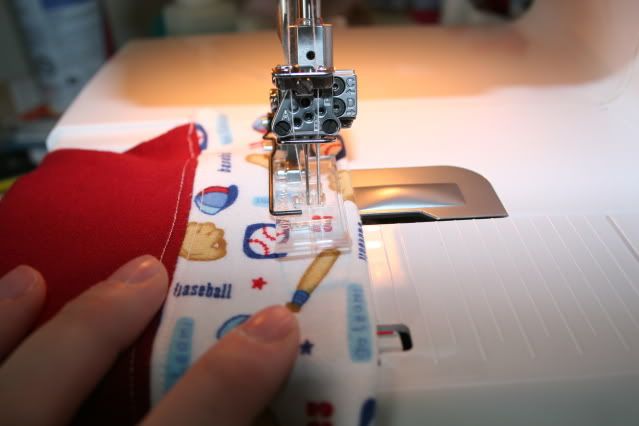
Step 7: Topstitch or coverstitch where the two pieces meet. I also did my sleeve hems and shirt hems while I was in coverstitch mode.
Step 8: Iron again using steam if all fabric is cotton knit.
You should now have 2 finished sleeves, a front, and a back.
Step 9: Assemble your t-shirt according to your pattern instructions. I used extra coverstitching and that*darn*kat's reverse applique tutorial to finish my shirt.
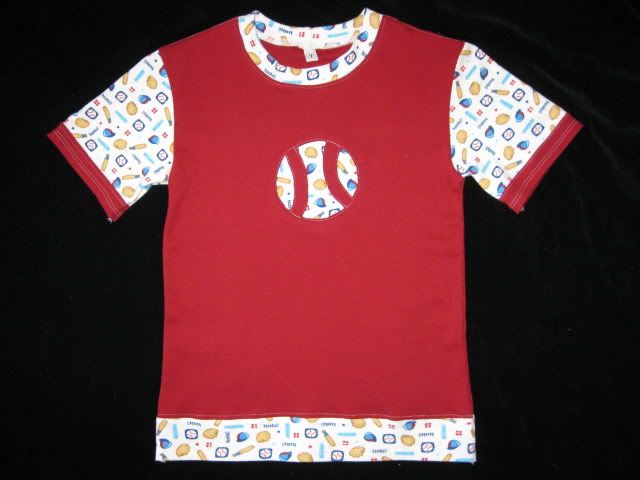
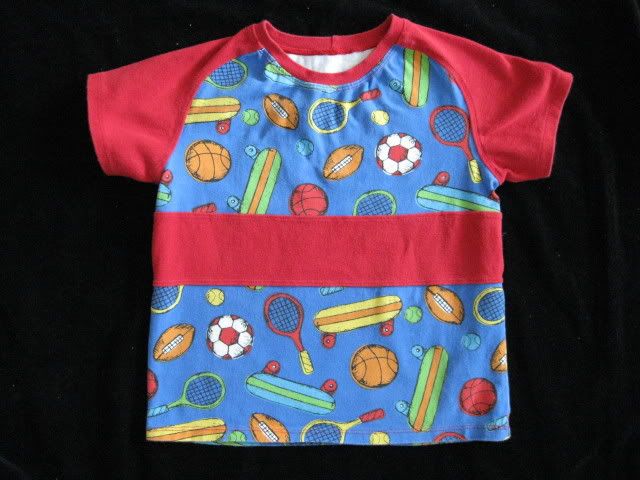
other example
Mel- mom to my two busy B's
My sewing blog-
To view links or images in signatures your post count must be 0 or greater. You currently have 0 posts.
My gluten-free blog-
To view links or images in signatures your post count must be 0 or greater. You currently have 0 posts.


 Reply With Quote
Bookmarks