"UM" Style Hand Bag Sew-Along - in downloads
Okay, I'm going to try to keep this short and precise. Usually those two things don't come hand in hand for me, so this will likely be lengthy. LOL
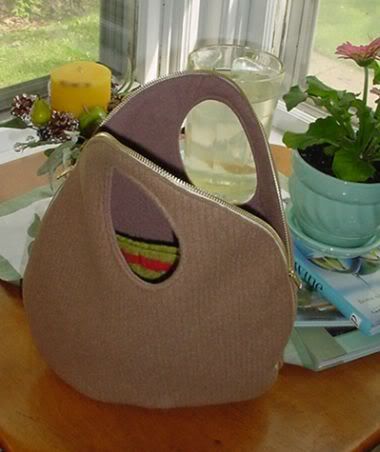
This is my attempt at replicating the Um Handbag by Conphorm: http://www.conphorm.com/carry.html
Step One: Prep & Purchasing
1) Choose your fabric. You'll need 2 layers of fabric. The Comphorm bag uses "industrial wool felt scraps". I have no idea what that is, and I know I don't have it or anything like it. Wool is ideal because of it's weight when felted and that it doesn't have to be edge finished. The closest I could get was this poor boy wool. I felted it more than I usually would (for wool wraps). I think some sort of blanket wool or a dense wool flannel would be more ideal. At the very least, it would save several steps that were necessary because my fabrics were knits.
2) Interfacing. You'll need to use a FUSIBLE interfacing since there are no seam allowances. I used a midweight Pellon interfacing for one layer and craft fuse for the other. I didn't do this on purpose -- I had a cutting mistake and didn't have enough of the Pellon to do the new cutting. I think any heavier weight interfacing would do, but I don't think I'd use Timtex.
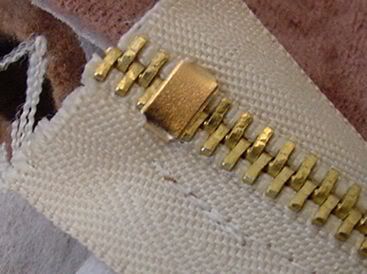
3) Zipper. I got zipper by the yard in the upholstery section at Joann's. You can create the double zipper by purchasing the packaged zipper pulls in the same section (set of 2). This makes for a heavy bag (brass), but it's not too heavy for the wool. If you needed something more lightweight, I believe you can get regular zippers by the yard. This bag took 42" of zipper, for reference.
Just put your zipper stop on one side for now. You won't really know the length you need until you've finished basting the zipper to the lining.

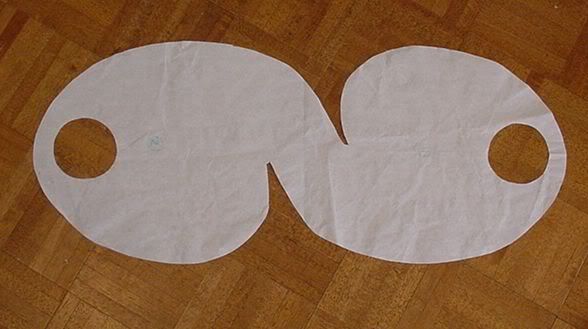
Step 2: Preparing the pattern.
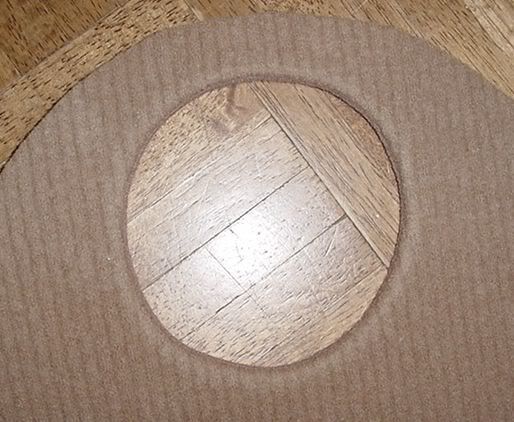
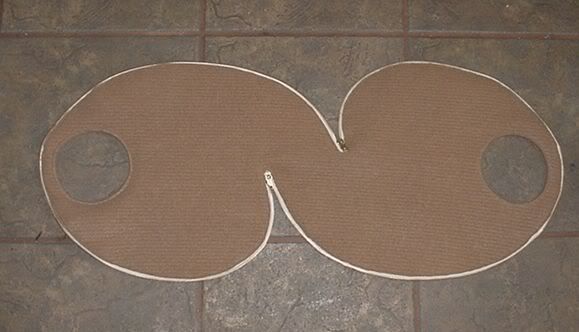
This wasn't hard and it didn't even take that long, so don't be intimidated by the drafting! I just printed out the photos from the site and went to with a pencil and a stack of heavy weight tissue paper (the kind they give you at TJMaxx). I just freehanded the shape and then cut it out. From here there's just a lot of folding in all directions to get everything exactly the same on both sides -- very important. Once I got a symmetrical looking pattern, I cut another and used that to finish the job. It helps to label the sides (1 and 2) or whatever so you know what side to fix if you find that one is off. I seamed up a couple out of tissue paper to make sure the zipper ends were placed properly. Then I sewed a couple more out of unwanted fabric. You'll want to do at least one of these so you can cut the placement for the handles. My handles are NOT right -- they should have been offset so that they lined up when the bag is zipped shut. Mark the bottom of the bag -- you should be able to see my fold line in the picture below, but I should have marked it more clearly. You'll also need to round out the hollows where the zipper stops go so that the fabric curves around it.
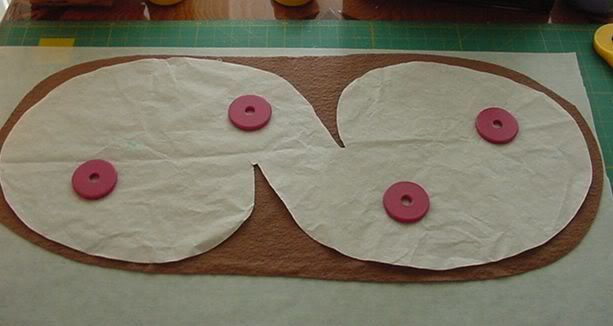
Step 3: Preparing and Cutting the Fabric.
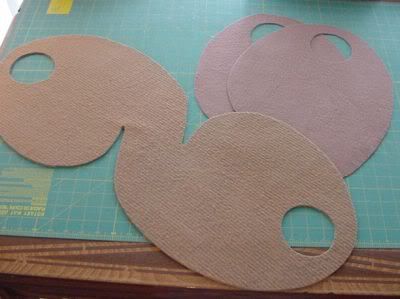
Felt your wool. If using a knit woolen or something that's not densely felted, you'll have to interface the peices. I cut my wool and interfacing in a large oval according to the pattern shape, fused the interfacing and then adhered it. I figured this was easier than trying to cut everything then adhere. Make sure that you have the outer and lining peieces cut correctly. The pattern cannot be flipped -- there's only one right way to do it and I did it wrong the first time. If in doubt, cut your outer fabric and then lay it on top of your lining the way it will be in your finished bag (wrong sides together) and cut the lining using the outer fabric. This will also ensure that your pattern peices are exactly the same.
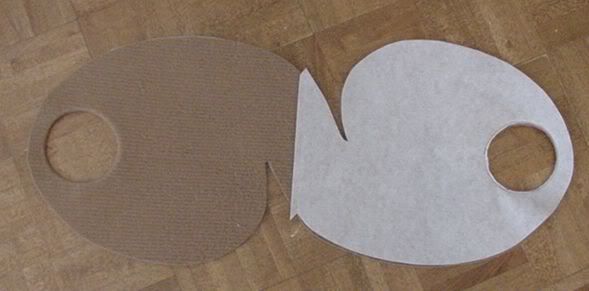
If you want to do turned and topstitched handles, you'll need to do a little work on the lining. If you had the right fabric, you could likely just leave raw edges and avoid this step. I T&T'ed because I felt I needed the extra stability in the handles.
Here's what you need to do to alter the lining: After adhering the interfacing, cut the oval in half. Baste a 1/4" seam and press flat. Place your center fold line (bottom of the bag) on the seam line and cut out your pattern. Remove basting so you have 2 lining peices again.
Step 4: Finishing handles and lining seam.
If you're leaving your handle edges raw (no T&T), you can skip this step and finish your handles after the zipper is installed.
If you're T&T: Put outside and one lining peice RST and seam the opening for the handle. Trim. Turn by pushing lining through handle, press, topstitch. Repeat for other side. Seam the bottom of the lining peice by using a 1/4" SA, as you did when you basted it in the last step.
Lay everything out, press, trim, etc.
The first picture shows one handle finished and the other before having been turned.
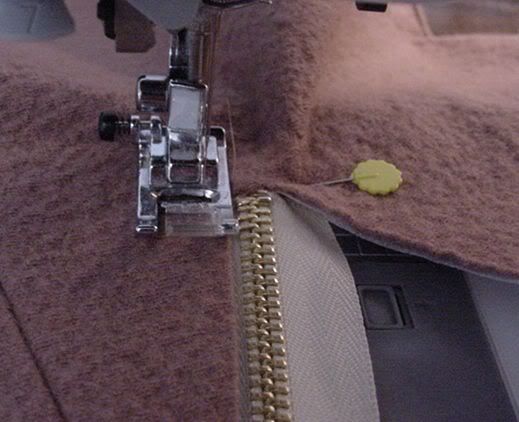
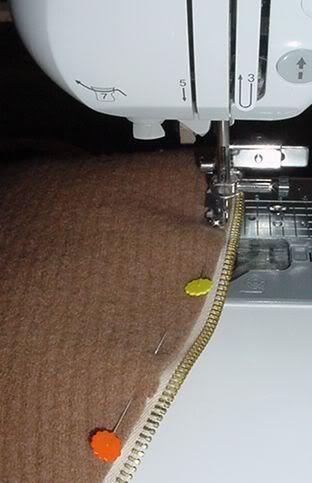
Step 5: Installing zipper to LINING.
Start with the end of the zipper that has the stopper and arrange it on one of the zipper hollows. I used my invisible zipper foot because, while my regular foot worked, I found it was too wide up near the handles. (The pic below was taken before I switched feet.)
Continue around the bag until you get to the zipper hollow on the other side. Cut the excess zipper off, leaving a bit. Install zipper stop.
Unzip the zipper, flip the tape to the other side and stitch it on.
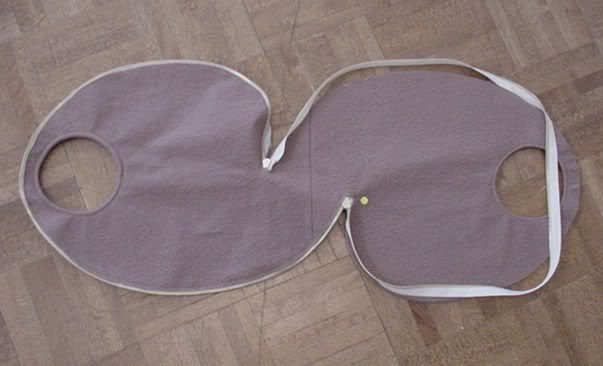
Step 6: Attaching the outer layer.
Lay outer layer on top of lining, with zipper sandwiched in between. I did some copious pinning here to be sure that everything was lined up and I didn't come across a bubble. Stitch all the way around.
Step 7: Zip, UnZip and amaze your friends!
I hope that's clear. PLMK if you have any questions. I wasn't sure where to put this so feel free to move it if necessary...
~*Meagan*~
Mama to my Sweet Pixies ~ Sophie Elise and Ellory Quinn
To view links or images in signatures your post count must be 0 or greater. You currently have 0 posts.
To view links or images in signatures your post count must be 0 or greater. You currently have 0 posts.
|
To view links or images in signatures your post count must be 0 or greater. You currently have 0 posts.


 Reply With Quote
Bookmarks