User Tag List

Results 1 to 5 of 5

Thread: Slipcover Sew-along. . .part 3

  1. #1
    Join Date
    Aug 2007
    Location
    Georgia
    Posts
    5,814
    Downloads
    18
    Uploads
    0

    Slipcover Sew-along. . .part 3

    Today, we’re going to finish putting together the base of the slipcover. This can be accomplished with 2 seams plus the addition of a skirt or ruffle. Let’s get started.

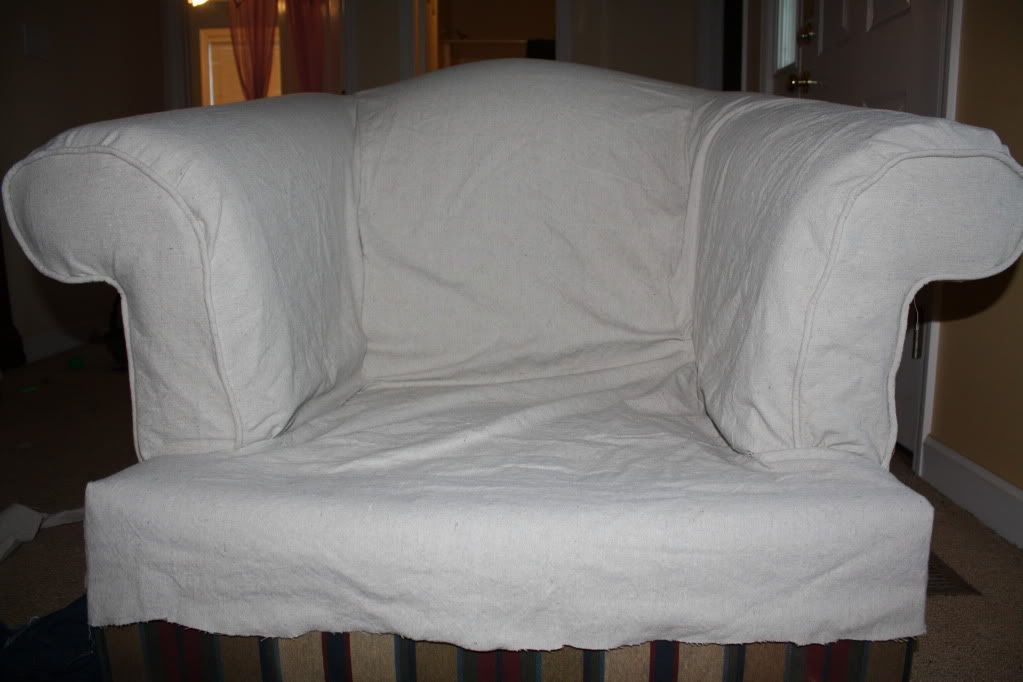
    At this point, you should have the part of the slipcover you put together in part 1 and both armrest covers that you put together in part 2 on the chair, wrong sides facing out.

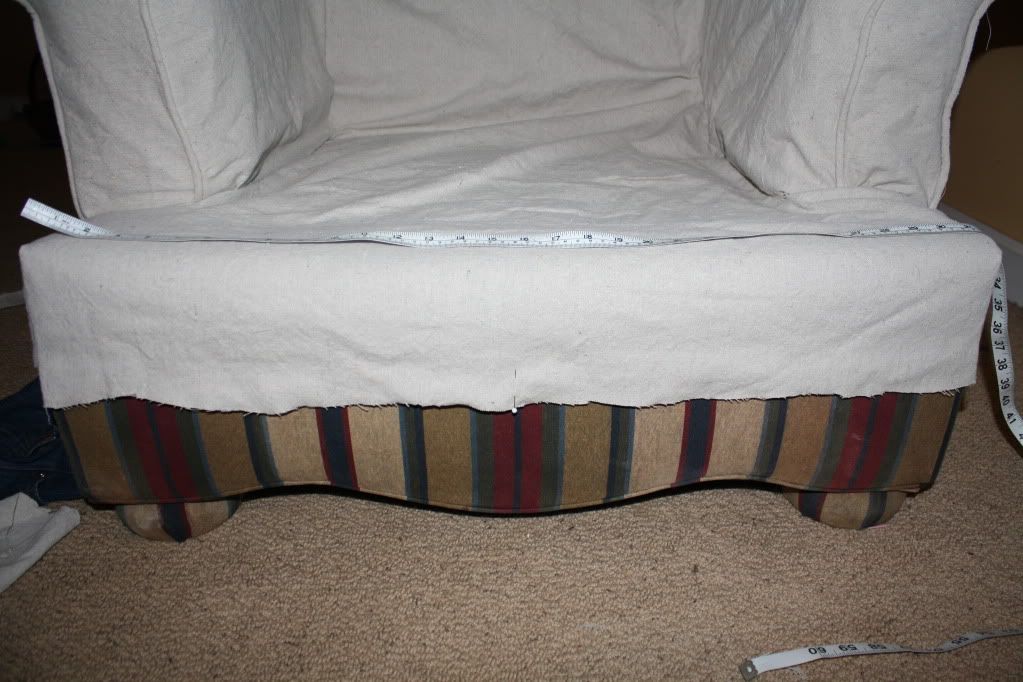
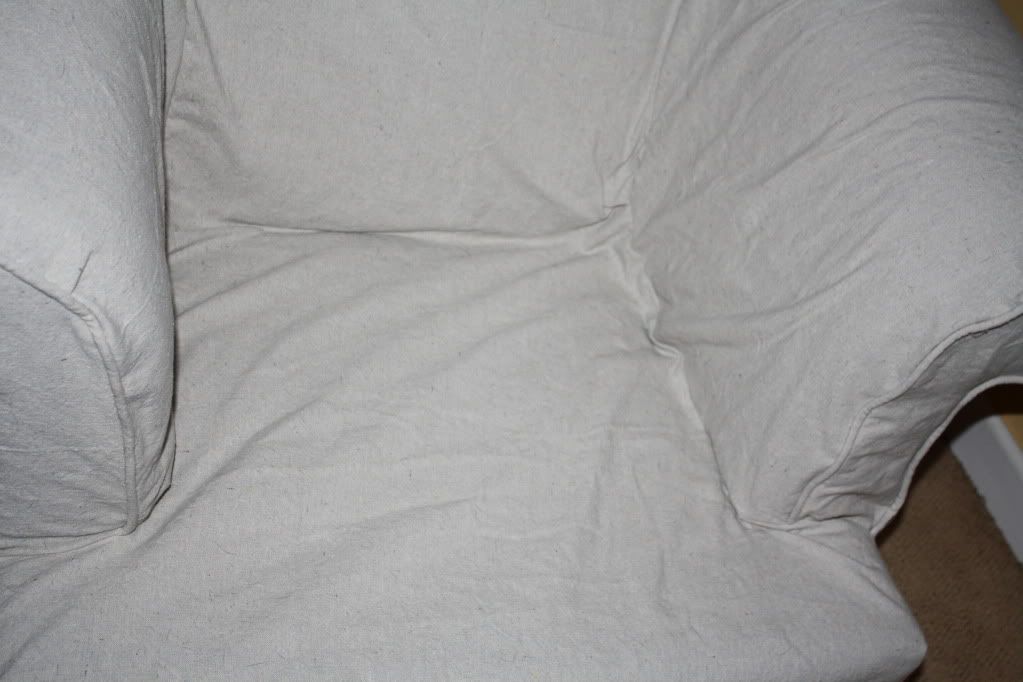
    Pin the following seams. (You should basically be able to do this all as 1 seam that goes up the front side,


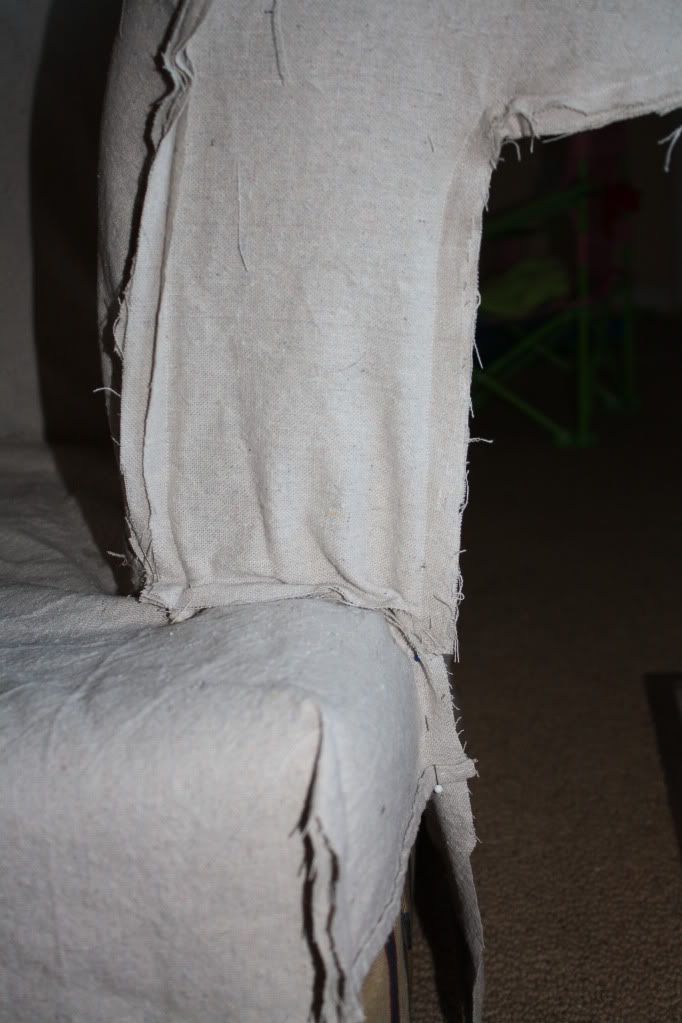
    in front of the armrest, down the side under the seat cushion,


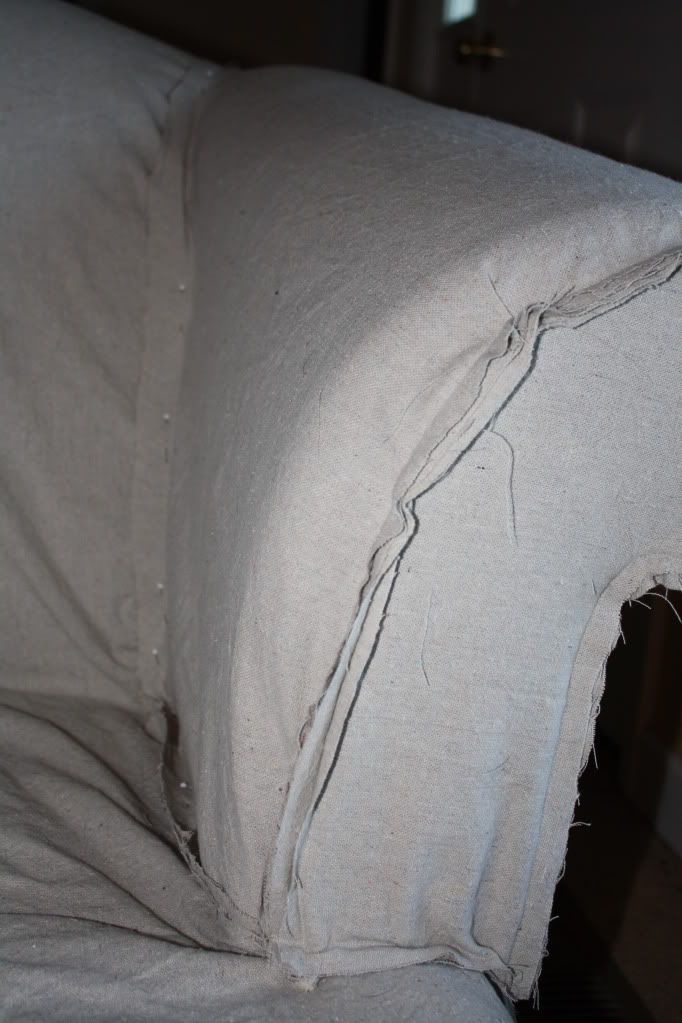
    up the side of the back cushion,


    over the top side of the back,


    and down the back sides. )


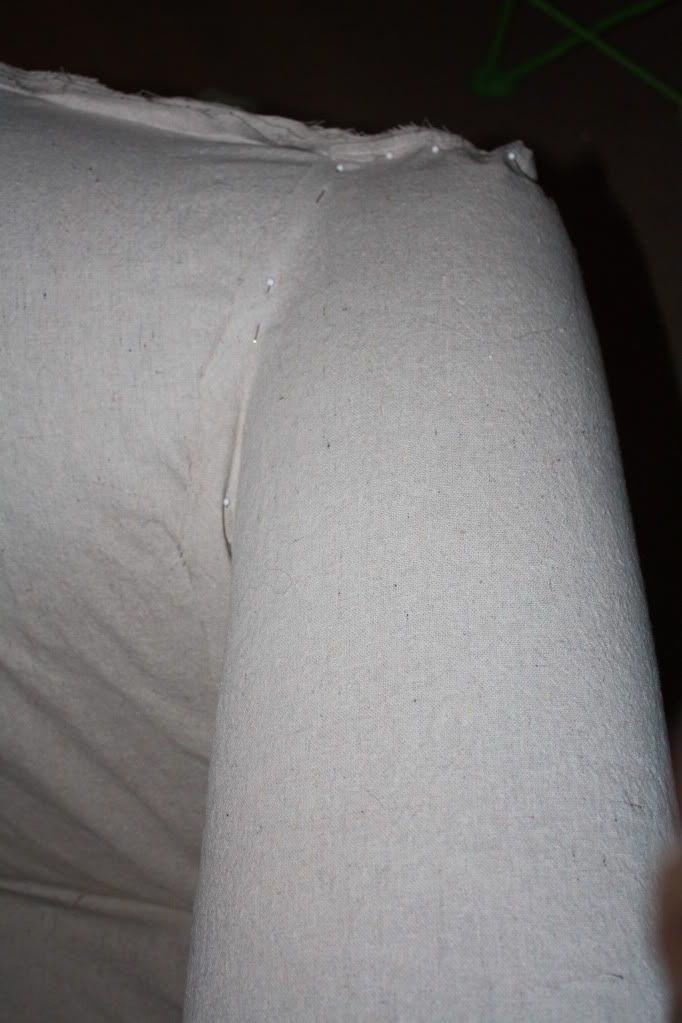
    You can either trim the seam allowances to ½-inch or use the pins you put in as your seam markings and sew along them. Either way, sew your seam(s). (You have a decision to make here. The slipcover made this way will be VERY form-fitting. It will be difficult to stretch on, but I’ve been able to do it. Your other option is to leave one of the seams that runs down the back open and attach ties or Velcro.)

    Now, turn your slipcover right side out and put it on your chair. If you sewed both back seams (like I did), it may take some shimmying and rearranging to get it to fit.


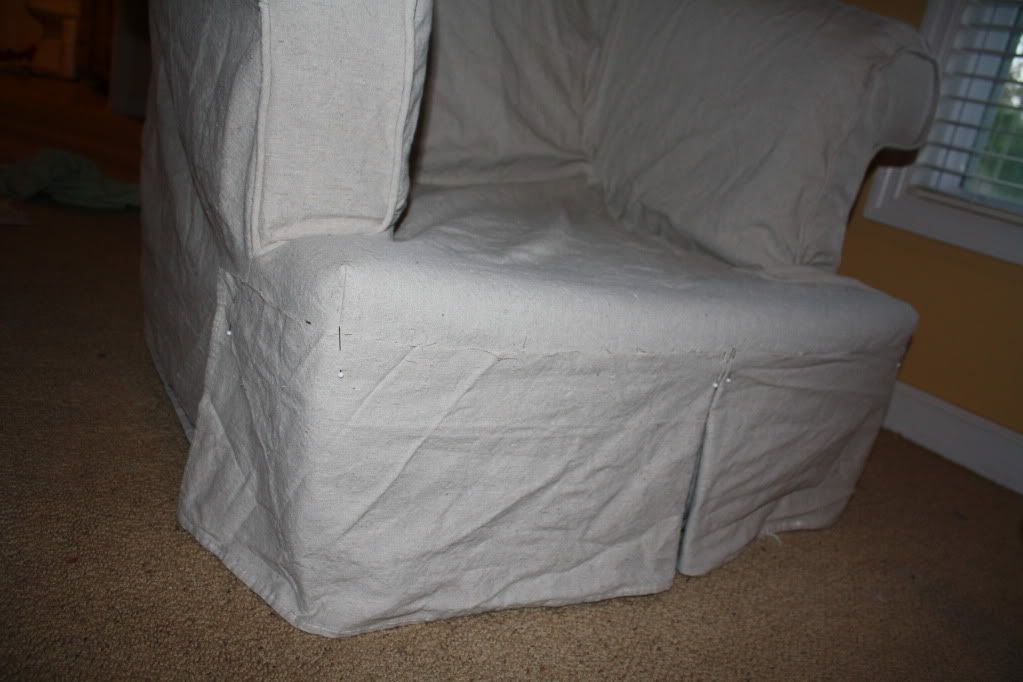
    Decide whether you want to do a straight skirt, a pleated skirt, or a ruffled skirt across the front. I decided to do a straight skirt with one big box pleat in the front. I reused the original hem from another side of my drop-cloth to make this easier to do. Cut a piece a little longer than the width you need by the length you will need plus seam allowance. Mark the center front if you want to put a pleat there.


    Find the center of your ruffle and pin it in place. Pin the sides in place and then fashion your box pleat by bringing the excess to meet in the center front.


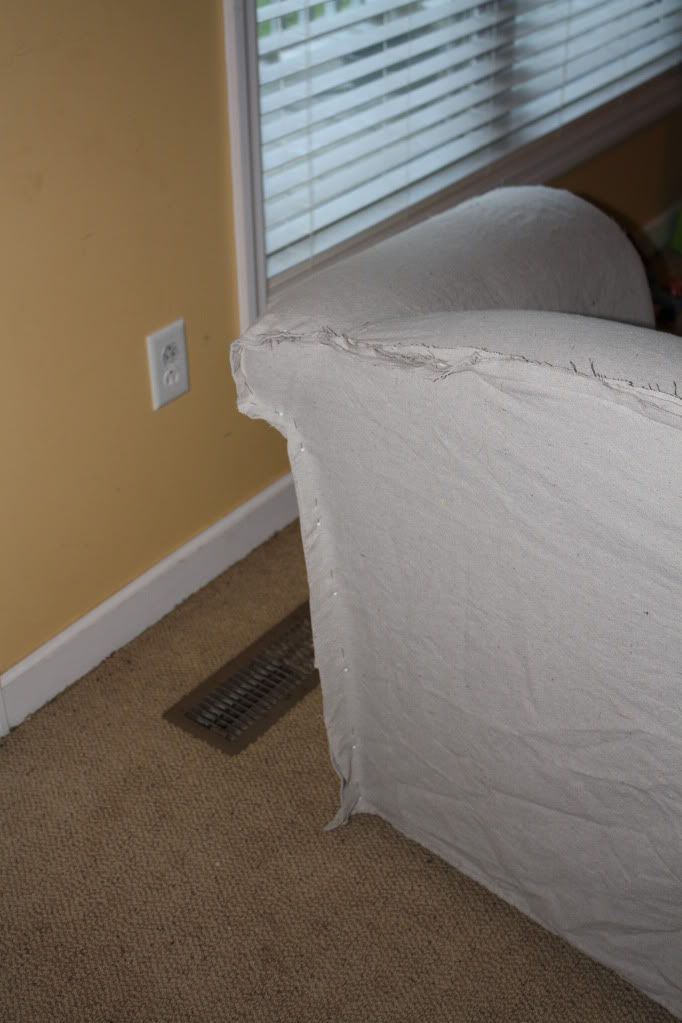
    Go sew it on and bring your slipcover back to your chair and put it in place. (You won’t need to take it off again.)


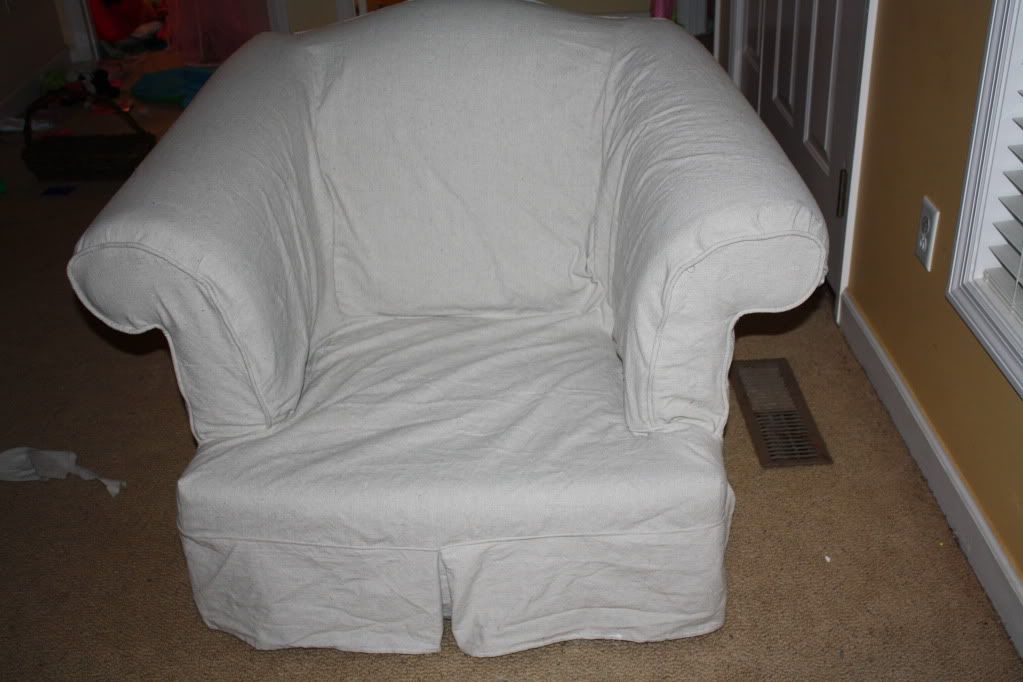
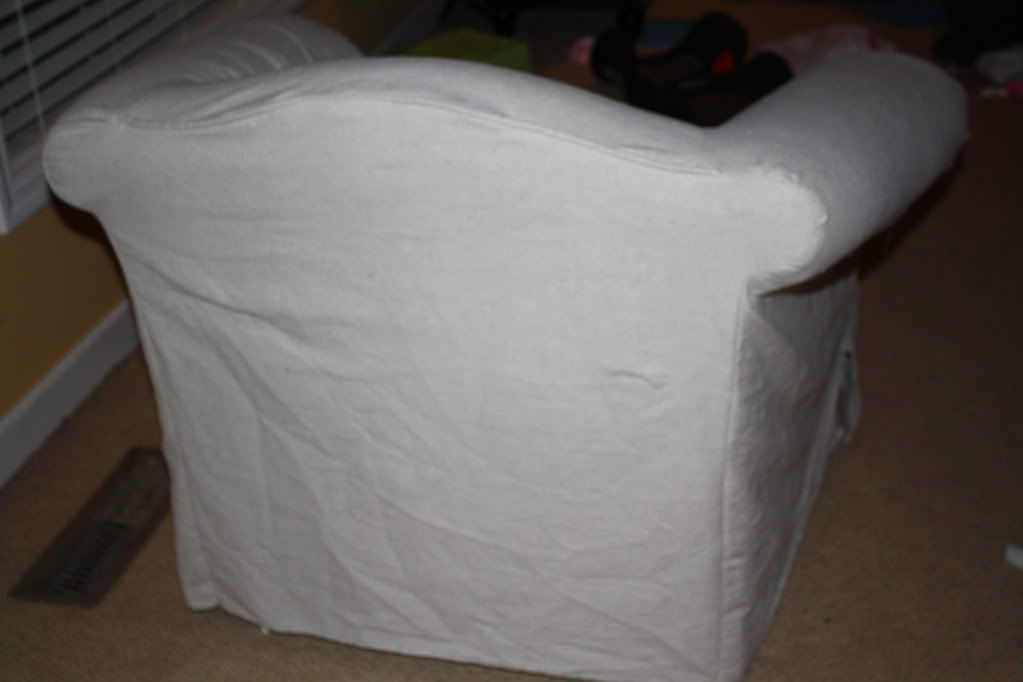
    If you have some wrinkles in the bottom of the chair, don’t sweat it. They will be covered up by your seat cushion.
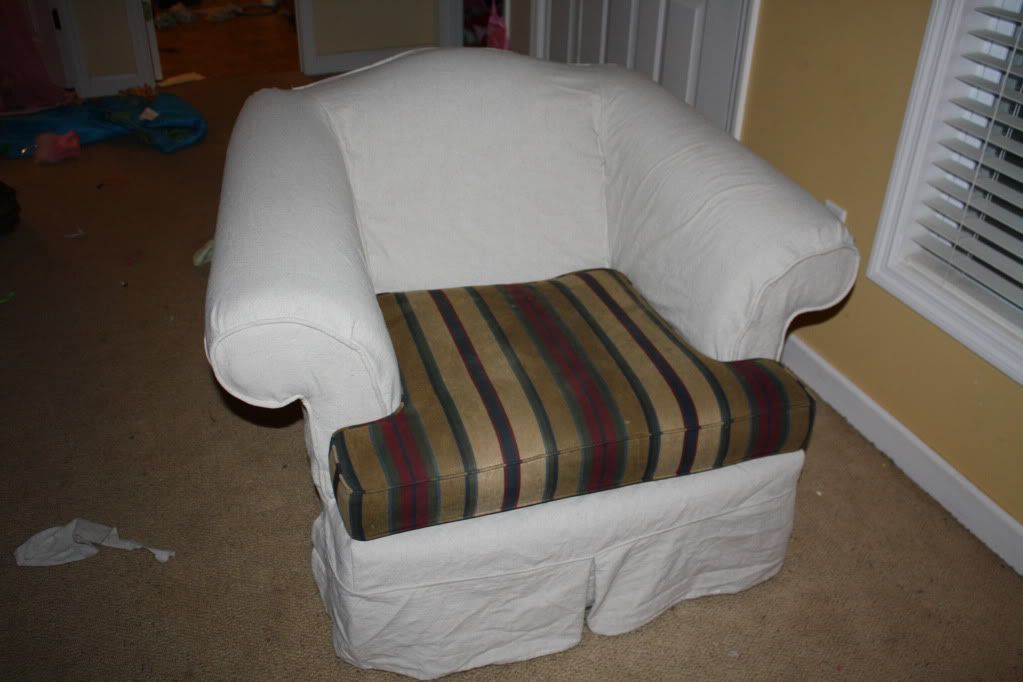


    Cool beans, huh?!

    Tomorrow, we'll cover that ugly seat cushion!
    Sandra
    DH (Love of my Life)
    DD#1 (Allie, 8)
    DD#2 (Jenna, 5)
    My machines: Janome TB30, Juki Pearl MO-655 Serger, Brother 2340CV, Janome Memorycraft 350E


    To view links or images in signatures your post count must be 0 or greater. You currently have 0 posts.


    To view links or images in signatures your post count must be 0 or greater. You currently have 0 posts.

    To view links or images in signatures your post count must be 0 or greater. You currently have 0 posts.

    To view links or images in signatures your post count must be 0 or greater. You currently have 0 posts.

  2. #2
    Join Date
    Jan 2011
    Location
    Essex, UK
    Posts
    3,019
    Downloads
    18
    Uploads
    0

    Re: Slipcover Sew-along. . .part 3

    Wow, this is looking great.....I'm really tempted to tackle my ugly sofa now! Thank you for putting this up here!

    To view links or images in signatures your post count must be 0 or greater. You currently have 0 posts.

    To view links or images in signatures your post count must be 0 or greater. You currently have 0 posts.


    Lisa, barefoot & barmy mum to Jamie and partner to Russ, my Music Man...and Rheumatoid Arthritis fighter!


    To view links or images in signatures your post count must be 0 or greater. You currently have 0 posts.


  3. #3
    Join Date
    Aug 2007
    Location
    Georgia
    Posts
    5,814
    Downloads
    18
    Uploads
    0

    Re: Slipcover Sew-along. . .part 3

    For those of you who are wondering:
    1. Yes, my carpet definitely needs cleaning, but I didn't realize it was quite that bad!!
    2. I will iron it when I finish . I usually press as I go when I sew, but I find that pressing at the end works for a slipcover.
    Sandra
    DH (Love of my Life)
    DD#1 (Allie, 8)
    DD#2 (Jenna, 5)
    My machines: Janome TB30, Juki Pearl MO-655 Serger, Brother 2340CV, Janome Memorycraft 350E


    To view links or images in signatures your post count must be 0 or greater. You currently have 0 posts.


    To view links or images in signatures your post count must be 0 or greater. You currently have 0 posts.

    To view links or images in signatures your post count must be 0 or greater. You currently have 0 posts.

    To view links or images in signatures your post count must be 0 or greater. You currently have 0 posts.

  4. #4
    Join Date
    Jun 2009
    Location
    The beach
    Posts
    856
    Downloads
    14
    Uploads
    0

    Re: Slipcover Sew-along. . .part 3

    Ok, I am through this step. Though mine isn't quite so pretty. I was using a serger and I busted the loopers! Not a huge deal as it was a cheap machine that was given to me. Anyhow, I'm back to using my regular sewing machine and I rushed through and wasn't as precise as I could have been. But I have the main cover done. Time to start on the cushions!

    To view links or images in signatures your post count must be 0 or greater. You currently have 0 posts.
    Cindy


    To view links or images in signatures your post count must be 0 or greater. You currently have 0 posts.

  5. #5
    Join Date
    Aug 2007
    Location
    Georgia
    Posts
    5,814
    Downloads
    18
    Uploads
    0

    Re: Slipcover Sew-along. . .part 3

    Can't wait to see it!
    Sandra
    DH (Love of my Life)
    DD#1 (Allie, 8)
    DD#2 (Jenna, 5)
    My machines: Janome TB30, Juki Pearl MO-655 Serger, Brother 2340CV, Janome Memorycraft 350E


    To view links or images in signatures your post count must be 0 or greater. You currently have 0 posts.


    To view links or images in signatures your post count must be 0 or greater. You currently have 0 posts.

    To view links or images in signatures your post count must be 0 or greater. You currently have 0 posts.

    To view links or images in signatures your post count must be 0 or greater. You currently have 0 posts.

Posting Permissions

  • You may not post new threads
  • You may not post replies
  • You may not post attachments
  • You may not edit your posts
  •