Ottobre 4/10 #4 'Pupu' overalls
A photo tutorial showing how to sew the lining to the shell, "note that pants legs are not placed within one another."
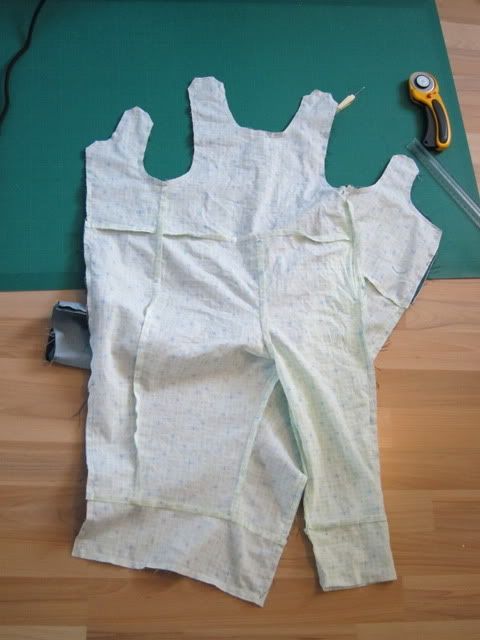
OK, so you have sewn your shell together. You have sewn your lining together. And now you come to the Joining Shell and Lining part of the instructions. You've pinned and stitched front edges, neck edges, arm holes, and left bottom leg edges. So far so good.
I did this with a light-weight green denim, that looks pretty light on the reverse side and a gingham-print cotton for the lining. Just so you know what you're looking at.
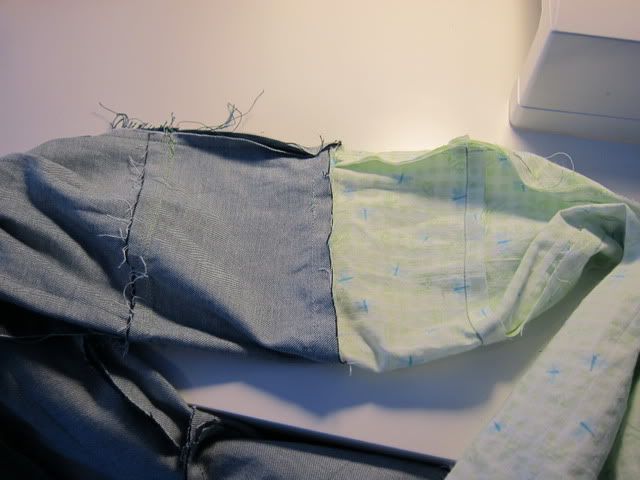
You will have something like this, when looking at the lining side of your overalls:
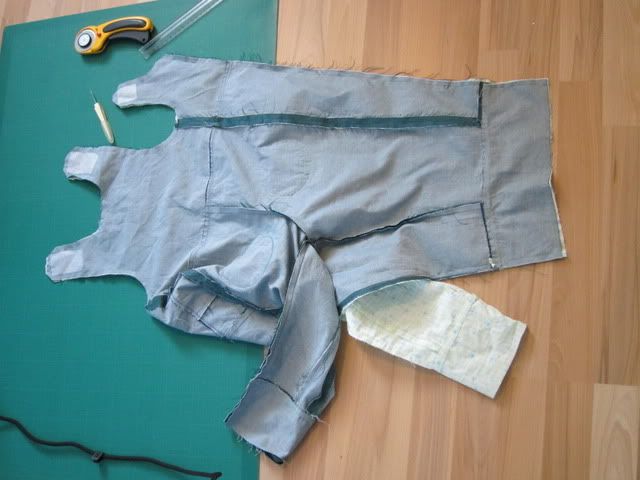
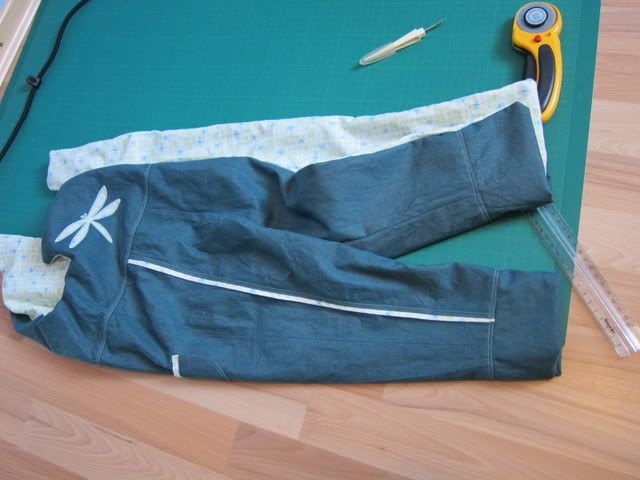
And here is the shell side:
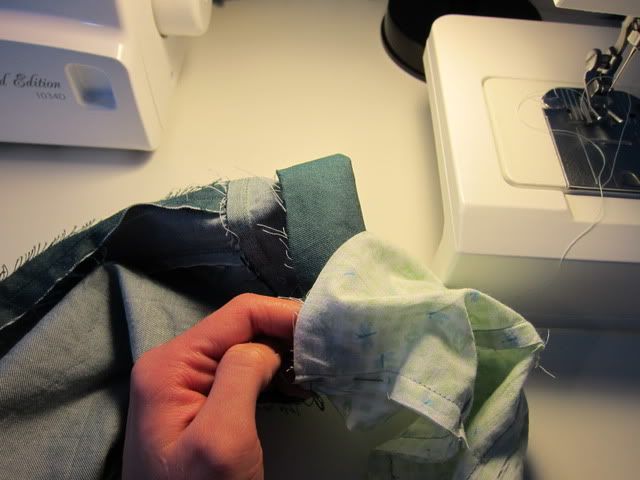
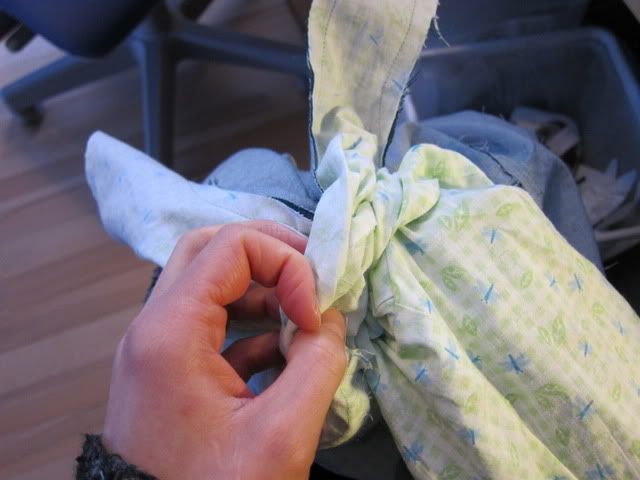
So now the question is, how do you sew the right bottom leg edges together without inserting the legs within one another?!?!!!
In a totally counter-intuitive move, you put the two legs together sort-of across the rest of the garment. Right sides together, so I found it easiest to make little cuffs:

Line your 'cuffs' up, and sort of roll one side over the other:

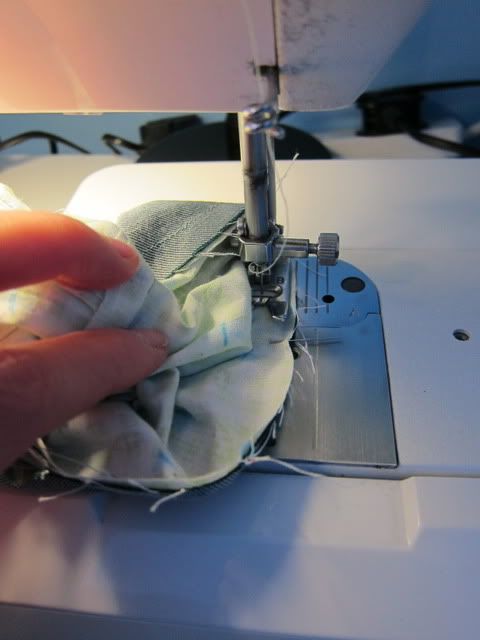
Making sure to keep your raw edges even, pin the two legs together all the way around:
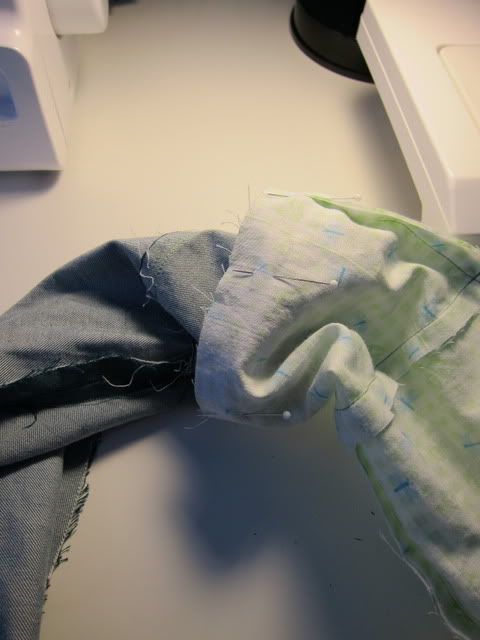

And sew! Be careful to keep your two layers of fabric flat, and, especially with little bitty sizes, to only catch two layers of fabric at a time! You don't want to sew the pant leg closed!
When you're done, you will have something like this:
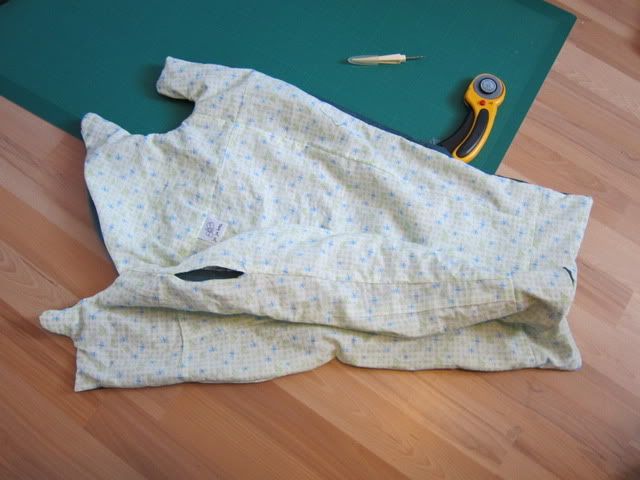
Now, turn right side out through the hole you left in the side seam of the lining:
It really does all come out, and you get a nice tidy pant leg!

(OK, it will be tidier after you press and topstitch.)
Lining side, almost all done:
Shell side, almost all done:
Really all done! (Note I didn't use closures all the way down the left front as suggested by the pattern and have added extra cuff sections for length.)
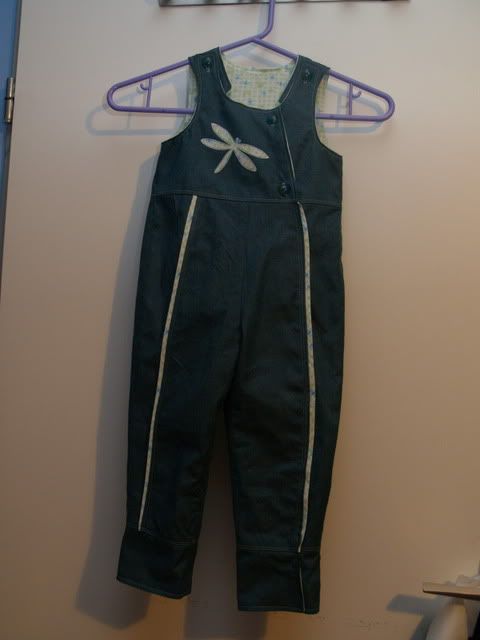
Ta-da! 
Expat Repatriating mama to two three!!!
To view links or images in signatures your post count must be 0 or greater. You currently have 0 posts.
New baby born at home, April 2014
(Disclaimer: He's bigger than that now)


 Reply With Quote
Bookmarks