Snowman Applique'd Shirt - in downloads
I made a big batch of these for a family that wanted matching shirts for a photo :-)
So follow along with my photos and make your own. I apologize for switching back and forth between the two colored shirts (purple and navy) it makes it a little confusing.
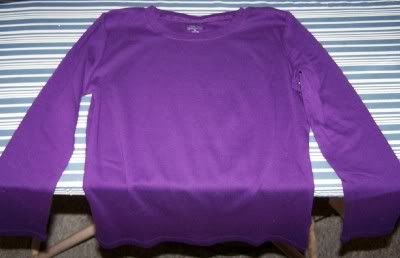
Step 1 - Purchase a ready made shirt blank. I have good luck at Target finding good quality, reasonably priced shirts. (I prefer American Apparel but i often don't have time to wait for a co-op or wholesale order).
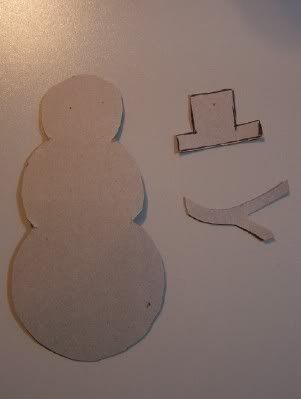
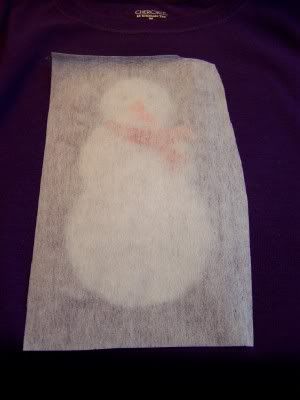
Step 2- Cut out patterns for your applique pieces. This is the pattern for the snowman, the hat & the scarf.
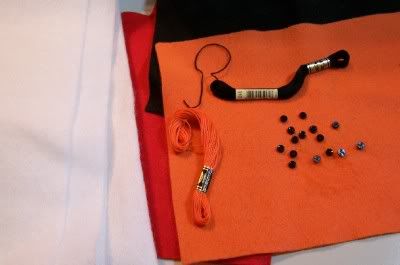
Step 3 - Gather embellishing supplies. I do a lot of hand sewing of the features and i use embroidery floss for that. I also use felt pieces for the scarf, hat & nose. I also use some tiny little buttons. For the main snowman I used fusible fleece, it's got such a nice fuzziness to it that it makes a neat snowman. Alternately you could use a fleece or flannel (you'd need to apply some kind of fusible webbing to it though).
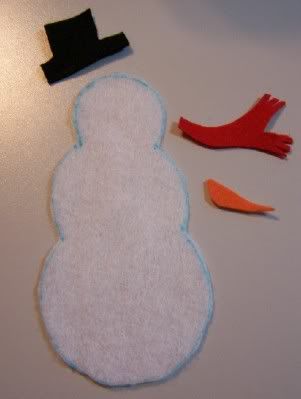
Step 4 - Cut out pieces.
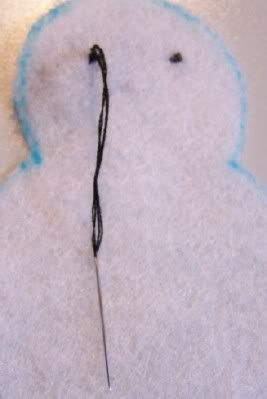
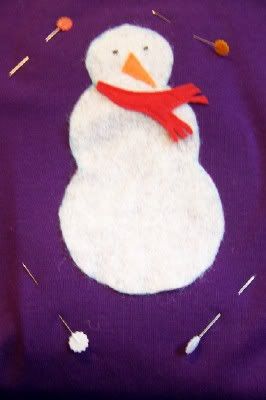
Step 5 - Embroider the eyes.
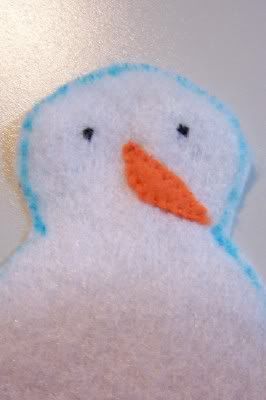
Step 6 - Hand sew (or machine if you want i guess) on the nose.
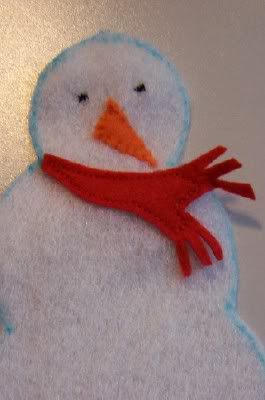
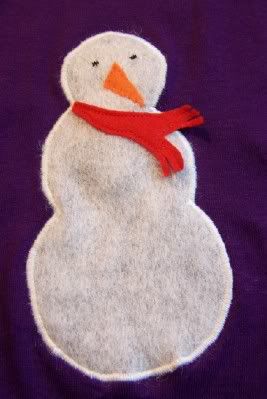
Step 7 - Sew on the scarf. Important DO NOT sew too close to the edge of the snowman or when you go to satin stitch around the snowman the scarf will be in the way.
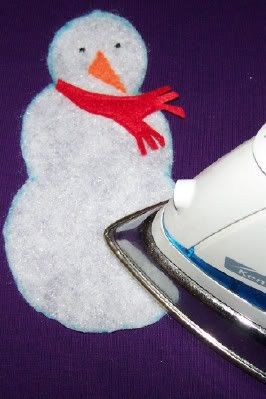
Step 8 - Iron on the snowman piece. Be careful to adjust your iron as needed based on the content of the materials you are using. You can also use a pressing cloth if desired to protect the applique.
Step 9 - Measure and cut a piece of tear away stabilizer. Make sure it's big enough to cover and hang over the snowman. (Also note - cut it large enough above the snowman to act as stabilizer for the hat later on, i forgot and had to put another little piece under the hat).
Step 10 - Pin stabilizer under the design.
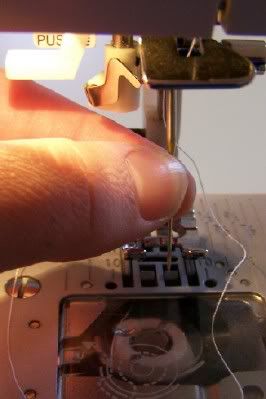
Step 11 - Change your machine needle to a stretch/knits needle. Trust me, it just works a LOT better than a sharp needle :-)
Step 12 - Set your machine to satin stitch, i use my middle width one at 4.0mm. Alternately you could use a wide zig zag set to a low stitch length to get the same effect.
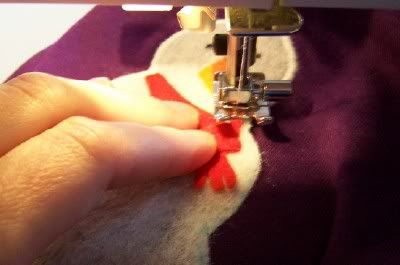
Step 13 - Stitch all around the snowman w/ white thread (or matching if you make a different colored snowman). Make sure you pick up the edges of the scarf as you go around.
Step 14 - Clip your threads and check to make sure it's securely stitched down. If there is a problem with your stitching or fusing it's much better to know now vs. later on.
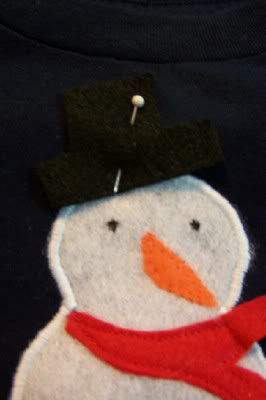
Step 15 - Pin hat in place. I find he looks pretty cute with it tilted off to one side. Note - I do not use any kind of fusible webbing for the hat, i just make sure i completely satin stitch it down. If it makes you more comfortable you could add some fusible webbing or a dot of glue to the hat, make sure if you use glue it's dry before you sew it.
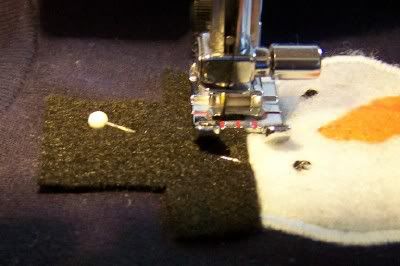
Step 16 - Sew down the hat. I again use the middle width satin stitch setting on my machine.

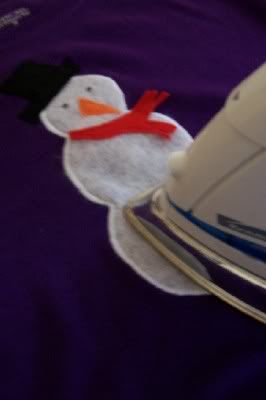
Step 17 - Press your design so that it lays nice and flat. Again being sure to adjust your iron as needed, and/or use a pressing cloth.

Step 18 - Sew on buttons. I found these great tiny little black buttons, you could also use larger multicolored buttons, or none at all. (alternately button eyes would be cute as well)
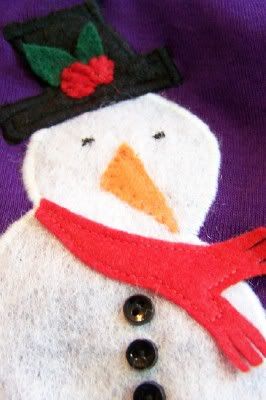
Step 19 - Add any other embellishements you desire. Because the shirts were dark and that hat is black I added a couple little holly leaves/berrys for more color. I just cut them from felt and hand sewed them on.
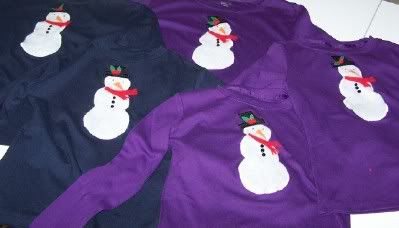
Step 20 - Admire your work! Consider making them for all those on your holiday list :-)
Sarah
To view links or images in signatures your post count must be 0 or greater. You currently have 0 posts.
To view links or images in signatures your post count must be 0 or greater. You currently have 0 posts.
Wife to John & mommy to princesses Faith & Olivia
To view links or images in signatures your post count must be 0 or greater. You currently have 0 posts.
To view links or images in signatures your post count must be 0 or greater. You currently have 0 posts.
To view links or images in signatures your post count must be 0 or greater. You currently have 0 posts.


 Reply With Quote

Bookmarks