zippered pants fly + waistband tute - DL

this is going to be a super long one, sorry! 
This is for DS and its an Otto pattern. Since pants are all construct based on pattern, I am concentrating solely on sewing the zipper fly.
Outer fabric is 100% virgin wool which imo is a bit scratchy, so I lined it with quilting cotton.
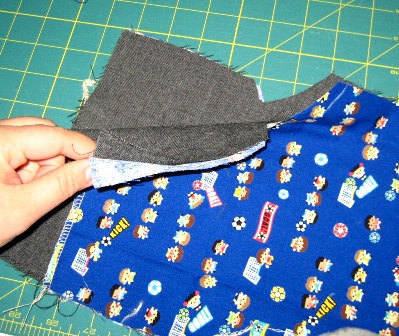
1. Lay the front pieces opposite of each other like this.

2. Finish the seam edges on each pant front leg (mine is 2 layers b/c its lined).

3. Dont get confused here, the printed fabric should be your wrong side if you are NOT lining the pants. Place the front panel, right side together.
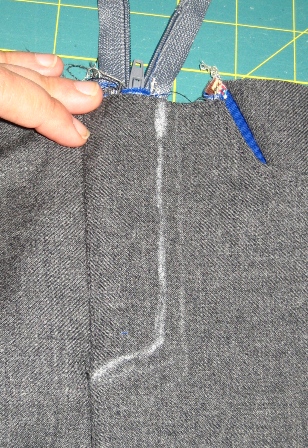
4. Transfer the markings from the pattern to the leg panel, all pants pattern will have this kind of markings. The small white horizontal line is where the zipper should end. Now sew basting stitch from the waist to the small horizontal line. Then adjusting your stitch length back to *normal*, backstitch, then continue to stitch down the curved part. does that make sense?

5. Flip it on the wrong side (in my case, printed fabric), and iron on both the wrong and right side.
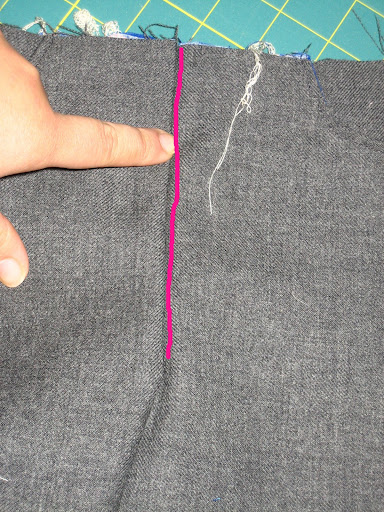
6. After pressing, flip it to the right side and edgestitch on the centre of the fly, where i've drawn a pink line in the pic.
7. How do I know where to stop? you can either have a mark on the right side or in my case (lazy way), once its all bunched up, means I am nearing that small white line..LOL

8. Now the scary part. I use 7" zipper b/c i got a ton on sale for this purpose aka sewing pants fly. it doesnt matter if the zipper is longer than the fly. if you've never apply zipper before, i suggest either pin the zipper on or use wonder tape.
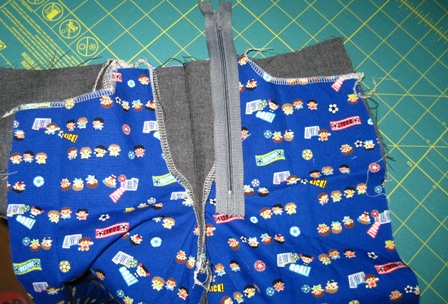
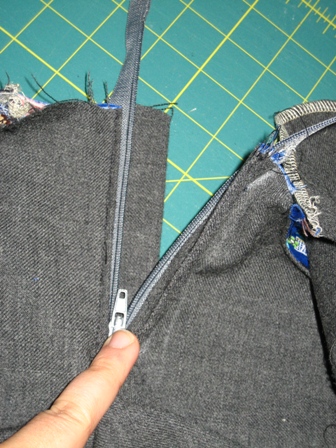
9.Put the zipper (teeth side down) on the fly flap. Align the left side of the zipper to the centre seam of the fly.
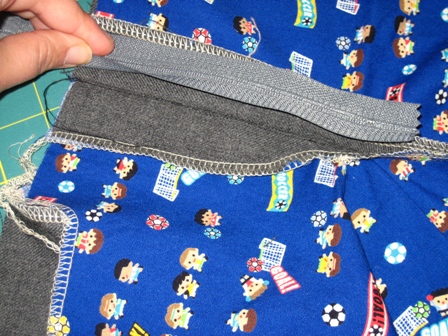
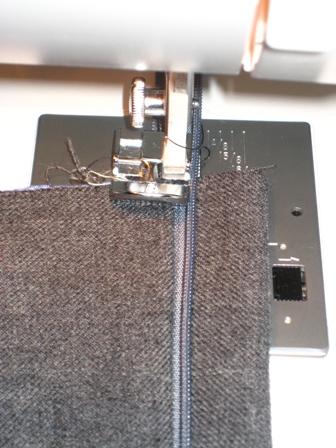
10. Move all layers to the left, except the right pants fly (where the right side of the zipper is on), then using a zipper foot, sew the right side ONLY.

11. and you want to stop where you mark the small white line.

12.Repeat the same on the other side. remember to move all the layers now to the right and only sew the left side of the zipper on the left side of the fly. and you will end up with something like this. it will seem like you are doing something wrong, but you are not, patience .gif "a (11)")

13. remember that basting stitch you sewed in step 4, now its time to carefully rip that.

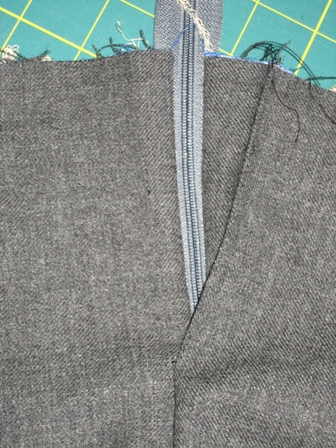
14. the fly should now look like this  half way there..
**if you dont want fly shield, skip to step 19.
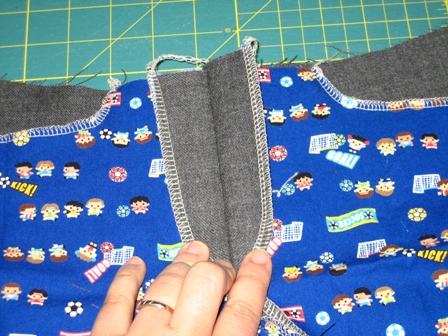
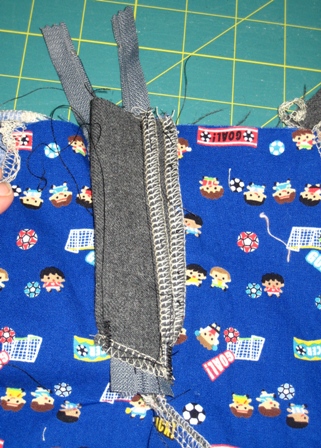
15. If you are adding a fly shield,finish the edges on the fly shield. now align the fly shield to the back edge of the left zipper. pin/baste accordingly.

16. Stitch a straight line as close as you can to the zipper teeth.
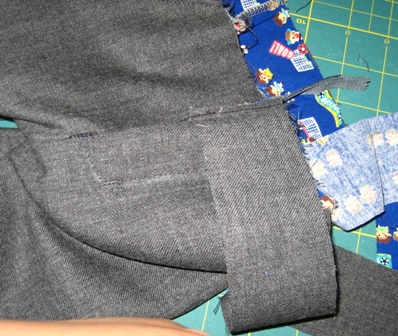
17. then take the fly shield template and place it on the front of the pants and draw it on the pants like this. ignore the lighter line, i made a mistake there.
18. tricky part, open the zipper, making sure you move the fly shield away from the right side of the zipper, topstitch on the chalked line.
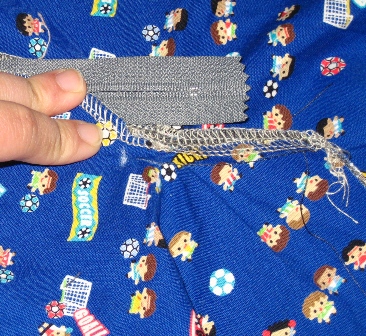
19.Flipping it on the right side, sew bartacks accordingly. this is how the bartacks looks on the wrong side for me. ignore the unclipped threads.
20. if you are not adding a fly shield, sew a straight stitch as close and as further down as you can on the left zipper. then repeat step 17 & 18 for topstitching.

21. And you've done your first zippered pants fly, congratulations! .gif "A (01)")

Onwards for waistband.
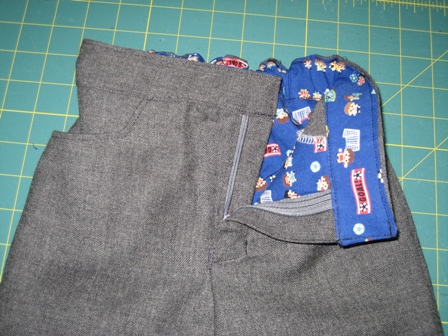
22. Most pattern comes with waistband pattern, I like mine a certain width, so this is cut at 2" width. Join the outer and inner fabric on both edges so you will have a tube.

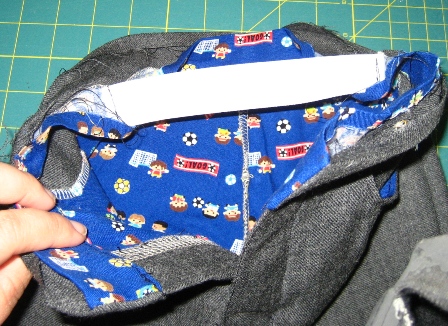
23. Confusing here, sandwich the pants waist in between the outer and inner fabric. Outer fabric right side + pants right side and inner fabric right side + pants wrong side. make sense? make sure the stitched ends are as close as you can to the pants top fly opening. This is also where you will cut the extra zipper, make sure the zipper head is zipped down before cutting the zipper. you dont want to have to rip the zipper and redo b/c you cut off the head 
24. align the waistband with the pants waistline and serge all around.

25. flip it over and this is what you will see. the raw edges of the pants waist is now hidden inside the waistband.

26.topstitch all around the bottom of the waistband. if you see the printed fabric, you can see the stitching. I then fold 0.5" all around the top waistband fabric and iron it.

27. I want to add elastics at the back so it fits my skinny ds better. His waist is 18", I cut 5" for the back elastics. I tack both ends of the elastics on the wrong side of the printed fabric.
28. Then using my sewing machine, I stitch the top waistband close, making sure I dont catch the elastic. By topstitching, I've also made a casing for the elastic.

29. How the back looks like.
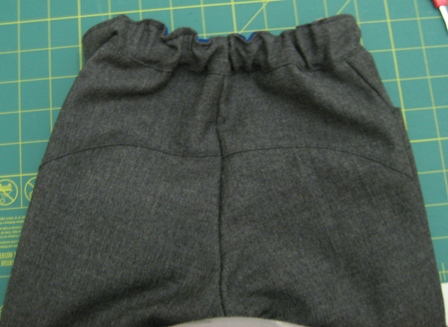
30. and I am done, how the front looks like. The only thing left is to hem it and add buttons for the front waistband.
hope this will help someone. thanks!.gif "A (02)")
mom to a 12 years old girly girl and a 10 years old smarty pants little man.
All typos are hereby blamed on my iPad.


 Reply With Quote
Bookmarks