Using a Double Fold Binder for your CS Machine-dwn
The ability to do pretty binding was a huge reason I bought my CS machine, a Brother 2340CV. Mine, however, did not come with a binder, and the one made for the machine was very spendy. So, I bought an industrial one on ebay for $20.
It came, but there were no instructions. Hmm. Undeterred, I scoured the internet for tutorials on how to use the thing. I found a couple of excellent ones, including this one:
http://www.cedesign.com/familyphotos...der/index.html
However, I still was having problems, in particular how to get the fabric fed into the binder properly. So, I set aside a couple of hours to figure this out, did lots of experimenting, and eventually came up with a way that works very nicely. This tute is the result.
Keep in mind that this is how I do it, on my particular machine. Your machine and binder attachment may be different!
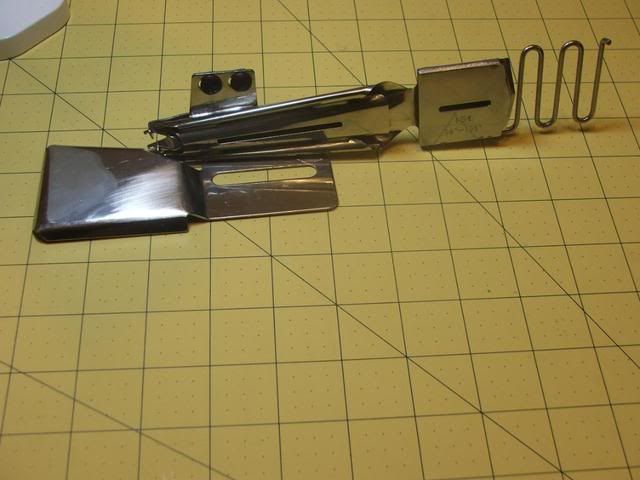
1. The Equipment
You will need your binder. There are different sizes - mine uses 1.5" strips.
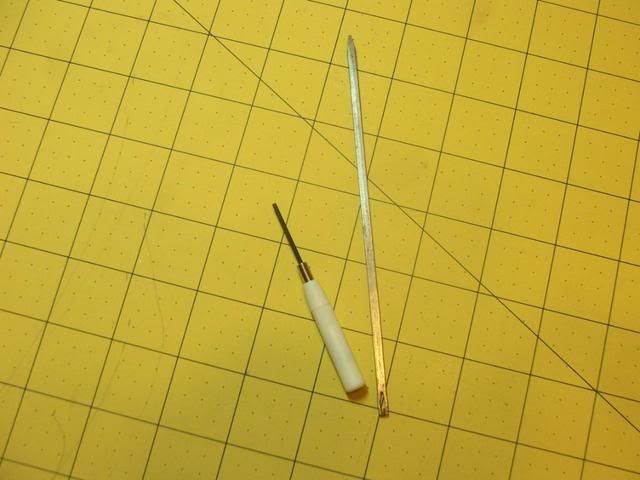
You will also need some sort of tool like an awl, crochet hook, or even a seam ripper will work:
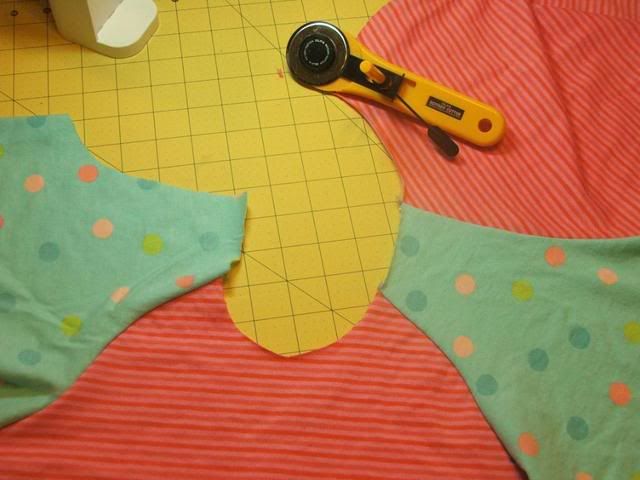
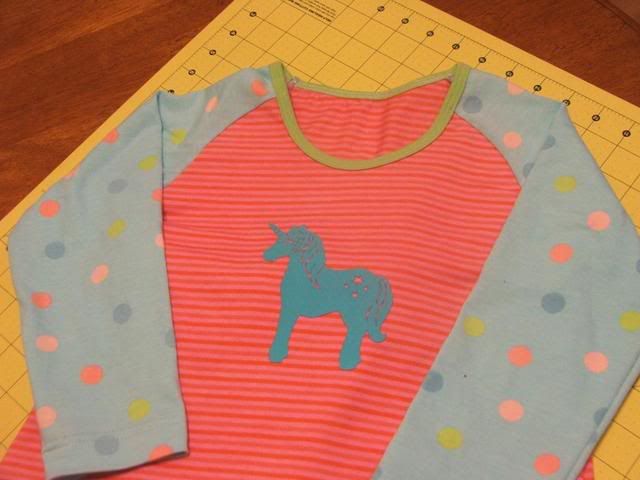
2. Your garment
If you are doing a neckline, leave one shoulder seam undone. Here is my naked neckline, a raglan:
3. CS machine set-up
After lots of experimenting, I found that using the center and right needles work best.
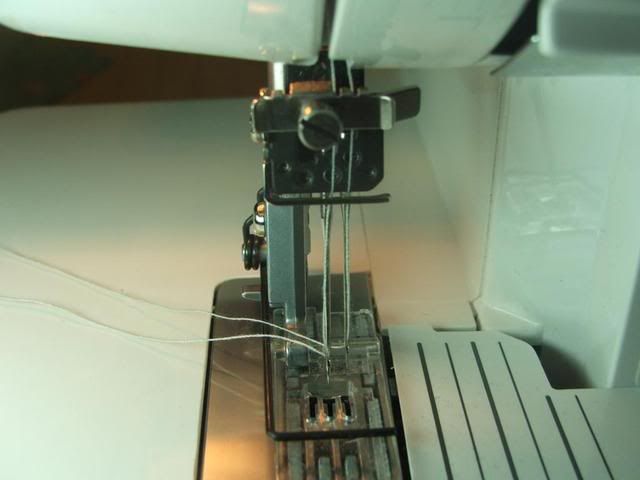
My tensions are set at 4.
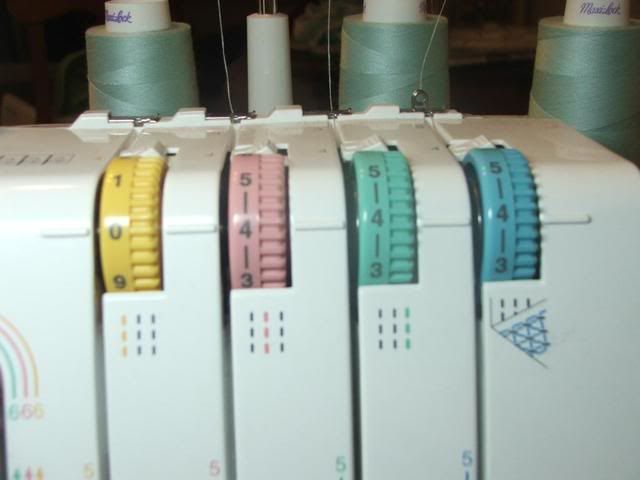
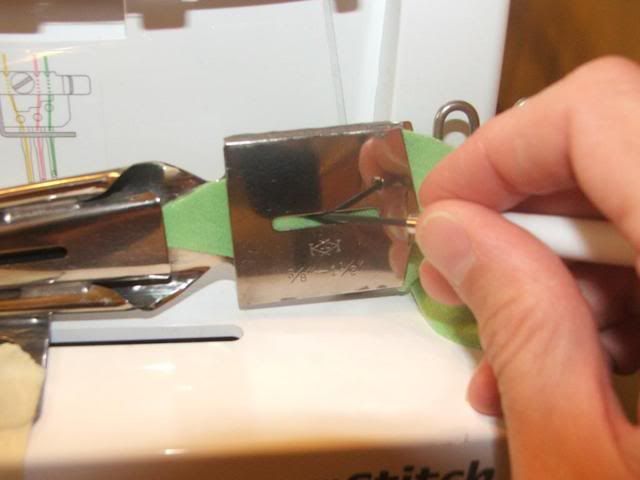
On my machine, I like to place the binder so that the large rectangular section lines up with the "crack" on my CS machine:
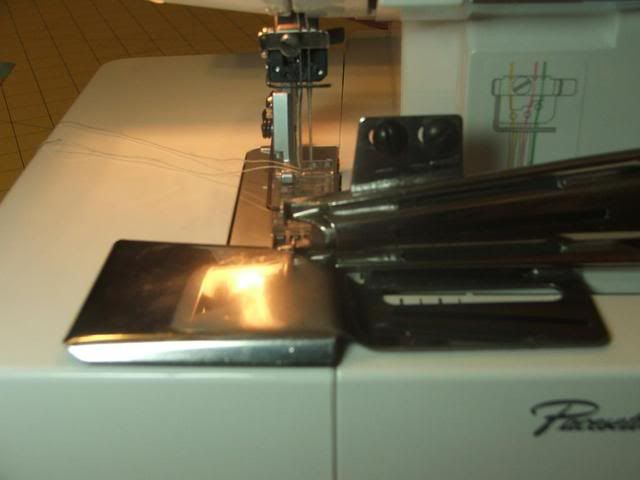
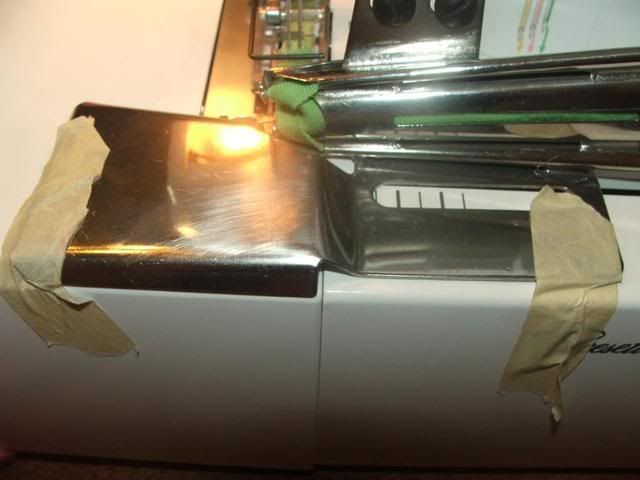
Now, if your binder came with your machine, you will probably be able to attach it securely with screws, or something similar. Mine did not come with that. Something like sticky-tack will work too, but I use a slightly more rustic approach:
4. Cutting your binding strips
Like I said, my binder uses 1.5 inch strips. I know because that is stamped onto it. Luckily, I have a ruler that is exactly 1.5 inches across:

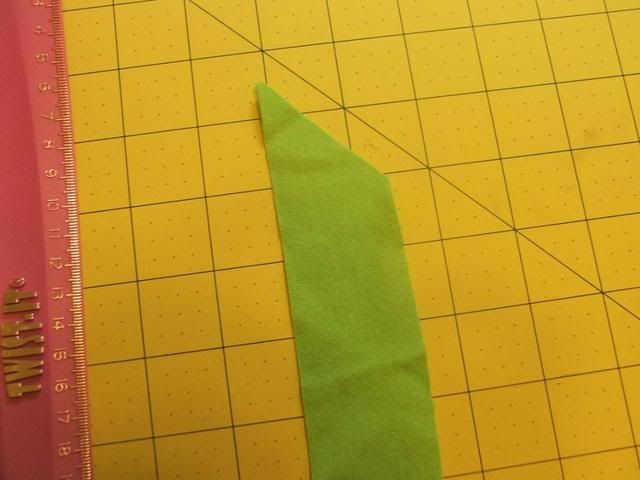
I disregard any pattern pieces for binding, and just cut very long strips - longer than I really need (just in case!).
Cut one end on an angle, for easy feeding into the binder:
6. Inserting the strips into the binder
With the WRONG side of the fabric facing you, take your awl, or long, thin tool of your choice, and push the strip through the binder:
I didn't take a picture of it, but make sure you feed your binding through the serpentine guides at the other end, although not all binders have these.
Once you get it all pushed through, it will look something like this:

Fold the raw edges in toward the center, then fold in the middle (to make it look like binding), and then put it under the pressure foot, making sure that the strip goes between the two prongs of the binder:
Make a few stitches to get it going, and to ensure that the stitches are where you want them. If not, you may need to adjust the placement of your binder a little.
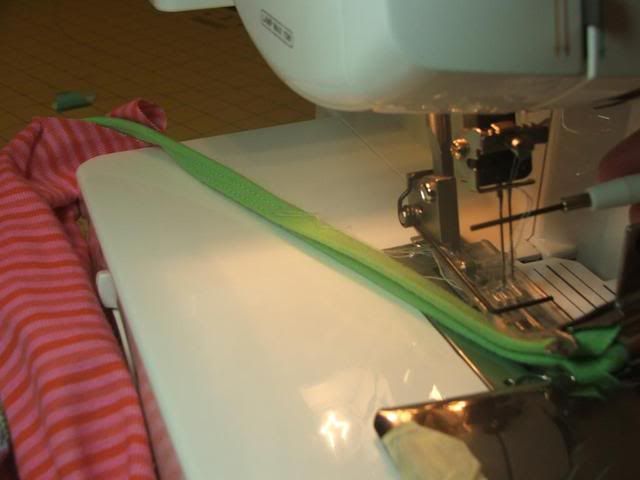
7. Time to bind!
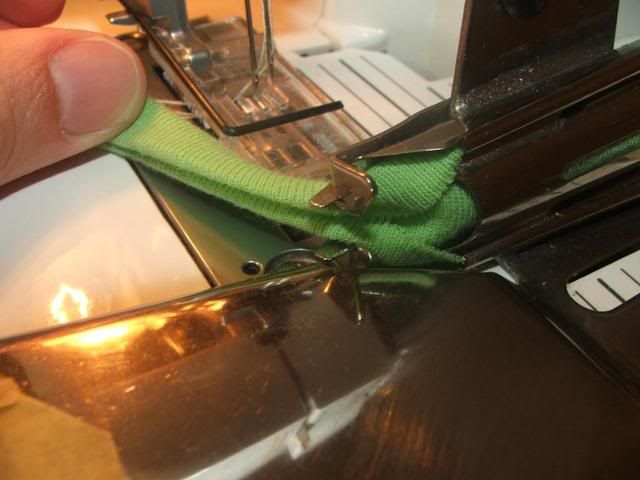
Here is where I had the most trouble at first: getting the garment fed into the binding. I finally figured out this method.
Take your little awl, or long, thin tool, and "stuff" your fabric into the crack right in front of the prongs of the binder:

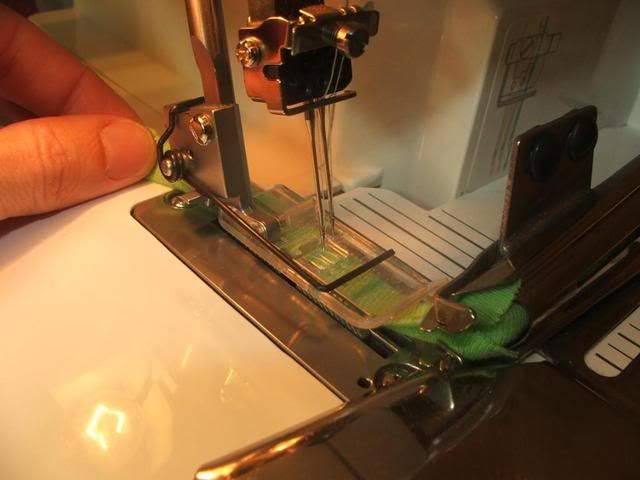
Start sewing. The fabric will be fed under the pressure foot, along with the binding.
You may need to stop occasionally to "stuff" it again - just don't "stuff" it too hard, or you may create tucks in the fabric.
Also, a word about going over seams in the garment. Many people hammer down their seams to get them nice and flat before putting them through a coverstitcher. That works.
But I have found that my CS machine can smell my fear: if I start to panic as a seam is coming up, and slow down, it will hiccup going over that seam. I have found that if I just keep going at a rapid clip, it goes over the seam no problem. I guess it needs some momentum to get over it! Also, make sure there are no serger threads hanging out over that seam - my CS machine HATES loose threads.
8. You're done! Almost!
Once you finish with your binding, you can just cut off any extra at the beginning and end.
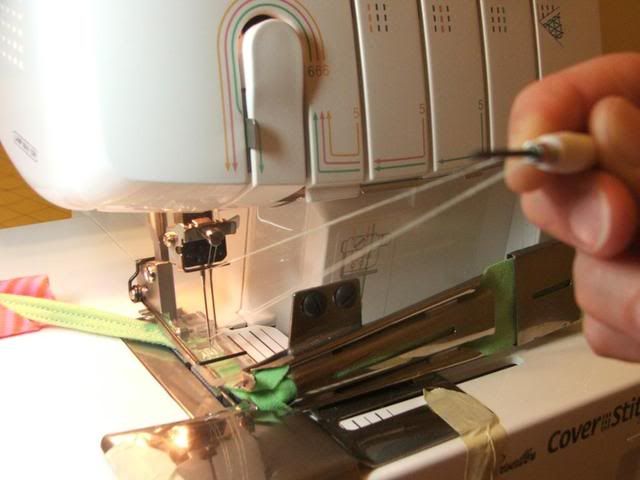
But while I'm here, I'm just going to quickly review how to end your CS and get your fabric out - and this goes for any coverstitching you do (especially on a Brother), not just binding.
Turn all your tensions to zero. Take your awl (such a handy little tool!) and put it behind your threads; then pull them out about 6-8 inches:
Pull your garment out - straight back - keeping your awl behind the threads so they don't get tangled:
Cut the needle threads, then pull your garment free. The needle threads will go to the bottom of your garment. Now, some people will tie these threads: If I am going to stitch over it anyway, I just trim them.
9. The finished product
Here is what it looks like, from the right side:
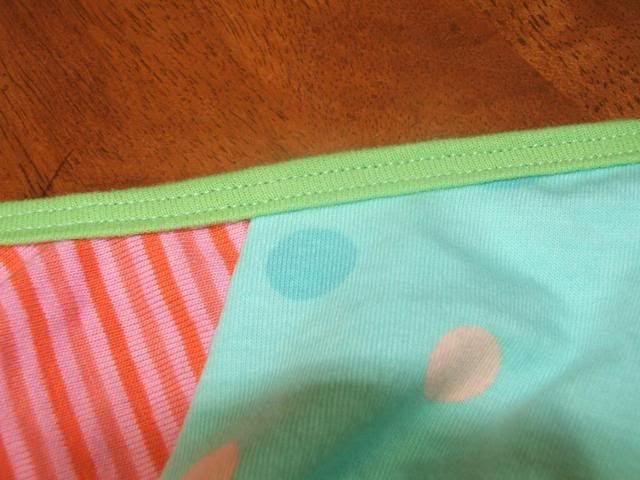
And from the inside:

10. Closing the seam
Some people just serge that other shoulder seam right away: I have problems doing this. My serger always grabs one side and pulls it so that one edge of my binding sits higher than the other.
To get around this, I always stitch down the width of the binding only (not the whole seam) on my sewing machine before putting it through the serger.
Then of course I lock my serger threads by pulling them through with an upholstery needle.
Once you have that seam all finished, it's a nice idea to tack down the seam with a bar tack or zig zag stitch, across the width of the binding. This way, the seam will sit flat.
DONE!
I hope this helps anybody who has a binder that has been sitting, lonely and forlorn, in a drawer for months...
carolyn
My Blog:
To view links or images in signatures your post count must be 0 or greater. You currently have 0 posts.
My Fabric Store:
To view links or images in signatures your post count must be 0 or greater. You currently have 0 posts.


 Reply With Quote
Bookmarks