Turn pants into a skirt (img heavy) PART 2
Now you are going to take your pants and lay them flat, letting the legs go their natural flow. Youve already tacked down the seams in the back and front and formed a V in the skirt. Youre ready now to make the panels.
I recommend laying something between the layers to keep from pinning the bottom layer to the top (ask me why
hate sewing things together because of stupid pins!)
I would usually say to use your quilters cutting mat, but seeing as how I didnt want to go upstairs, I grabbed the next best thing: The new Victorias Secret Catalog
I had to smile a little inside thinking about what I was doing to the pages
those super skinny models that look NOTHING like me, LOL.
Anyways..back to the tutorial!!!
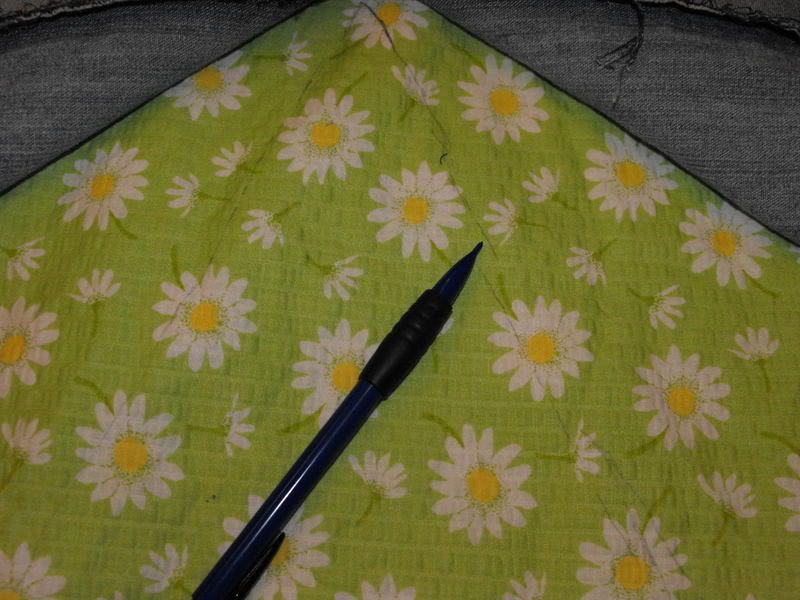
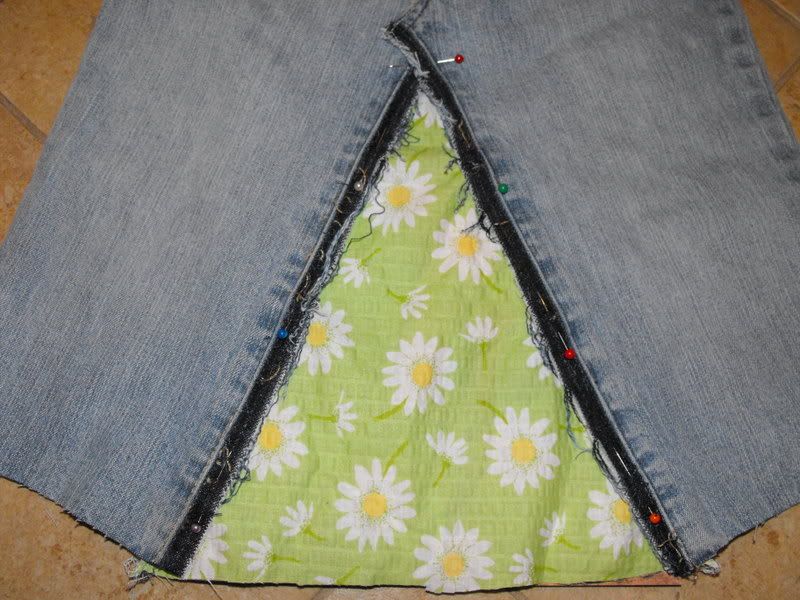
On top of you cutting mat/magazine/piece of cardboard, lay your insert fabric down and lay the jeans back on top of them. Trace the V onto the panel-to-be (I used a pencil hoping you could see it better, but tailors chalk would work great too.)
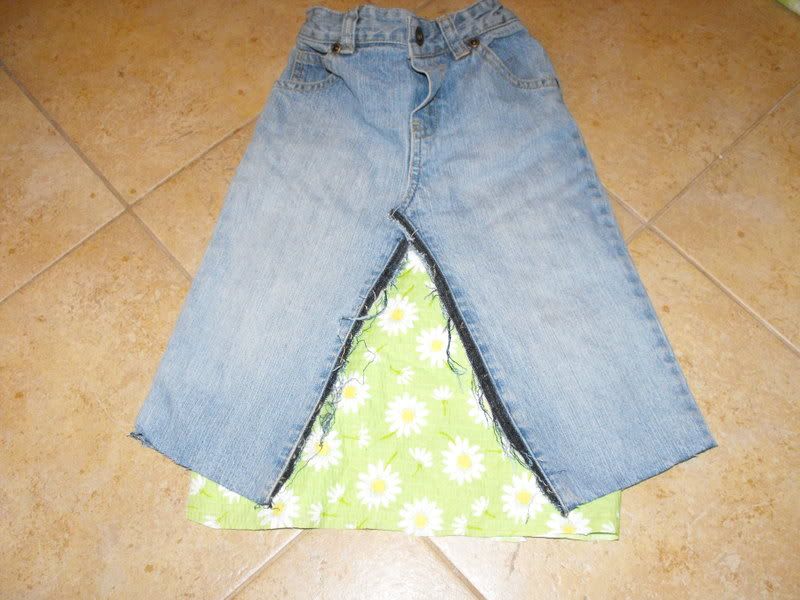
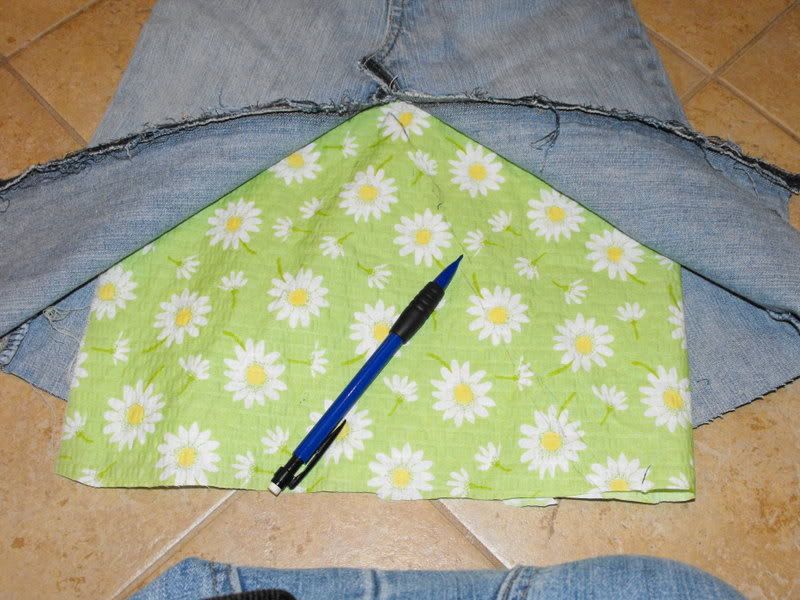
Cut out the V, leaving seam allowance. I leave about an inch. Serge/zig zag over the edge to keep from fraying.
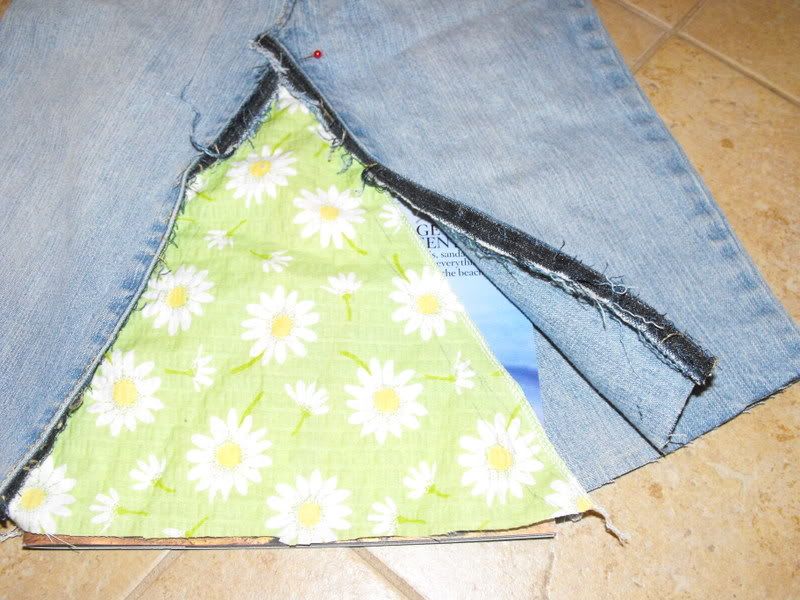
Lay it back inside the skirt, and pin it on the lines you chalked. Here is where it really matters if you are going to fray or not
.I frayed the front and not the back to show both ways.
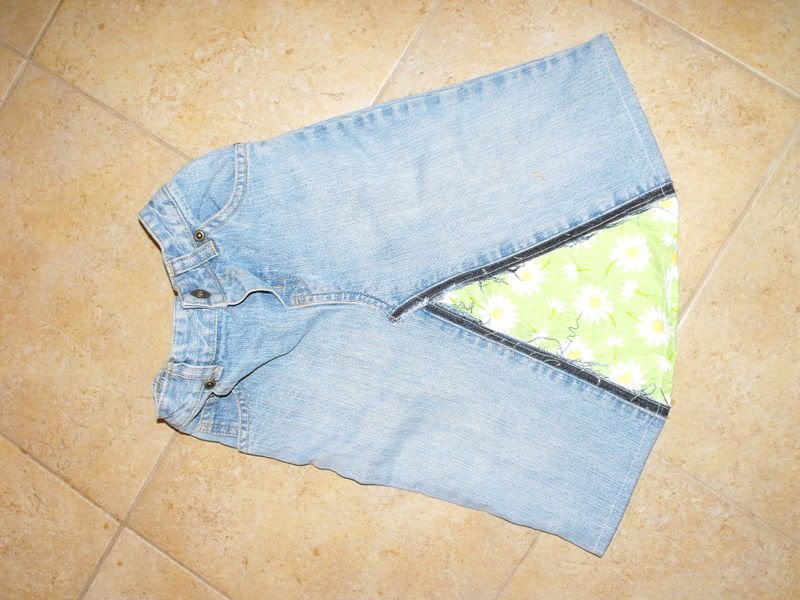
Here is the front:
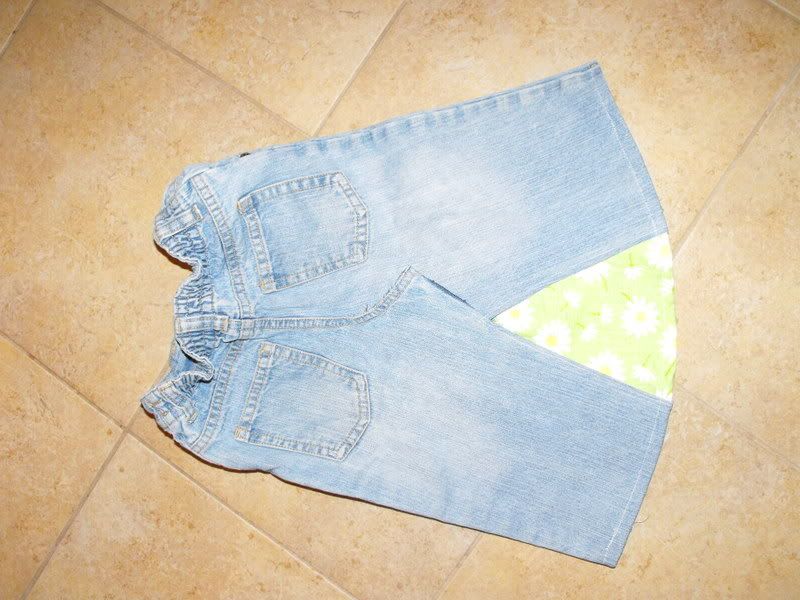
Here is the back:
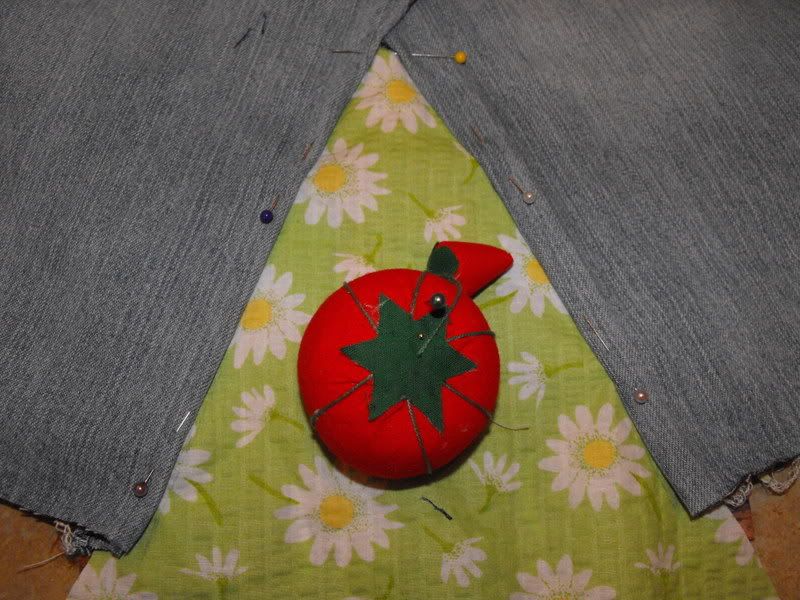
**NOTE** You will sew the front panel (or back, whichever you decide) first! THEN trace the back the same way you did the front, I just took pics of tracing the front, do the back the same way.
Now you skirt is almost done! You need to cut it off to the right length, either curving it (I curved this skirt) or cutting off straight. If you want to hem it, go ahead, or you can stitch 2 seams close together on the raw edge and let it fray!
Now enjoy your skirt!
Sorry, it was a bad pair of jeans, which is why I used them, LOL. That and it was quicker to do a babys pair than to do an adult size, LOL.
Amber
I blog!
To view links or images in signatures your post count must be 0 or greater. You currently have 0 posts.
My Great Granny, and my sewing inspiration!
To view links or images in signatures your post count must be 0 or greater. You currently have 0 posts.
Her 8oth Birthday Party
To view links or images in signatures your post count must be 0 or greater. You currently have 0 posts.


 Reply With Quote
Bookmarks