

Thought I'd share how I do it
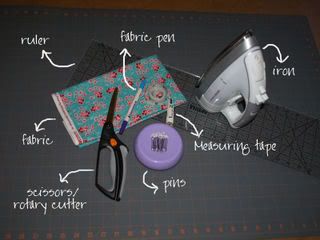
Supplies:
measuring tape, fabrics, fabric pen, ruler, scissors/rotary cutter, elastic thread, pins, iron, & of course, your sewing machine
First start with measuring. Measure around the chest. Next you want to measure from the top of the armpit to the length you want the top/dress to be. For my DD I measured 20 for her chest and 10 for the length of the top.
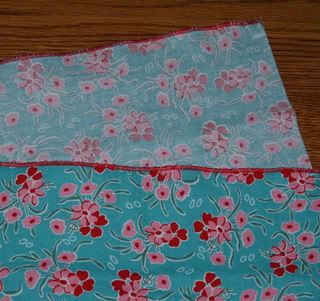
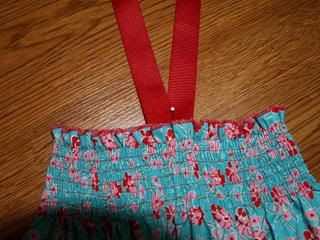
Length Measurement- Now we decide what kind of finish the top & bottom will have and this will tell us how much to add to our length measurement. For this top I am going to do a rolled hem. I usually cut ¼ off so I will add ½ to my total length (1/4 for the top and ¼ for the bottom) So my length is 10.5
Width Measurement- For my DDs top I double her width measurement (but depending on the size you need and the fabric width you can sometimes do 1 and a half instead of 2 times the width, shirring can be very forgiving) So my width is 40.
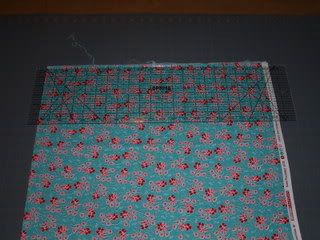
Lay out your fabric and use your ruler and fabric pen (or rotary cutter) to measure and cut out the measurement you just figured out above.
TIP: If your width measurement is bigger than the measurement from selvage to selvage, you will need to cut 2 pieces.
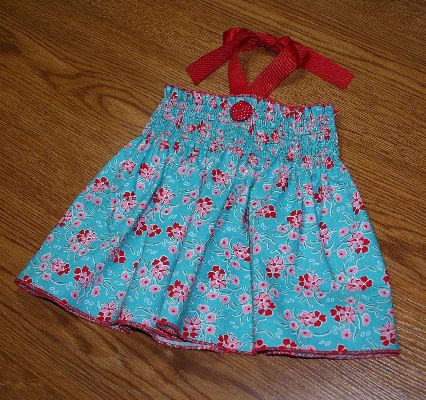
Now its time to sew! Finish the top & bottom edges with the technique you chose. Heres my rolled hem. (see below for a couple other finishes I did to show you)
TIP: If you had to cut 2 pieces to accommodate your width measurement, stitch one side seam first & then finish the top & bottom edges.
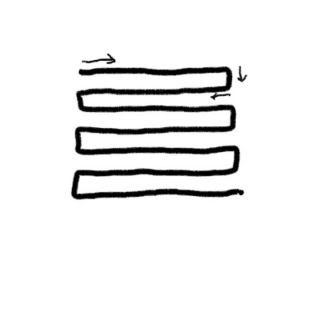
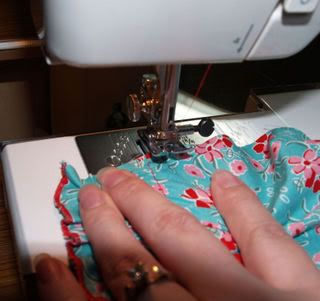
Now to the shirring. Use regular thread in the top and elastic thread in the bobbin. I wind several bobbins (I have to do it by hand) and keep them ready. I start by lining the edge up 5/8 & stitch my first row of shirring. When I get to the end of the fabric I leave the needle in the fabric, turn to a 90 degree angle and stitch about 3 stitches (along the side edge), leave the needle in the fabric and rotate it again 90 degrees lining up the other side of your presser foot with the first row of shirring.
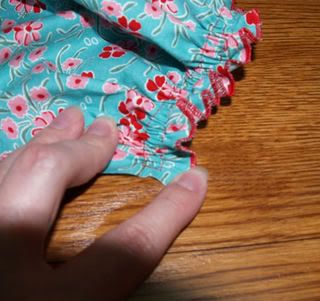

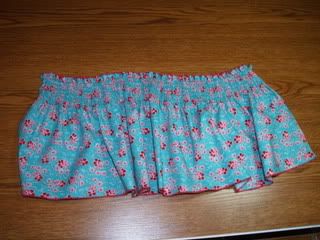
Continue the technique until you do the amount of rows desired, I did 7 rows for my DD. When Im done I tie the thread and elastic thread together for added security.
TIP: keep track of your elastic thread and if you need to switch the bobbin you will want to finish the row at the end of the fabric as opposed to the middle
continued....
.gif "a (11)")

 Reply With Quote
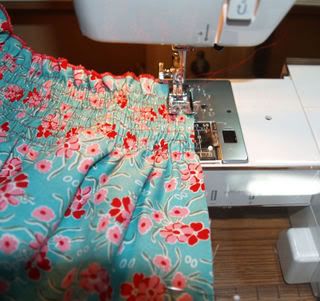


.gif "A (02)")
.gif "A (01)")


Bookmarks